vSphere 7 05 Updates and Upgrades
18 Jun 2022
Resources:
- VMware Pathfinder
- Home lab environment is the best opportunity for hands on with updating and upgrades.
vSphere Lifecycle Manager
Life-cycle Manager is the next generation of update manager, which was used to:
- Upgrade and patch ESXi hosts
- Install VIBs (additional third-party bundles - extensions)
- Update VM hardware and VMware tools
Life-cycle Manager adds everything in update manager plus:
- Image consistency
- Base Image / Base Version of ESXi
- Components such as third-party bundles (previously called VIBS)
- Desired state across all ESXi hosts for:
- Firmware
- Drivers
The shift towards desired state configurations, with the ability to re-mediate hosts that drift. A caveat is that all host must be from the same vendor, ideally the same model for consistency.
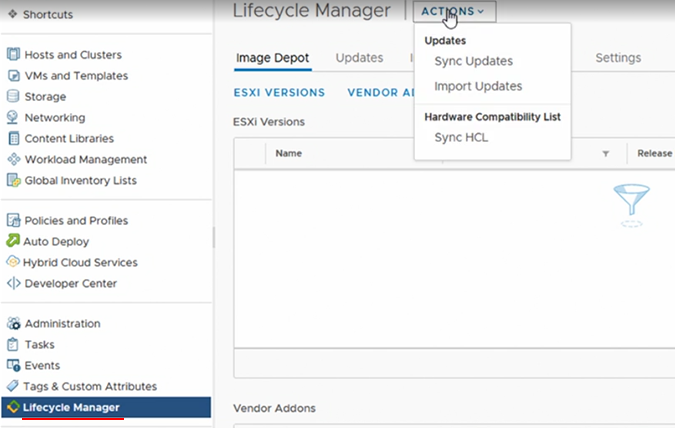
Image Depot
Image can be added either through an online sync or offline bundle (zip) file.
Manage hosts within a cluster using a single image
Navigate to the ESXi cluster and select Updates and “Manage with a single image”.
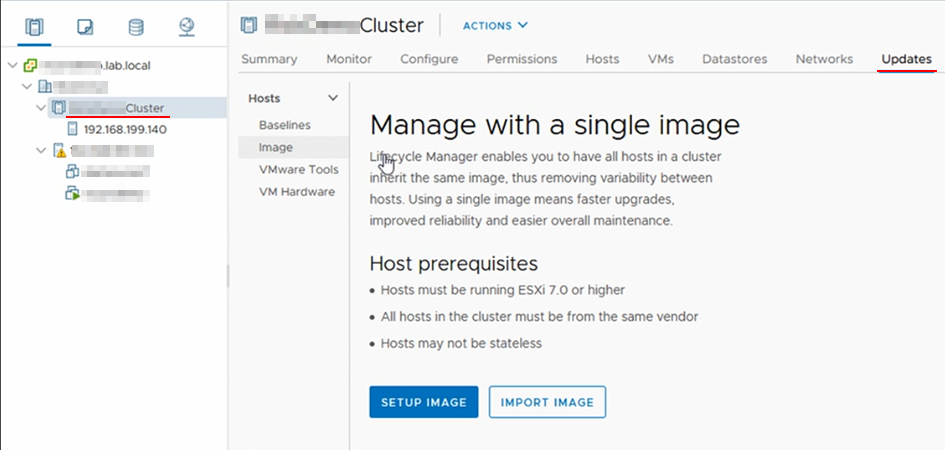
The first step is to define an image, this is comprised of:
- ESXi version,
- Vendor add-ons,
- Firmware and drivers add-ons
- Components (third party bundles)
Scrolling down there is a validate and save button. The hosts will then run an image compliance test and provide a report.
The drift comparison will show what is required or missing from the image.

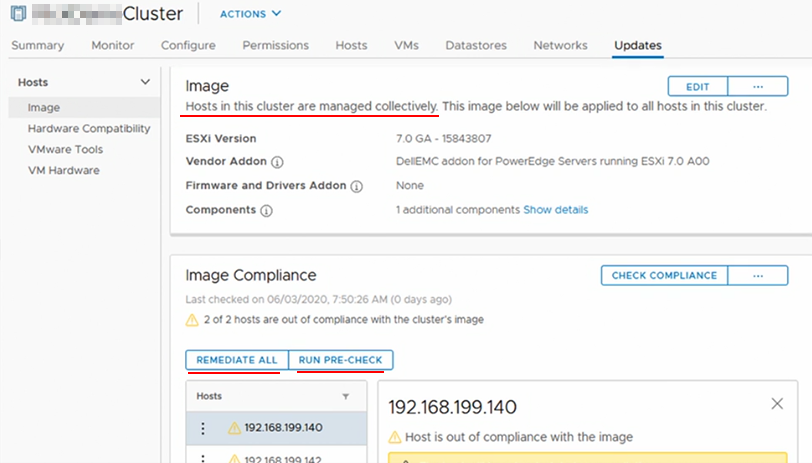
Once we finish the image setup all the hosts will be managed collectively.
Options to run a pre-check and remediate either all hosts or specific hosts are available. When remediating hosts you will be presented with a detailed impact report before hand.
After the updates an additional compliance scan is performed.
Images can be exported as either JSON, ISO or ZIP.
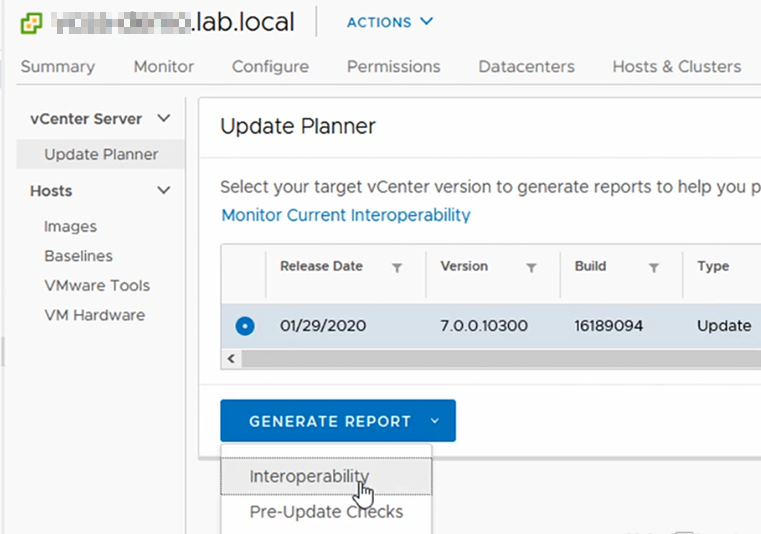
vSphere Update Planner
To access the update planner you must have joined the Custom Experience Improvement Programme (CEIP).
The option for Update Planner may be missing in your environment, it should be listed in vCenter > Updates, under Hosts. A possible fix is to issue the following command from SSH or DCUI.
service-control --restart vsphere-ui
Update planner was introduced in version 7.0 and is meant to simplify the update planning process by generating an interoperability report and pre-update check.
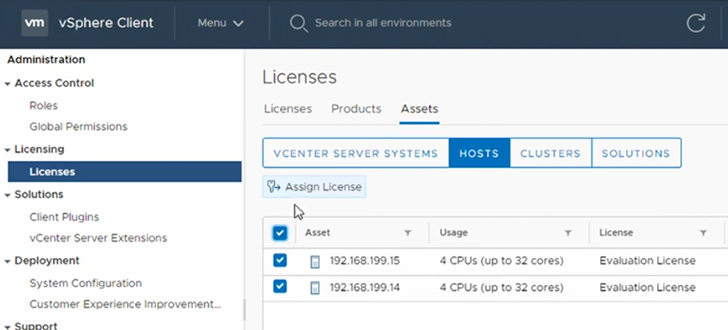
Assign Licence Keys
The process is to add the licence keys then assign the licence to hosts and vCenter servers.

Licenses can be assigned in bulk by selecting all the appropriate hosts.
Install VMware Tools
VMware tools are important for use of VMXNET network interface card or memory ballooning, which will improve the performance of a VM.
In Windows the ISO is mounted and administrators can install the tools. The VMware documentation provides instructions for other operating systems such as Linux.
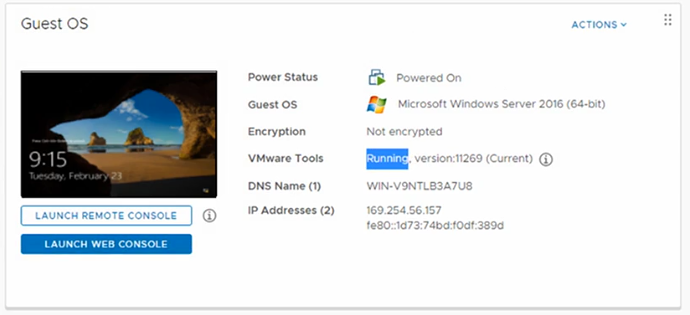
VMware Tools can be installed either on a single VM or in bulk via the ESXi host and Updates.
Virtual Appliances including vCenter should be updated via the built-in tools such as the vCenter Server Appliance Management Interface (VAMI)
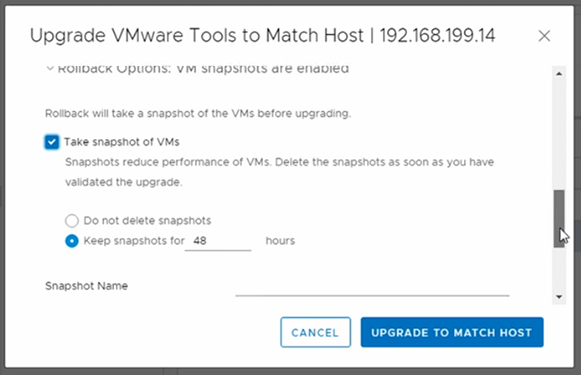
Updates can have different schedules for states of VMs, as a reboot may be required:
- Powered ON VMs
- Powered OFF VMS
- Suspended VMs
Rollback options include automatic VM snapshots, which can be automatically removed after a configured period of time (this is recommended to keep environment tidy).
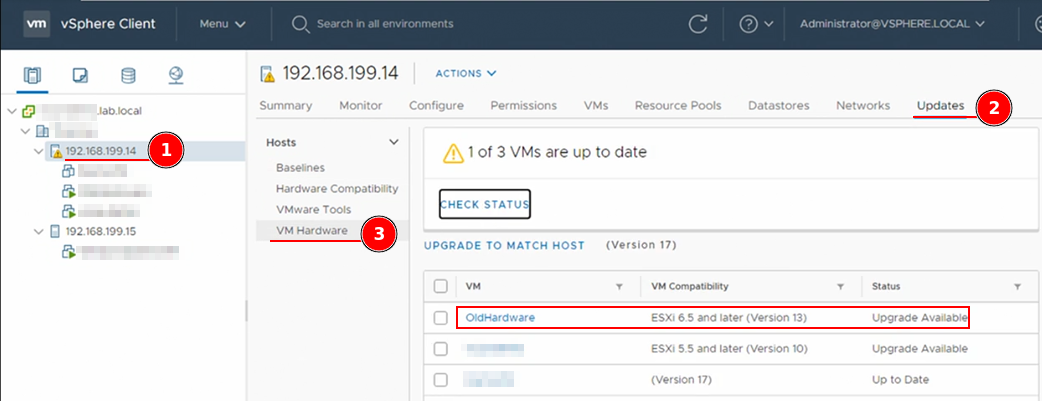
Upgrade Virtual Hardware
Its advisable to upgrade the virtual hardware to the latest that is supported by the ESXi cluster, as this brings additional features and support that the version brings.
Its worth noting that virtual hardware cannot be upgraded while the VM is online. Similar to VMware Tools, we can upgrade individual VMs or in bulk
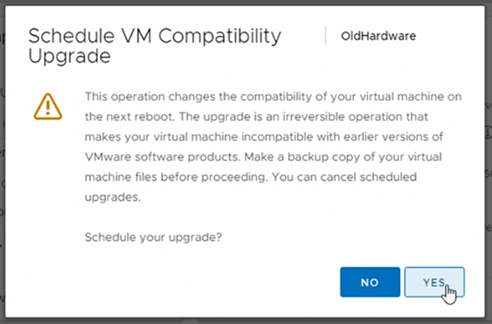
Upgrades can also be scheduled, including an option to apply on next guest normal restart.
Upgrading to ESXi 7.0
A useful online tool is VMware Compatibility Guide.
A good practice when upgrading is to extract a host profile as a backup.
Upgrade Methods include:
- Lifecycle Manager (previously known as Update Manager)
- Interactive
- Scripted
- ESXCli
- Auto Deploy
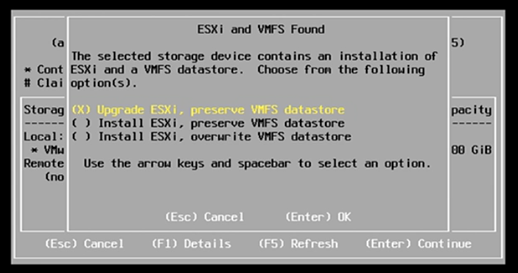
Interactive Upgrade
When upgrading in an interactive method, the process is the same as a fresh installation of ESXi, although after selecting the storage location the installer will detect the existing deployment and offer an upgrade option.
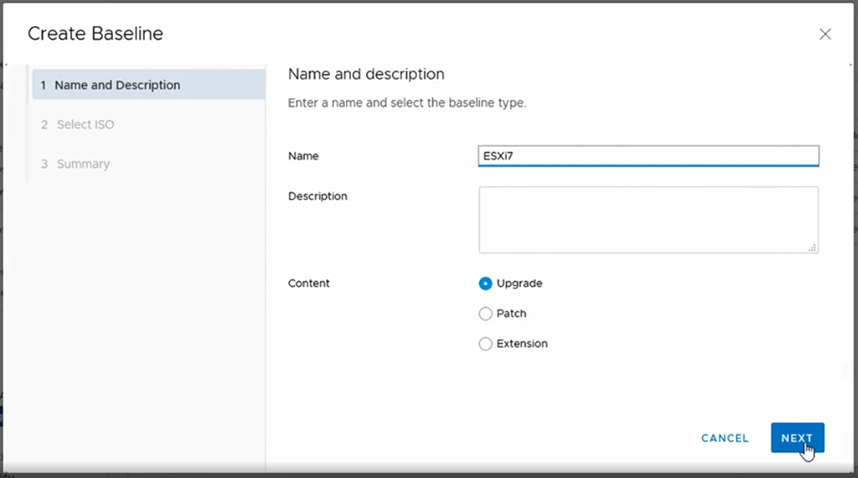
Lifecycle Manager Upgrade
In the Lifecycle Manager section and Image depot, download the ESXi 7.0 image.
Create a new baseline, which will be an “upgrade”, once completed a new baseline will be created.
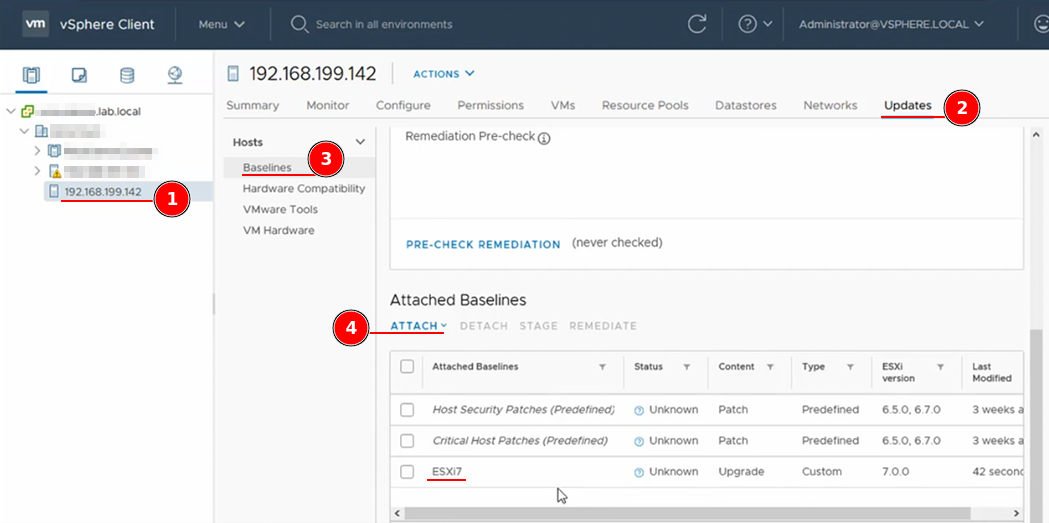
Then navigate to an ESXi host > Updates and select Baselines.
Next attach the newly created baseline, then check the baseline and remediate.
A remediate wizard will open with options including VM migration, scheduling etc.
The remediate process will run and the host will be upgraded.
Upgrade vCenter Server Appliance
VMware documentation for Upgrading the vCenter Server Appliance
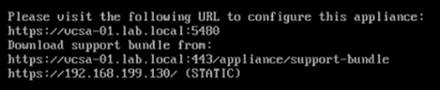
Take a note of the vCenter Server Appliance URL details as these will be required during upgrade.
Take a backup of the vCenter Server Appliance and ensure that account passwords have not expired.
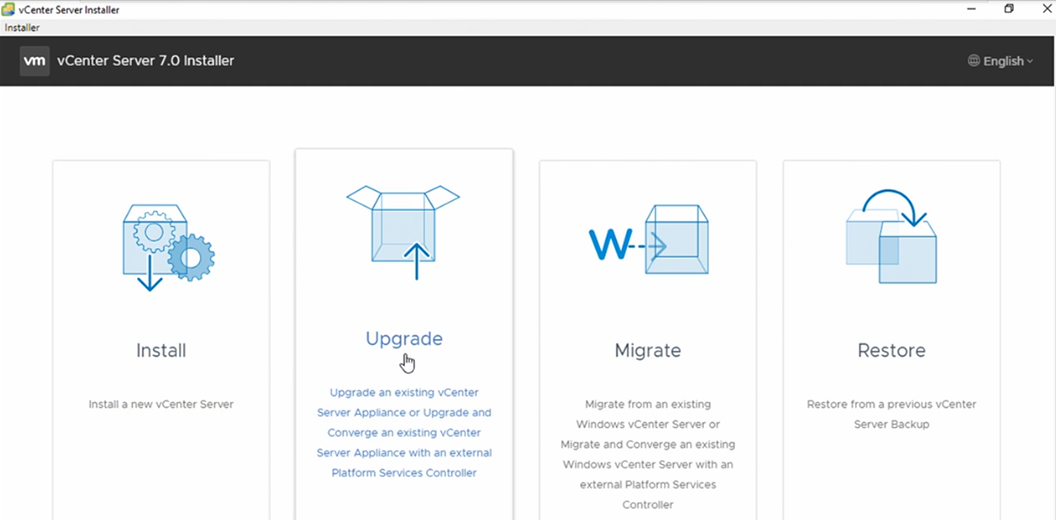
Download the vCenter installation media (ISO) and run. The upgrade option will start a wizard, which will create a new vCenter Server Appliance VM then in Stage 2 migrate existing configuration.
The newly created vCenter Appliance will need its own IP address etc, which will be separate from the older vCenter Appliance. This is a temporary measure as the new VM will take over the old vCenter Appliance configuration.
Ensure correct DNS records for the new VM.
Stage 1 has completed and will progress into Stage 2.
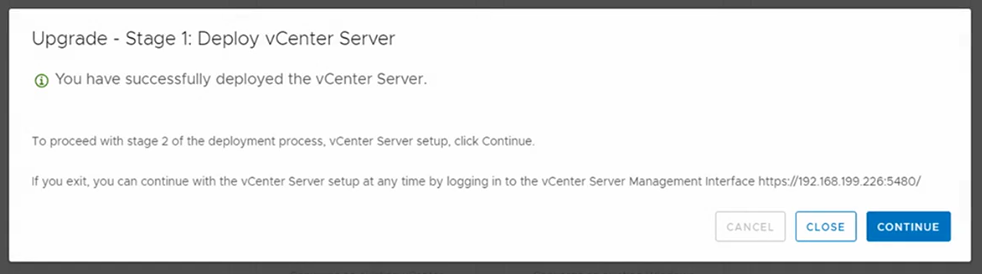
Stage 2 wizard will prompt for a few options including what data to copy to the new vCenter Server Appliance.
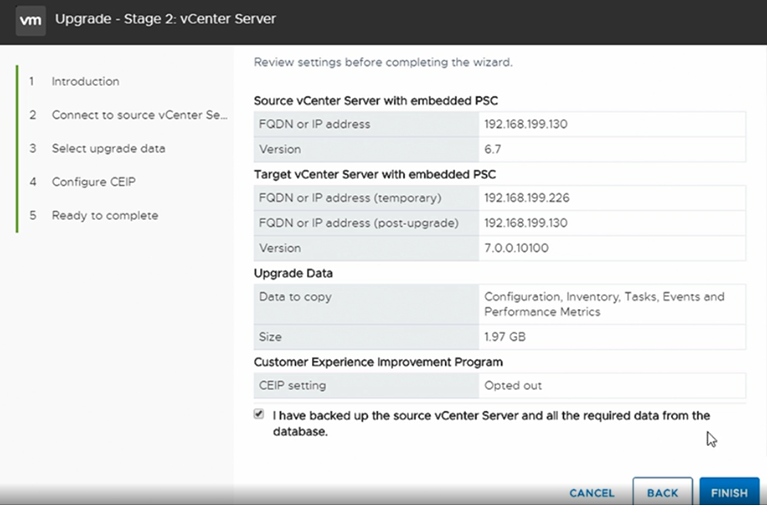
Once the migration has completed the old vCenter Server Appliance will be powered off.