Vagrant
15 Oct 2022
Vagrant is an open-source tool produced by Hasicorp to build and manage development environments through use of virtual machines.
Vagrant is supported out of the box for VirtualBox, Hyper-V and Docker, with the ability to manage other types of machines as well through providers such as VMware.
Installation
Instructions for all platforms are available from the Vagrant downloads section.
You must have a virtualisation product installed as well, I will be using VirtualBox as its cross platform between Linux, MacOS and Windows and straight forward to install.
MacOS
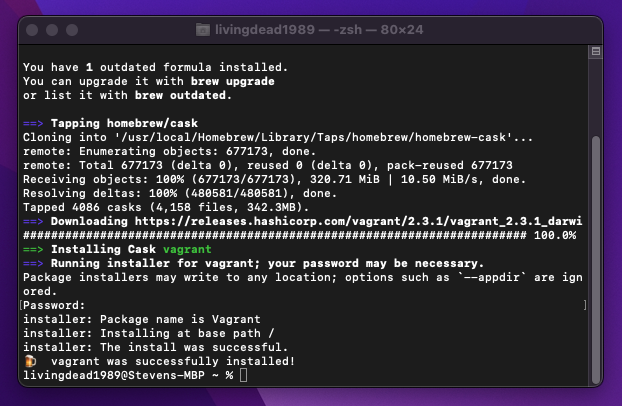
To install Vagrant onto MacOS, we’ll be using Homebrew
brew install vagrant
After installation you can verify your installation by calling the version command
vagrant -v
Linux
To install Vagrant onto Linux Debian family, follow the instructions below, or use Homebrew.
wget -O- https://apt.releases.hashicorp.com/gpg | gpg --dearmor | sudo tee /usr/share/keyrings/hashicorp-archive-keyring.gpg

echo "deb [signed-by=/usr/share/keyrings/hashicorp-archive-keyring.gpg] https://apt.releases.hashicorp.com $(lsb_release -cs) main" | sudo tee /etc/apt/sources.list.d/hashicorp.list

sudo apt update && sudo apt install vagrant
After installation you can verify your installation by calling the version command
vagrant -v
Boxes
Vagrant uses boxes, these are images for virtual machines. The Vagrant Cloud hosts boxes and allows the community to share.
To see what boxes, we have available use vagrant box list.
Add Boxes
To add a new box, such as the Ubuntu Jammy image, use the below command.
vagrant box add ubuntu/jammy64

Remove Boxes
To remove a box, you’ll need to know what is currently available
vagrant box list
Then you can use the name with the remove command
vagrant box remove ubuntu/jammy64
First Vagrant machine
A Vagrant file is used for the creation and configuration of the development machines. Vagrant files can be created from scratch, or we are provided with one when a project is initialised.
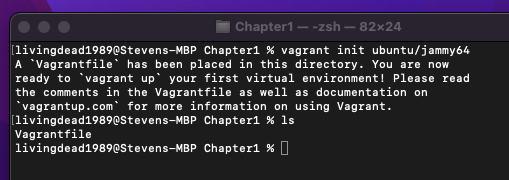
To Initialise a project, use the init command:
vagrant init ubuntu/jammy64
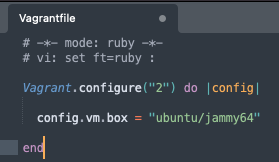
The supplied Vagrant file provides the minimum required to get a virtual machine up and running.
This file states:
- Configure Vagrant version 2,
- Use the prefix “config”,
- Configure a Virtual Machine using the Ubuntu Jammy image,
- Close the file.
Later we’ll be expanding this Vagrantfile.
Now we can tell Vagrant to start and provision the environment using the up command.
vagrant up
My environment will use VirtualBox and provide a new Ubuntu 22.04 virtual machine.
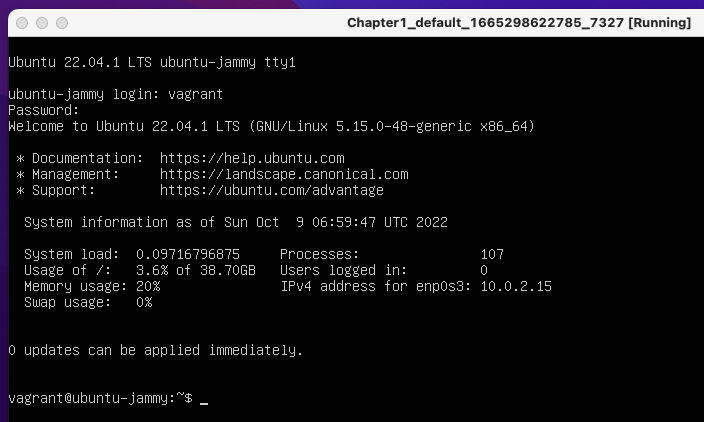
By default, Vagrant will provision machines with the username and password of vagrant.
You can review the status of the deployed machines by using the command, this will also provide the virtual machine name, which can be used for remoting.
vagrant status
To view the status of machines across multiple projects
vagrant global-status
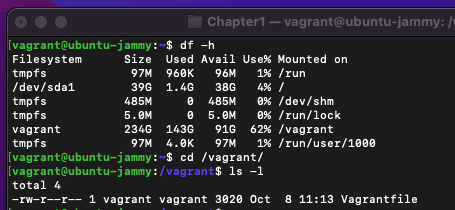
Folder Share
By default, Vagrant will share the project folder with the created development machine, mounting it under /vagrant, as shown in the figure below.
Remote into VMs
There are a few options for remote access, either through the virtualisation platform such as VirtualBox or using SSH. Later when we start deploying multiple virtual machines, we’ll need to use the machine name after for example vagrant ssh web
vagrant ssh
If we deploy a development machine with a GUI, then we can also use RDP.
vagrant rdp
For Windows, PowerShell is available.
vagrant powershell
Controlling VMs
Halt and Reload
If you wanted to shutdown (halt) virtual machines, for example to continue with development later then the command halt can be used. - Alterations are saved
vagrant halt
The command reload is the equivalent of running halt followed by an up.
Documentation: Halt and Reload
Destroy
When you are finished with the development environment you can remove it by using the destroy command. - Alterations are lost
vagrant destroy
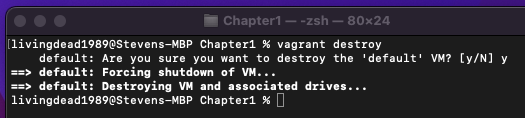
Documentation: Destroy
Vagrant File
Provision Script
A provision script can be inline or an external file, these help to automate your development environment by executing the script when using vagrant up. Provision scripts and the Shared folder can be helpful as manual changes within a development environment are lost when the project is destroyed.
Provision scripts can make good use of the synced_folder, we can include statements and commands to leverage this space, as shown below.
The following bootstrap.sh example script is used and placed within the project folder.
#!/usr/bin/env bash

apt update
apt install -y nginx

# removes default www folder and replaces with the one stored in the synced_folder
if ! [ -L /var/www/html ]; then
  rm -rf /var/www/html
  ln -fs /vagrant/html /var/www/html
fi
Now within your Vagrantfile add the following:
# -*- mode: ruby -*-
# vi: set ft=ruby :

Vagrant.configure("2") do |config|

  config.vm.box = "ubuntu/jammy64"
  # Provision Script
  config.vm.provision :shell, path: "bootstrap.sh"

end
Then finally, start the project again using vagrant up.
Networking
Public and Private Network
Private networks allow for access to the guest machine but should not allow general public access to the Vagrant machines, as they are insecure by default and design.
To configure a private network to assign an address using DHCP
# -*- mode: ruby -*-
# vi: set ft=ruby :

Vagrant.configure("2") do |config|

  config.vm.box = "ubuntu/jammy64"
  # Provision Script
  config.vm.provision :shell, path: "bootstrap.sh"
  # Private Network - DHCP
  config.vm.network "private_network", type: "dhcp"

end
To configure a static private IP address
# -*- mode: ruby -*-
# vi: set ft=ruby :

Vagrant.configure("2") do |config|

  config.vm.box = "ubuntu/jammy64"
  # Provision Script
  config.vm.provision :shell, path: "bootstrap.sh"
  # Private Network - Static
  config.vm.network "private_network", ip: "192.168.56.10"

end
Hostname
To set a hostname use the configuration below, this will modify the /etc/hosts file.
# -*- mode: ruby -*-
# vi: set ft=ruby :

Vagrant.configure("2") do |config|

  config.vm.box = "ubuntu/jammy64"
  # Provision Script
  config.vm.provision :shell, path: "bootstrap.sh"
  # Private Network - Static
  config.vm.network "private_network", ip: "192.168.56.10"
  # Hostname
  config.vm.hostname = "vagrant-web"

end
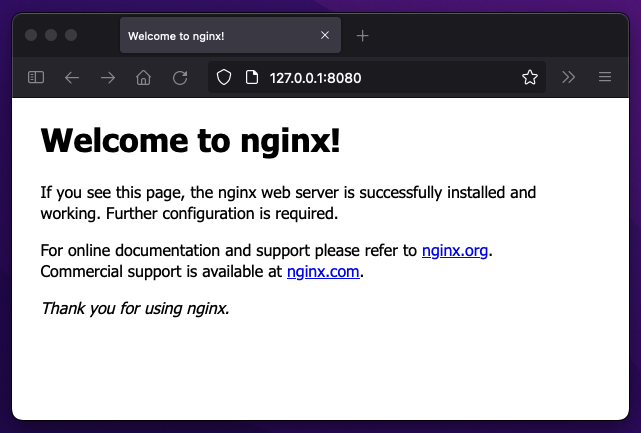
Port Forwarding
Configuring a Port Forward exposes the guest (VM) port to be accessible via the host machine.
Continuing from our Nginx example above, adding the following to our Vagrant file.
# -*- mode: ruby -*-
# vi: set ft=ruby :

Vagrant.configure("2") do |config|

  config.vm.box = "ubuntu/jammy64"
  # Provision Script
  config.vm.provision :shell, path: "bootstrap.sh"
  # Private Network - Static
  config.vm.network "private_network", ip: "192.168.56.10"
  # Hostname
  config.vm.hostname = "vagrant-web"
  # Port Forward
  config.vm.network :forwarded_port, guest: 80, host: 8080

end
Reload your development environment, then on your host machine visit ‘127.0.0.1:8080’ and you’ll see the Nginx default page from the guest (VM) machine.
Providers
Vagrant’s default virtualisation platform is VirtualBox. Additional providers can be added as well as we can specifically state the provider and even configure values for it.
Documentation - Providers
Below a continued example, which adds the VirtualBox provider and configures aspects such as:
- Name, instead of using the Vagrant file folder name.
- Linked Clones for an improved import operation and saves disk space when working with multiple VMs. - Note: Vagrant will not destroy the master, only the links.
- Setting the number of allocated CPUs.
- Configuring the available memory.
# -*- mode: ruby -*-
# vi: set ft=ruby :

Vagrant.configure("2") do |config|

  config.vm.box = "ubuntu/jammy64"
  # Provision Script
  config.vm.provision :shell, path: "bootstrap.sh"
  # Private Network - Static
  config.vm.network "private_network", ip: "192.168.56.10"
  # Hostname
  config.vm.hostname = "vagrant-web"
  # Port Forward
  config.vm.network :forwarded_port, guest: 80, host: 8080
 # Provider
 config.vm.provider "virtualbox" do |v|
   v.name = "vagrant demo web"
   v.linked_clone = true
   v.cpus = 1
   v.memory = 1024
  end

end
Multi-Machine
Up to this point we have been working with a single VM. To create Multi-Machine Vagrant file we need to wrap our existing configuration within the a config.vm.define tag and modify the child items as shown below.
Documentation - Config.VM
config.vm.define "name" do |name|
 name.vm.box = ""
end
Following on from another previous example, I have included another machine called “DB”.
# -*- mode: ruby -*-
# vi: set ft=ruby :

Vagrant.configure("2") do |config|

  # Virtual machine - Web
  config.vm.define "web" do |web|
    web.vm.box = "ubuntu/jammy64"
    # Provision Script
    web.vm.provision :shell, path: "web-bootstrap.sh"
    # Hostname
    web.vm.hostname = "vagrant-web"
    # Port Forward
    web.vm.network :forwarded_port, guest: 80, host: 8080
    # Provider
    web.vm.provider "virtualbox" do |vb|
      vb.name = "vagrant demo web"
      vb.linked_clone = true
      vb.cpus = 1
      vb.memory = 1024
    end
  end


  # Virtual machine - DB
  config.vm.define "db" do |db|
    db.vm.box = "ubuntu/jammy64"
    db.vm.provision :shell, path: "db-bootstrap.sh"
    db.vm.hostname = "vagrant-db"
    db.vm.provider "virtualbox" do |vb|
      vb.name = "vagrant demo db"
      vb.linked_clone = true
      vb.cpus = 1
      vb.memory = 1024
    end
  end

end
I also created another additional bootstrap shell script called “db-bootstrap.sh”.
#!/usr/bin/env bash

apt update
apt install -y mysql-server

systemctl start mysql.service
Now when we start the development environment two virtual machines will be created.
vagrant up