RPI NVR
27 May 2023
The purpose of this article is to explore the use of a Raspberry Pi 4 as a Network Video Recorder (NVR) for a few network cameras in a home environment.
The Raspberry Pi 4 is an excellent single board computer (SBC), which utilises a Broadcom BCM2711, quad-core Cortex-A72 and comes with RAM options of 1, 2, 4 and 8 GB. We have access to 2 USB3 ports so we can add additional storage, it has a Gigabit Ethernet, all bundled into a small form factor, which consumes very little power.
Components that I am using in this project are listed below, although they were not purchased specifically for this project:
- Raspberry Pi 4, 4 GB
- GeeekPi aluminum case with ICE tower cooler
- USB-C power supply
- Storage
- TP-Link PoE+ Switch 8-Port Gigabit
I have identified possible software choices, which I will setup an environment for each for testing, you’ll see this in the article below, the links provided will take you to the appropriate section of this article:
- Prepare the Raspberry Pi
-
Install Docker - D requires Docker
- iSpy
- Kerberos - D
- Shinobi
- Frigate - D
PiNVR is another option, which looks interesting, and I would like to test I am unable to obtain a copy at the time of writing as the beta is expected release early 2023.
To cut to the results, my preferred software solution is iSpy, the overall look and feel was great, and it provided an excellent level of compatibility and flexibility.
Operating system compatibility table, if you are interested in running these NVR software solutions on a different platform.
| Operating System | iSpy | Kerberos | Shinobi | Frigate |
|---|---|---|---|---|
| Linux | Yes | Yes | Yes | Yes |
| Windows | Yes | No | No | Not officially supported |
| Docker | Yes | Yes | Yes | Yes |
| Raspberry Pi | Yes | Yes | Yes | Yes |
Feature compatibility table
| Feature | iSpy | Kerberos | Shinobi | Frigate |
|---|---|---|---|---|
| ONVIF support | Yes | Yes | Yes | Yes |
| Accessed via web browser | Yes | Yes | Yes | Yes |
| Local only (Not cloud dependant) | Yes | Yes | Yes | Yes |
| MQTT support | Yes | Yes | Yes | Yes |
| Motion detection | Yes | Yes | Yes | Yes |
| PTZ control | Yes | Yes | Yes | No |
Cameras
I initially purchased Reolink RLC-810A PoE 4K 8MP cameras, which only supported H.265, not H.264 this caused issues with live view and playback features as there isn’t much support for H.265, although they all recorded in 4K H.265. If you have the ability to change to H.264 then this will work for live playback.
I also purchased a HiLook IPC-B150H-M PoE 5MP camera, this is classified as an End of Life (EoL) product from Hikvision, which I was unaware of at the time of purchase. It was delivered with firmware version 5.5.82, which presented an issue that no modern browser was supported. Using a Windows 10 virtual machine with Edge running in IE Mode and I was able to upgrade the firmware to version 5.5.89 (latest), but sadly this didn’t resolve the issue and the cameras needed to be returned.
Although the search for a good quality, reasonably priced PoE camera continues, for now I have a few Raspberry Pi Zero W cameras dotted around, which I will utilise.
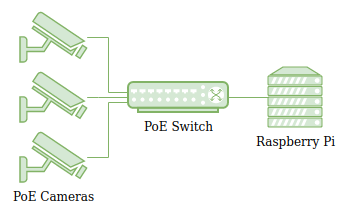
I have my PoE cameras plugged into a PoE switch, which I will connect the Raspberry Pi NVR to as well. This switch connects to the rest of the network.
The recommended camera requirements for these NVR solutions would be:
- H.264 & H.265
- RTSP (real time streaming protocol) supported
- Good resolution and frame rate
- Multiple streams (review sub-stream, some are heavily limited)
- ONVIF compliant
- Modern browser support
Notes about Reolink
- Reolink use an UID (unique user identification), when connecting to the Reolink platform. This option can be disabled via the camera settings, under “Network Settings” and advanced, if you feel you need to.
- In the article How to Live View Reolink cameras via VLC Media Player, it states “Do not use special characters for your password”, I will be creating an additional view only user, separate from the default admin account.
- Reolink motion detection zones are used for a no-alarm area, which personally feels backward and can easily catch you out.
- The RTSP (Real Time Streaming Protocol) stream is VBR (Variable Bitrate) and the RTMP (Real-Time Messaging Protocol) stream is CBR (Constant Bitrate).
- Stop smearing or broken streams with CBR streams instead of VBR.
- Below is a sample of RTSP and RTMP
rtsp://USERNAME:PASSWORD@CAMERA_IP:554/
rtmp://USERNAME:PASSWORD@CAMERA_IP/bcs/channel0_main.bcs?token=sdasdasd&channel=0&stream=0&user=USERNAME&password=PASSWORD
Misc Information
- HLS - HTTP Live Streaming is an HTTP-based protocol, it is newer and more adaptive type of video streaming protocol.
- RTSP stream involves transcoding the native stream. This transcoding not only has a CPU overhead on the device you are fetching the stream from, it introduces a delay or lag in the video stream.
- MPEG-DASH - Dynamic Adaptive Streaming over HTTP (DASH), is an adaptive bit rate streaming technique that enables high quality streaming over the internet using HTTP web servers.
Prepare the Raspberry Pi
For the software below, I will be using Ubuntu 22.04 LTS, therefore I will place the instruction once to reduce the amount I repeat this step.
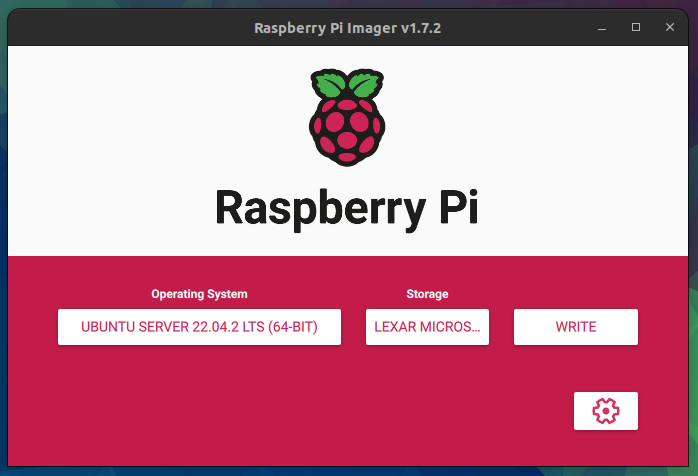
Using the Raspberry Pi imager utility, I will be flashing Ubuntu 22.04.2 LTS (64-Bit) with advanced options to configure the host name, enable SSH, set the username and password and locale settings.
Insert the microSD card, plug in an Ethernet cable and power and let the Raspberry Pi boot.
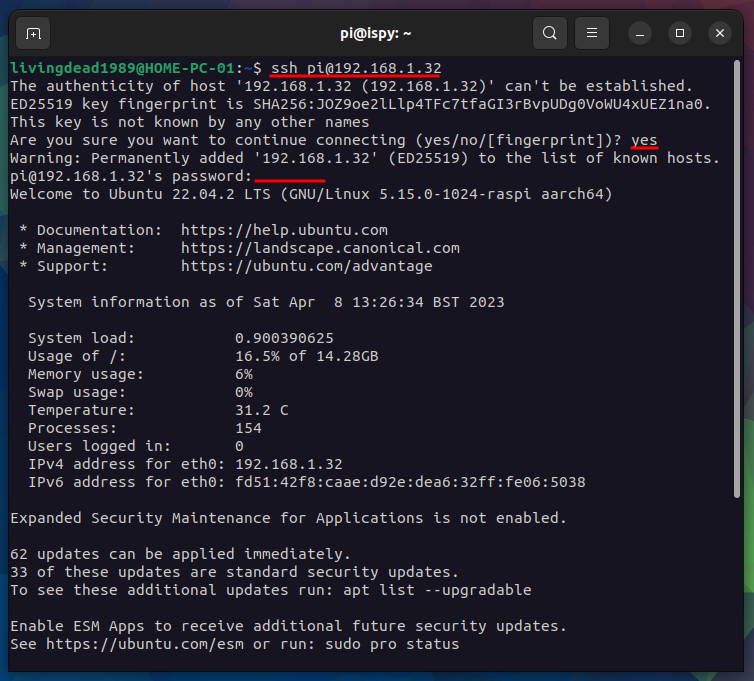
Find its IP address and open an SSH connection to the Raspberry Pi.
ssh username@rpiaddress
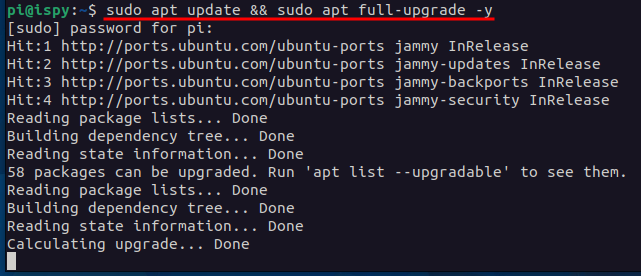
Update the system
sudo apt update && sudo apt full-upgrade -y
Restart the Raspberry Pi if required by the full upgrade.
sudo shutdown -r now
Install Docker
To install Docker - following the steps from Docker Docs
In case there are any other versions of Docker, we will remove them using the below command
sudo apt remove docker docker-engine docker.io containerd runc
As we have only just updated the apt package index we can skip that can go straight to installing packages to allow apt to use a repository over HTTPS
sudo apt install -y \
    ca-certificates \
    curl \
    gnupg
Add Docker’s official GPG key
sudo mkdir -m 0755 -p /etc/apt/keyrings
curl -fsSL https://download.docker.com/linux/ubuntu/gpg | sudo gpg --dearmor -o /etc/apt/keyrings/docker.gpg
Use the following command to setup the respository
echo \
  "deb [arch="$(dpkg --print-architecture)" signed-by=/etc/apt/keyrings/docker.gpg] https://download.docker.com/linux/ubuntu \
  "$(. /etc/os-release && echo "$VERSION_CODENAME")" stable" | \
  sudo tee /etc/apt/sources.list.d/docker.list > /dev/null
Update the apt repository and installing the latest Docker
sudo apt update && sudo apt install -y \
    docker-ce \
    docker-ce-cli \
    containerd.io \
    docker-buildx-plugin \
    docker-compose-plugin
Some post installation steps to allow a non-root user to manage Docker.
sudo groupadd docker
sudo usermod -aG docker $USER
newgrp docker
I suggest a quick restart at this point
sudo shutdown -r now
Container Management UI
Optional step: If you would like a container management UI, a suggestion would be Yacht, which is extremely easy to install. Alternatives include: Portainer and Rancher.
The below commands will deploy a Yacht container, the below is slightly modified from the documentation as I have stated the latest image and to always restart the container.
docker volume create yacht

docker run -d -p 8000:8000 --name yacht  --restart=always \
-v /var/run/docker.sock:/var/run/docker.sock \
-v yacht:/config  \
selfhostedpro/yacht:latest
You can check if the container is running by issuing the docker ps command. If you get stuck at any time you can use the docker --help, this works for commands as well such as docker ps --help.

Now you can visit the Yacht web interface on port 8000 and manage your containers
http://192.168.1.32:8000/
The default username is “[email protected]” with a password of “pass”, which I recommended changing straight away.
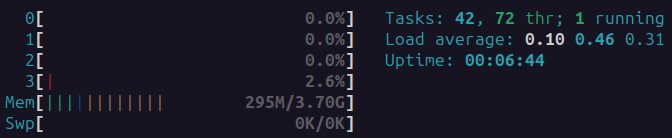
After installing Yacht, htop showed the following load on the Raspberry Pi.
Docker Compose YAML files are stored in the following location:
/var/lib/docker/volumes/yacht/_data/compose/PROJECTNAME/PROJECT.yml
iSpy
Agent DVR is a standalone replacement for iSpy that runs as a service, uses less CPU and features a web user interface, which I will be using in this article.
iSpy recommend using Ubuntu 20+ as it has FFmpeg v5 available as a package install.
Start by prepare the Raspberry Pi, this contains the steps of flashing the MicroSD, connecting to the Raspberry Pi and updating the environment.
Now we can start to install iSpy
Ensure curl is installed
sudo apt install -y curl
Run the iSpy installer script using the below command (no requirement for sudo):
bash <(curl -s "https://raw.githubusercontent.com/ispysoftware/agent-install-scripts/main/v2/install.sh")
For the question “build ffmpeg v5 from agent DVR (Ubuntu)” enter yes.

Wait for the installation script to complete, this took roughly 16 minutes then prompted for my password
For the question “setup AgentDVR as system service” enter yes.

Once the installation has completed you can then access the web user interface by visiting the device IP or hostname with port 8090.
http://192.168.1.32:8090/
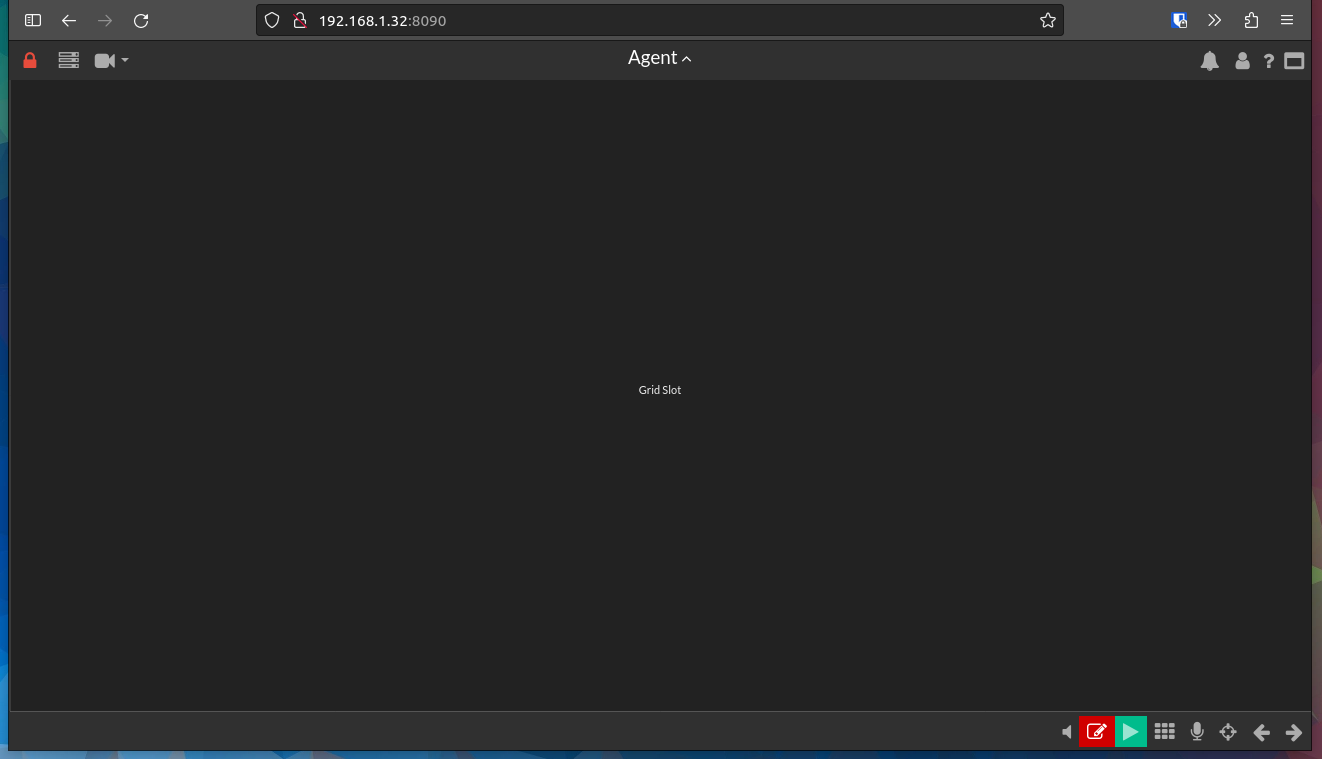
The initial questions are; your preferred language and browser access to your microphone. Then you are placed into the dashboard, which looks bare to begin with.
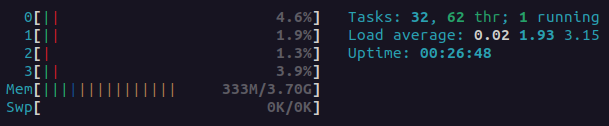
Using htop I can see that the Raspberry Pi load after installation and before any configuration looks like the following.
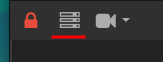
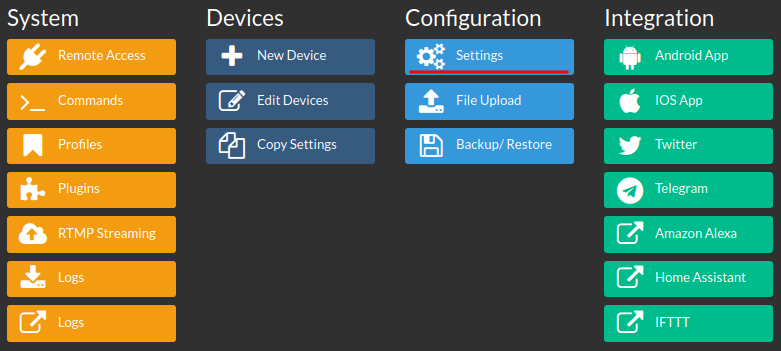
Lastly I will change some server settings, this can be done via the “Server Menu” button in the top left corner, as shown in the figure below.
In the “Configuration” column, select “Settings”.
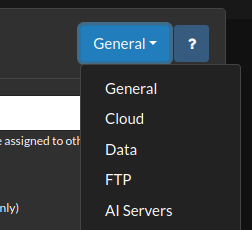
iSpy uses the top right drop down button as a way of sorting multiple sections, review each before continuing.
In general menu I will modify the server name, add my culture code and preferred date and time format.
You may also wish to configure a SMTP server for email notifications and add additional storage via the “Storage” button.
Before we add a camera it is worth reviewing the Performance turning guide.
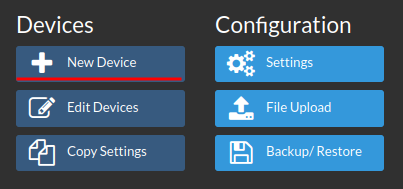
Now lets add our first camera, using the “Server Menu”.
This time from the “Devices” column, select “New Device”. On the select display slot screen click the “Grid slot” to place the new device in that layout.
When adding a new device we are presented with the following options:
- Network Camera Wizard (Simplest approach)
- You’ll need to type in the make of camera and select from a drop down list.
- Provide credentials
- Specify the network address of the camera.
- The device will be queried for usable types and URLs.
- ONVIF
- NDI (Network Device Interface)
- Video Source
- Audio Source
- Copy Device
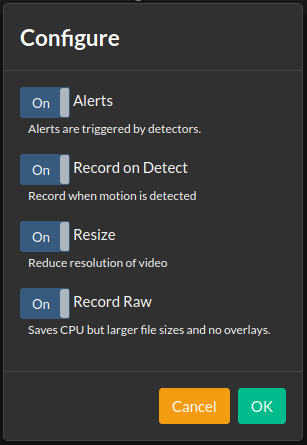
I will continue by added an ONVIF device. I’ll be enabling all the options; Alerts, Record on Detect, Resize and Record Raw (default on).
The next screen we can start to configure the camera, start by defining the source by clicking the “…” button on the right of “Source Type”.
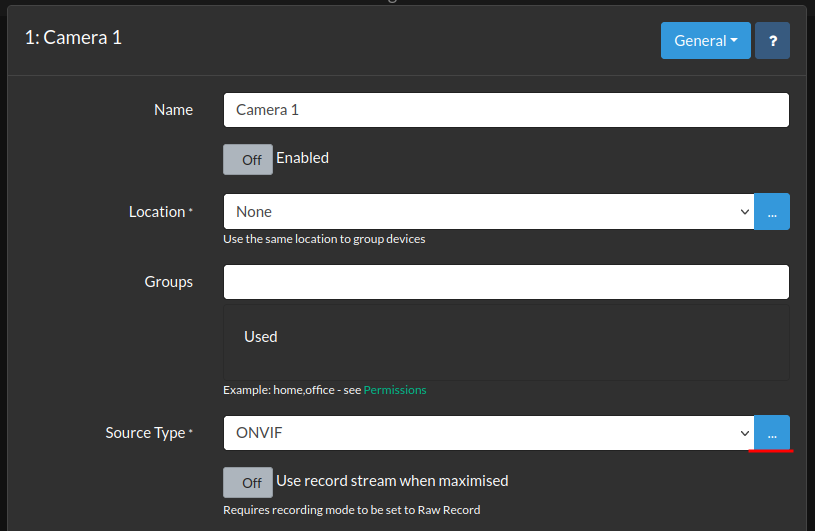
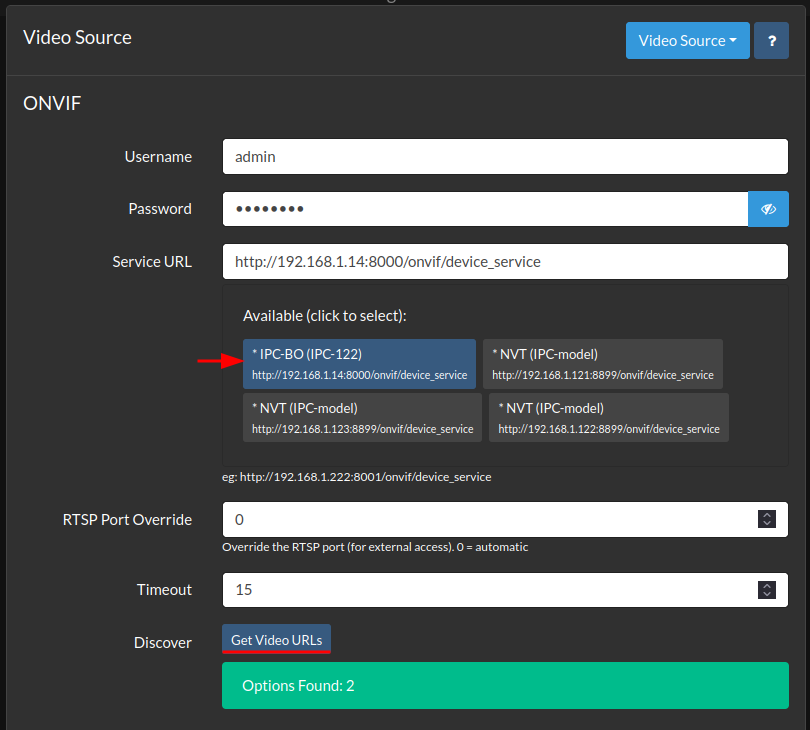
On this screen you’ll need to enter your credentials and selecting the available URL (check with your camera), lastly under “Discover” click the “Get Video URLs” button to auto-populate based on a device query.
This is a good starting point and we can continue to add the camera.
Scroll down a little and set the detected video URLs for Live URL and Record URL

From the drop down select “Detector”, this is where we can configure which type of detector and create zones.
We can create up to 5 different zones, which can be drawn on using the pencil tool.
Reolink AI is available detector option, which I will be using. Other options include:
- Objects
- ONVIF
- People
- Simple
- Speed
- Tracking
- Tripwires

After adding a single camera htop showed the following load on the Raspberry Pi.
I found that I could not get the live view quality of the camera that high as the CPU cores of the Raspberry Pi could not handle the demand and playback of H.265 4K was impossible without cooking the Raspberry Pi CPU, if the Reolink camera supported both H.264 and H.265, this would not have been an issue, although I could download the footage with ease.

The features of iSpy are excellent, I liked the ability to add floor plans and position cameras for ease of use.
Kerberos
Kerberos is different to other solutions as the Kerberos Agent runs as a container and only supports a single camera per instance. We can run multiple instances by using a Docker Compose file and configuring each camera.
In this article I will be deploying on top of Ubuntu 22.04.2 LTS (64-Bit), although it can be installed upon any Docker compatible system.
Start by prepare the Raspberry Pi, this contains the steps of flashing the MicroSD, connecting to the Raspberry Pi and updating the environment.
Now install Docker, and optional container management.
Now we can start to install Kerberos.
We can deploy Kerberos with Docker or with Docker Compose. I will be continuing the use Docker Compose, below is a sample YAML file to get you started.
version: "3.9"
services:
  kerberos-agent1:
    image: "kerberos/agent:latest"
    ports:
      - "8081:80"
    environment:
      - AGENT_NAME=agent1
    volumes:
      - ./agent1/config:/home/agent/data/config
      - ./agent1/recordings:/home/agent/data/recordings
With the Kerberos instance/s up and running we can now login to the web panel
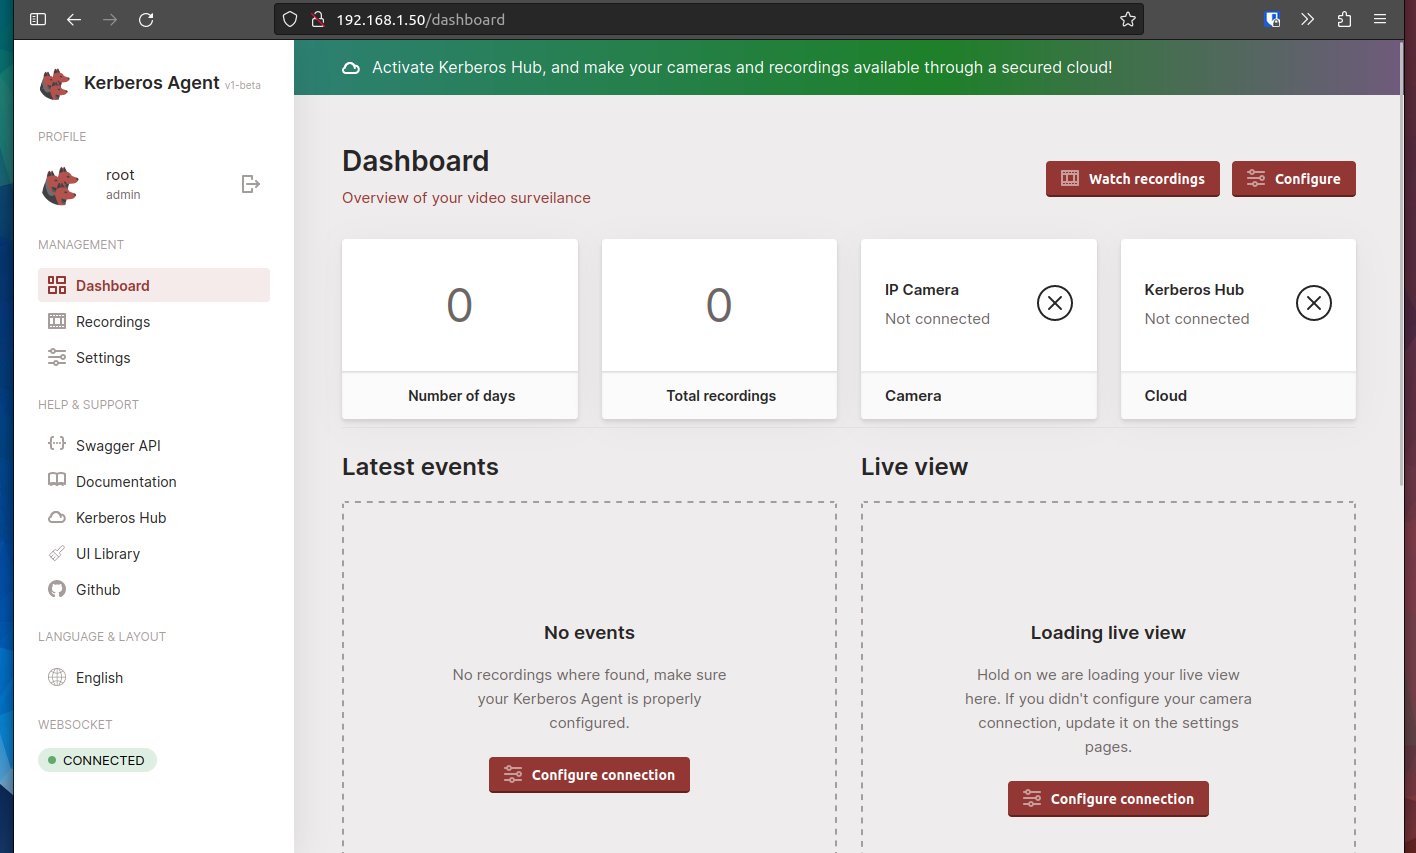
http://192.168.1.32:80
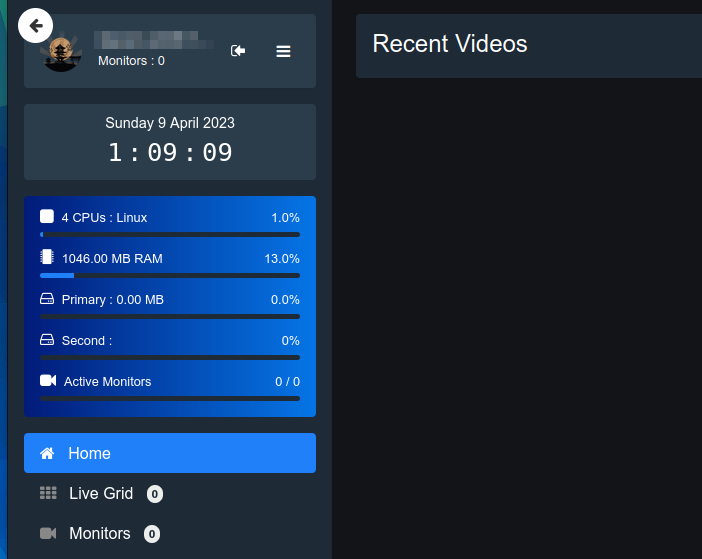
The default username is “root” with a password of “root”. Once logged in you’ll be greeted by the dashboard.
Using htop I can see that the Raspberry Pi load after installation and before any configuration looks like the following.

Shinobi
In this article I will be deploying on top of Ubuntu 22.04.2 LTS (64-Bit), although it can be installed upon CentOS, Rocky, MacOS, FreeBSD and OpenSUSE.
Start by prepare the Raspberry Pi, this contains the steps of flashing the MicroSD, connecting to the Raspberry Pi and updating the environment.
Now we can start to install Shinobi.
Become root
sudo su
Then run the Shinobi script installer
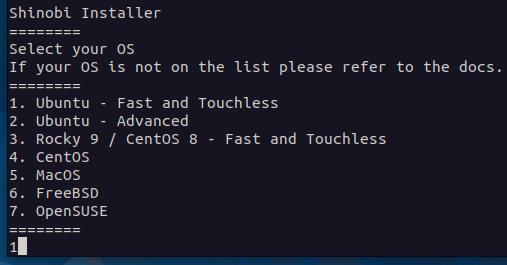
sh <(curl -s https://cdn.shinobi.video/installers/shinobi-install.sh)
For the question “Install the development branch” select no.

I will be using the option 1 “Ubuntu - Fast and Touchless”, which installs without further prompts, including installing MariaDB without a password.
The installation process will begin and took me roughly 8 minutes to complete.
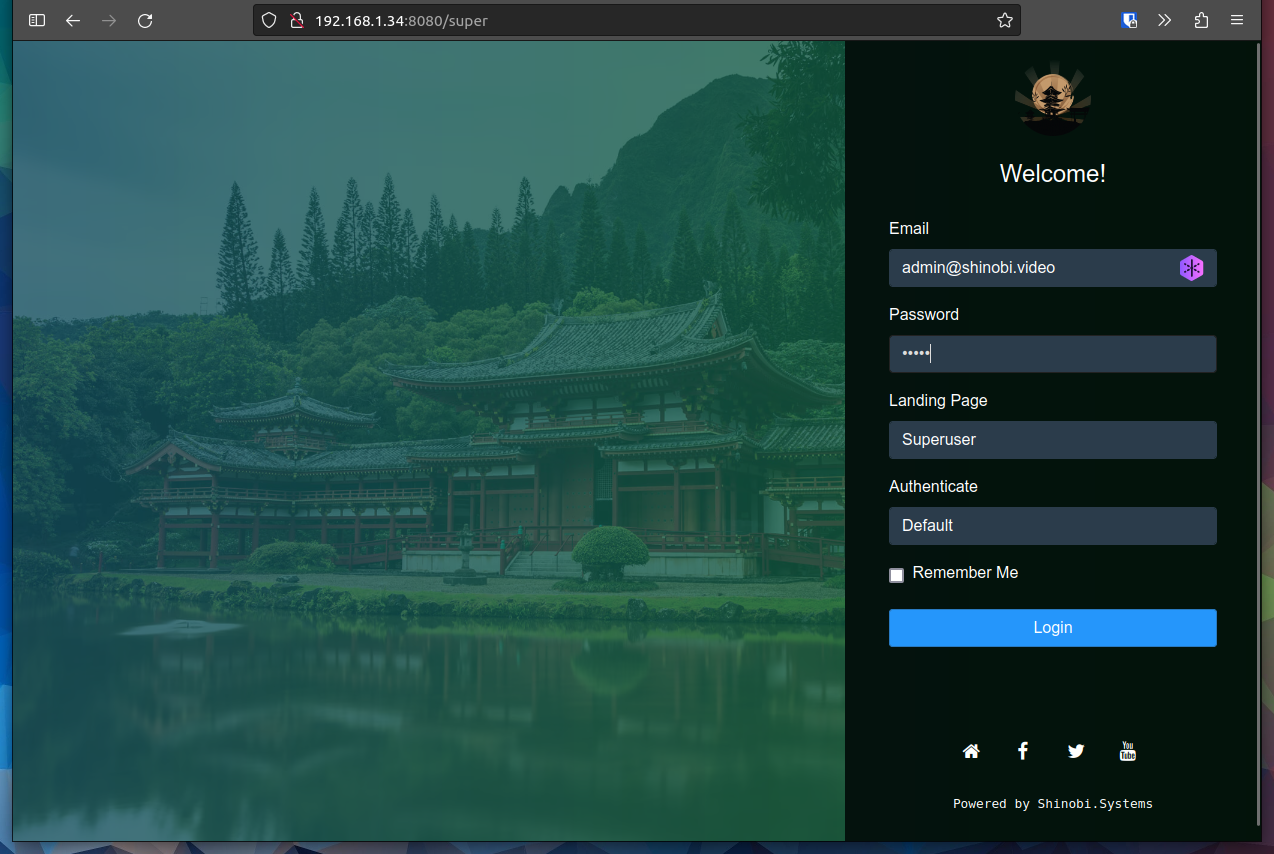
Once the installation has completed you can then access the web user interface by visiting the device IP or hostname with port 8090.
http://192.168.1.34:8080/super
The default superuser username is “[email protected]” wiith a password of “admin”.
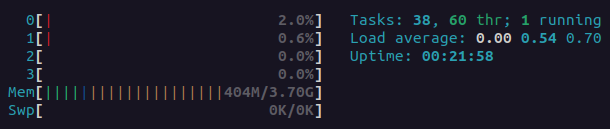
Using htop I can see that the Raspberry Pi load after installation and before any configuration looks like the following.
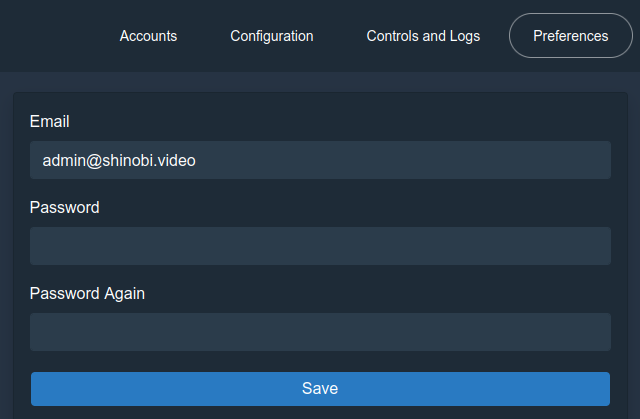
First things first, after logging in as the superuser, navigate to “Preferences” and set a new password.
If you need to configure additional storage or SMTP this can be completed in the “Configuration” tab.
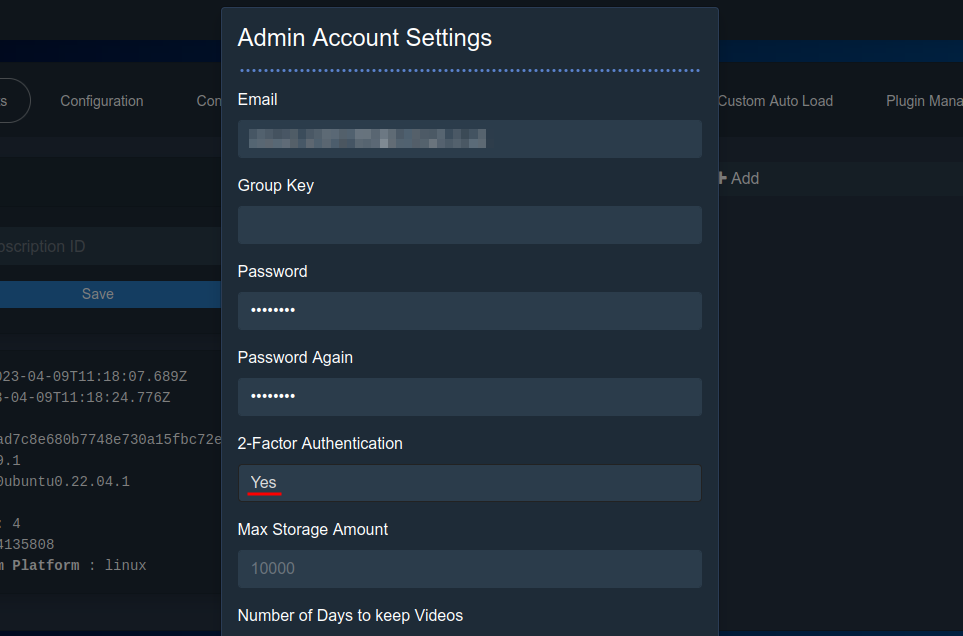
Next switch to the “Accounts” tab and create a new user. The new user by default will have “All Privileges” but this can be changed if you scroll down.
At this point you will not be able to configure 2-Factor Authentication as you have not fully configured everything that is required. Although its recommended to use a strong password in conjunction with MFA.
Now you can log in using your own account.
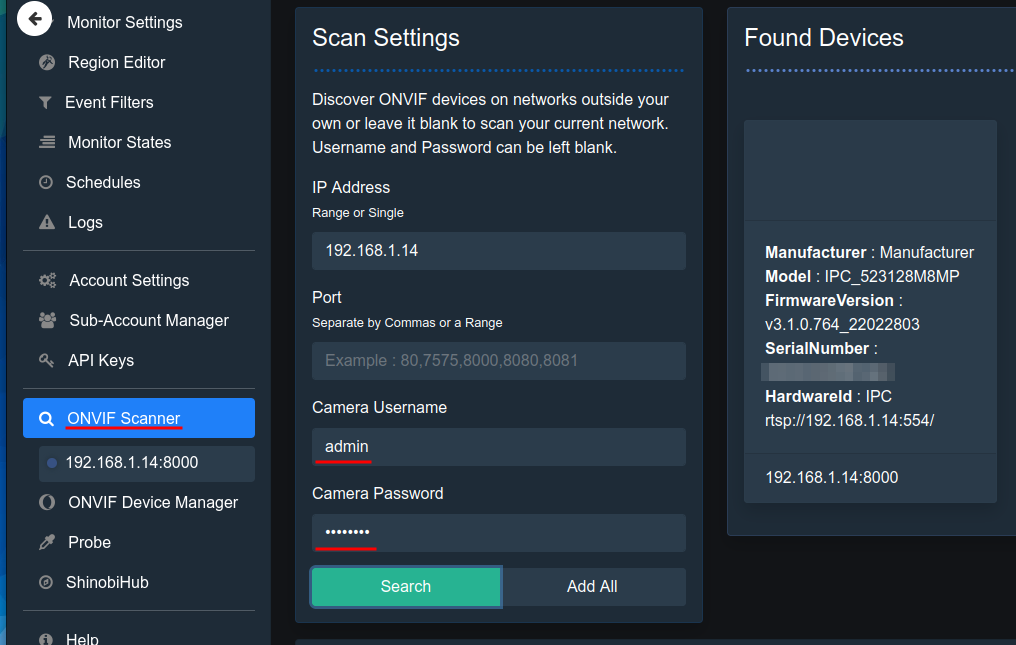
We can add our first camera by utilising the ONVIF scanner tool in Shinobi. From the main menu on the left, scroll down and click “ONVIF Scanner”.
I am limiting my search scope by adding a single IP address, but you can leave it blank for everything on the Shinobi subnet or set a range for example 192.168.1.10-192.168.1.20. Dont forget to add your username and password, then click “Search”.
On the right under “Found Devices” your camera should be detected, click it to take you to the configuration page.
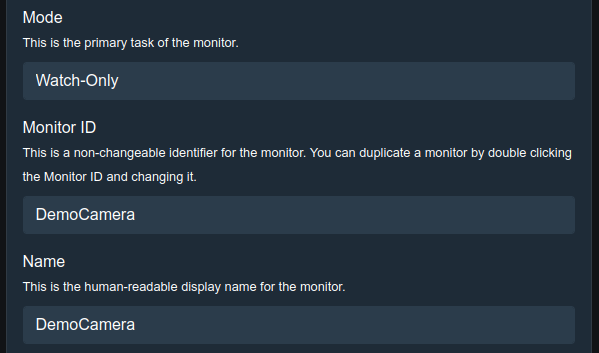
The configuration will be automatically detected, but there are a few settings you may wish to change.
The default value for “Mode” is set to “Watch-Only”, which you will want to change to “Record” when you are ready. You will also want to change the “Monitor ID” and “Name”, this is cameras name, as you can see in the screenshot below I have called mine “DemoCamera”.
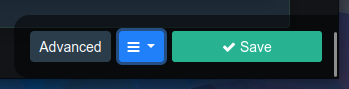
For advanced options you need to toggle it from the menu in the bottom right. Once complete proceed by saving.
Because the Reolink RLC-810A only supports H.265, the only way I managed to get an image for liveview was to change the “Steam Type” to use MJPEG.
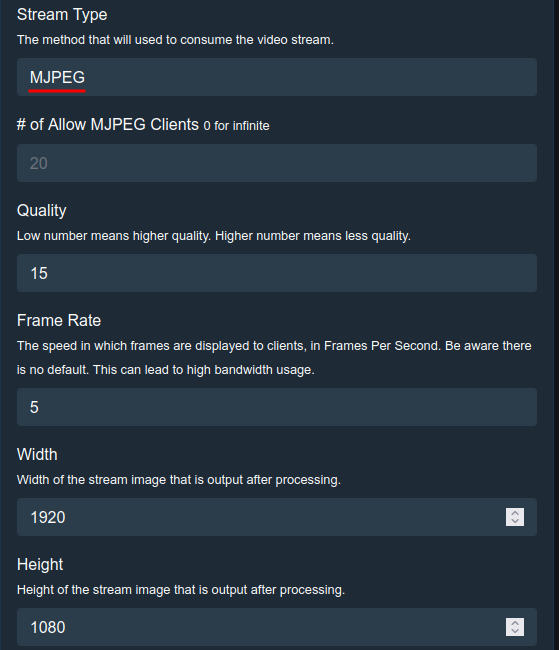
But this meant that my Raspberry Pi was running at roughly 40-50% CPU even with the resolution reduced to 1920x1080 at 5 frames per second.

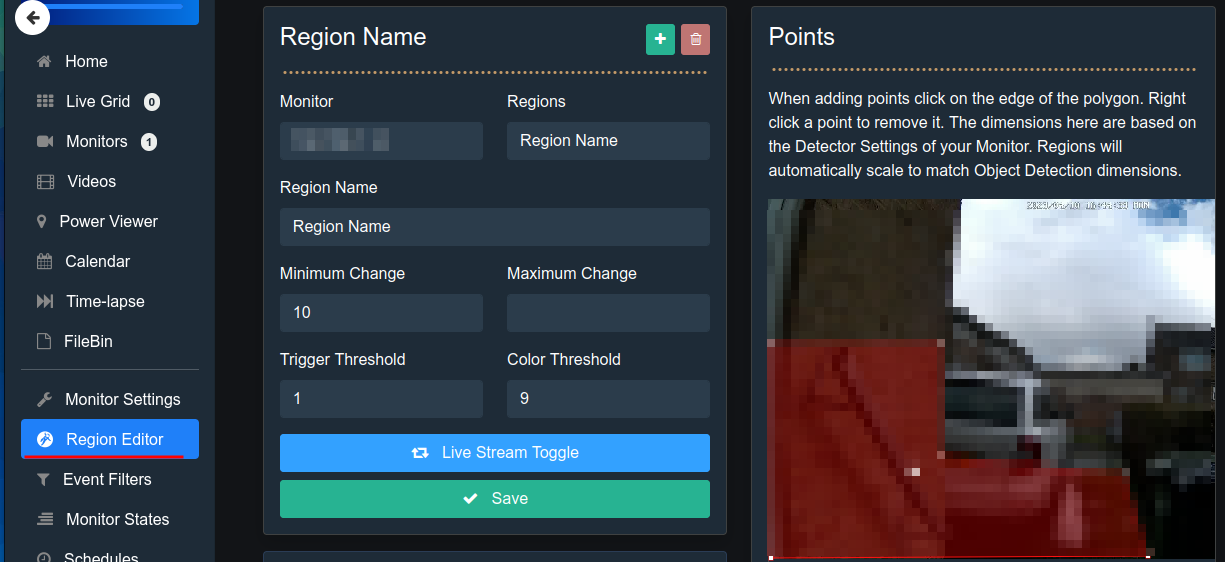
Shinobi had all the expected features such as Regions and Schedules directly on the main navigation bar.
I liked the ability to create different storage and send different streams, although generally I found the interface a little hard to use, I suspect this is due to its liquid interface approach, which works nicely on mobile devices, but doesn’t feel slick on a desktop.
Frigate
Frigate is an open source NVR built around real-time AI object detection. All processing is performed locally on your own hardware, and your camera feeds never leave your home.
It is strongly recommended to use a Google Coral device, to offload the AI detection workloads. The USB Accelerator could be used along side your existing setup. - due to the cost of the device I have not purchased on for this project, as mentioned in the documentation the accelerator will draw a lot of power. Because I will be using USB storage device, its recommended to use a powered USB hub.
In this article I will be deploying on top of Ubuntu 22.04.2 LTS (64-Bit), although it can be installed upon any Docker compatible system.
Start by prepare the Raspberry Pi, this contains the steps of flashing the MicroSD, connecting to the Raspberry Pi and updating the environment. Next install Docker, and optional container management.
NOTE: Raspberry Pi limits the amount of memory available to the GPU. In order to use ffmpeg hardware acceleration, you must increase the available memory by setting gpu_mem to the maximum recommended value in config.txt
Config.yml file
All of Frigates configuration is performed via the config.yml file, this is accessible via the host and web interface after installation.
Before creating the container we need to create an basic config.yml file, otherwise we’ll run into issues where the system will create a directory called “config.yml” instead.
sudo mkdir -p /var/lib/docker/volumes/frigate_config/_data/ && nano $_/config.yml
Place the follow configuration example code into your config.yml file, CTRL+O to save, CTRL+X to exit.
mqtt: # MQTT is optional from Frigate version 0.12.0
  enabled: False

cameras:
  test: # dummy camera
    enabled: False
    ffmpeg:
      inputs:
        - path: rtsp://10.0.10.10:554/rtsp
          roles: # detect, record, rtmp
            - detect
            - record
            - rtmp
detect:
  enabled: False
  width: 1280
  height: 720
  fps: 5

record:
  enabled: False

rtmp:
  enabled: False

snapshots:
  enabled: False
Docker Container
Now we can start to install Frigate, the suggested method to install Frigate is to use Docker Compose. Below is a Docker Compose YAML file to get you started.
The default shm size of 64MB is fine for setups with 2 cameras detecting at 720p, you may need to adjust this if you have to many, or high resolution cameras.
NOTE: Its common practice to add :ro to the config.yml volume to make it read-only, preventing tampering via the web interface.
version: "3.9"
services:
  frigate:
    container_name: frigate
    privileged: true
    restart: unless-stopped
    image: ghcr.io/blakeblackshear/frigate:stable
    shm_size: "64mb" # raw decoded frames in shared memory
    #devices:
      #- /dev/bus/usb:/dev/bus/usb # passes the USB Coral
      #- /dev/apex_0:/dev/apex_0 # passes a PCIe Coral,
      #- /dev/dri/renderD128 # for intel hwaccel, needs to be updated for your hardware
    volumes:
      - /etc/localtime:/etc/localtime:ro
      - config:/config # volume for the config.yml file
      #- config:/config:ro # readonly volume
      - media:/media/frigate
      - type: tmpfs # Optional: 1GB of memory, reduces SSD/SD Card wear
        target: /tmp/cache
        tmpfs:
          size: 1000000000
    ports:
      - "5000:5000"
      - "8554:8554" # RTSP feeds
      - "8555:8555/tcp" # WebRTC over tcp
      - "8555:8555/udp" # WebRTC over udp
    environment:
      FRIGATE_RTSP_PASSWORD: "password"

volumes:
  config:
  media:
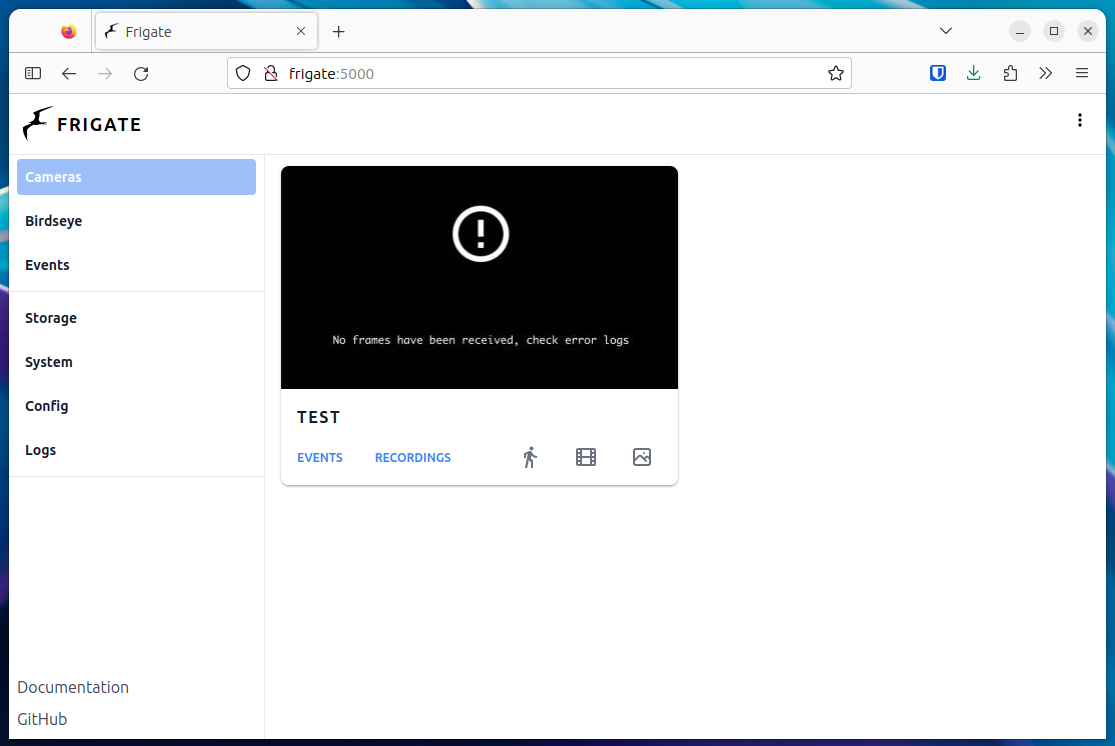
Now we can visit the web interface using the hostname or IP address, via port 5000. There is no authentication
http://frigate:5000/
The screenshot below is the dashboard, with our dummy camera.
Official documentation for camera setup, and guidance for specific cameras, such as Annke, Reolink and Unifi. This is the link for a full configuration reference.
Useful pieces of information
How to find RTSP streams using NMap
- Install NMAP -
sudo apt install -y nmap nmap --script rtsp-url-brute -p 544 192.168.1.100
How to port scan devices using NMap
- Install NMap -
sudo apt install -y nmap nmap -p 1-65535 -T4 -A -v 192.168.1.100
How to easily find your camera resolution
- Open VLC,
- Open the RTSP stream
- Navigate to “Tools” and select “Media Information”.
How to create masks and zones in Frigate
- Select the camera
- Change from “Live” to “Debug”
- Click “Show options”, under the video feed
- Select “Mask & Zone creator”
- Create zone, copy the generated code into your
config.ymlfile.
Below you’ll find a demonstration configuration file. It is worth reading the official documentation as this system is very customisable, based on your requirements and equipment.
mqtt: # MQTT is optional from Frigate version 0.12.0
  enabled: True
  host: mqtt.networkingdream.com
  port: 1883
  topic_prefix: frigate
  client_id: frigate
  user: mqtt_user
  password: mqtt_password
  tls_insecure: True

#detectors:
#  coral:
#    type: edgetpu
#    device: usb
#    model:
#      path: "/custom_model.tflite"

go2rtc: # reduce connections to camera using go2rtc
  streams:
    rtsp_camera:
      - rtsp://192.168.1.100:554/stream

cameras:
  frontdoor: # Camera name
    enabled: True
    ffmpeg:
      inputs:
        - path: rtsp://127.0.0.1:8554/rtsp_camera # Local stream from go2rtc
          roles:
            - detect
            - record
  backdoor: # Camera name
    enabled: True
    ffmpeg:
      inputs:
      # Multiple paths for main and sub streams, each doing a different role
        - path: rtsp://192.168.1.111:554/stream # Main stream
          roles:
            - record
        - path: rtsp://192.168.1.111:554/stream # Sub stream
          roles:
            - detect

detect: # Global detect settings
  enabled: False
  width: 1280
  height: 720
  fps: 5

record: # Global record settings
  enabled: False
  retain:
    days: 7
    mode: motion # all, motion, active_objects
  events:
    retain:
      default: 14
      mode: active_objects
      objects: # granular retain control over different objects
        car: 7
        motorcycle: 7
        bicycle: 7

rtmp: # Global rtmp settings - RTMP is deprecated in favor of restream
  enabled: False

snapshots: # Global snapshot settings
  enabled: False
  retain:
    default: 7

objects: # Global object settings
  track:
    - person
    - car
    - motorcycle
    - bicycle

motion: # Global motion settings
  threshold: 25
  mqtt_off_delay: 30
My conclusion
In my experience the biggest issue I found was finding cameras budget friendly and that were suitable. The above mentioned software is fantastic, they are open-source and free which is amazing!
I personally really liked iSpy, as it was super easy to use, full of features and well documented. On the flip side Frigate is amazing, but is not that easy to implement if you are new to this and are not comfortable editing YAML files.
I am super excited about Frigate and its power, and I am likely to continue with it, using different hardware and adding a Coral.
The use of Raspberry Pi for a NVR, which was the purpose of this article. The Raspberry Pi is a fantastic option to play and experiment with these NVR solutions. Although the Raspberry Pi can run a very small environment, it does lack the power to run anything larger than 3-4 cameras, of course depending on the camera and resolution.
All of these projects, provide us with the freedom to use multiple vendors and additional features and integrations, which are just not available in a pre-built setups.