pfSense HAProxy ACME
27 Jun 2021
Why and Goals
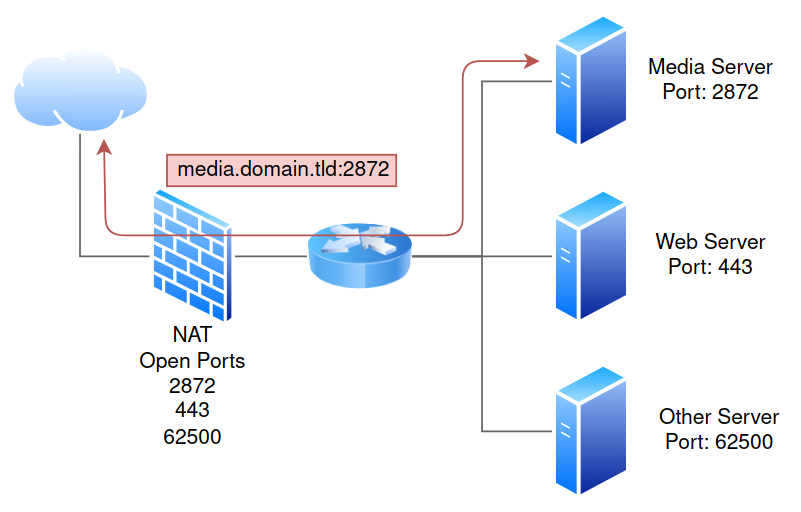
The purpose of this is to create a reverse proxy with Let’s Encrypt integration, this will simplify exposing services to the internet with a domain name and issuing free certificates . The figure below shows exposing services through NAT and forwarding traffic through the network based upon port number. In this type of scenario we also would have to setup Let’s Encrypt on each server.
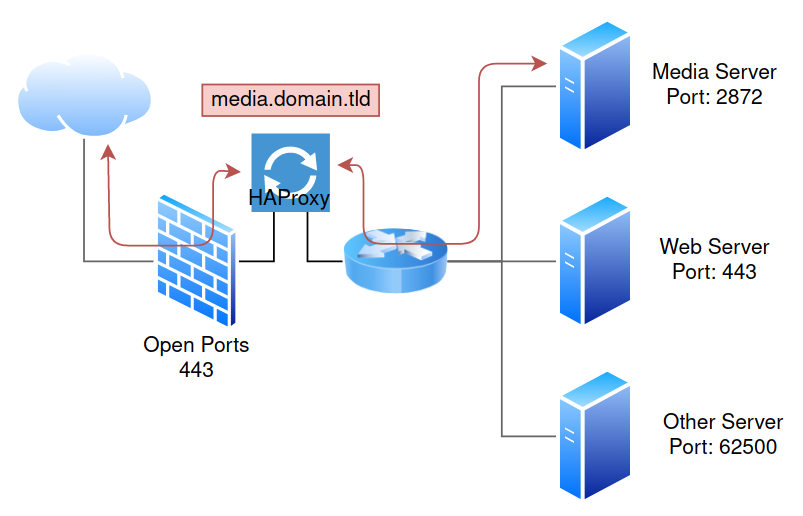
By using a reverse proxy we can reduce the number of exposed ports and with Let’s Encrypt integration we can offer a single point for Let’s Encrypt to authenticate.
Its worth mentioning that the Firewall, Proxy and Router devices are combined into a single pfSense box, I have split them for demonstration purposes.
Other benefits of this type of solution include:
- More granular control
- Increased security
- Use of services such as Let’s Encrypt (free SSL certificates)
- Load balancing
- Health checks
- Reports, Monitoring and Stats.
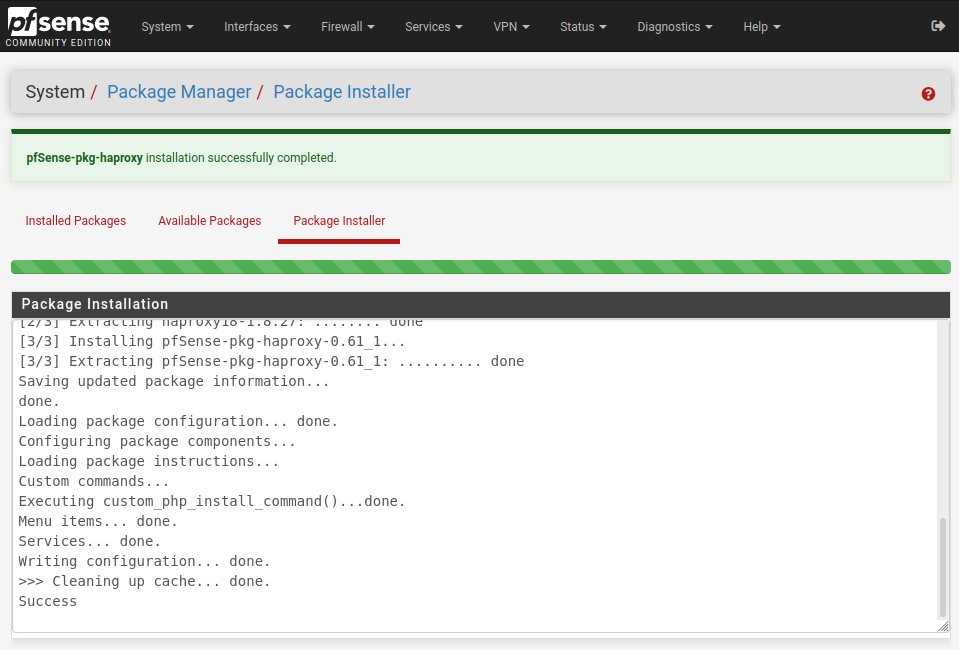
Installation of Packages
You can install the required package by navigating to System > Package Manager and using the Available Packages to search and install:
- haproxy
- High availability, load balancing, and proxying for TCP, HTTP and HTTPS-based applications.
- acme
- Interfaces with Let’s Encrypt to handle the certificate generation, validation, and renewal processes.

Cloudflare and DNS entries
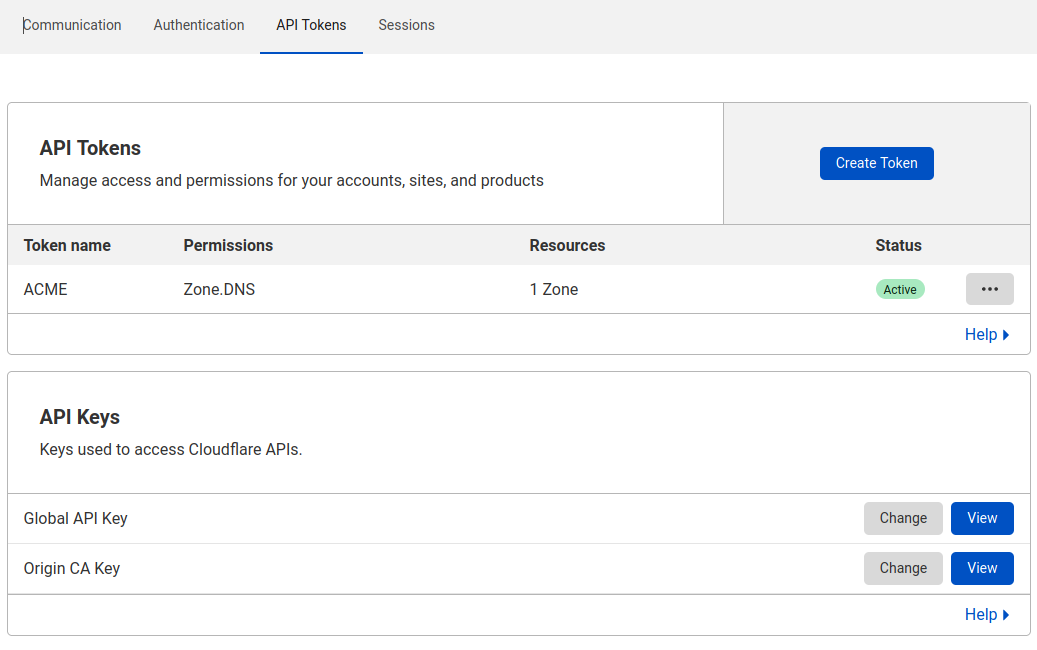
We have Cloudflare for our domain services, these include Firewall, Caching and DNS. I already have my DNS A records which resolve to my external IP address.
I have also configured an API token for ACME as this will need write permission to your DNS records.
Configuration of Packages
ACME
Once the ACME package has been installed we can begin to configure it. We’ll need to create an account key, this registers the ACME server with Let’s Encrypt.
Navigate to Services > ACME Certificates > Account keys and select Add.
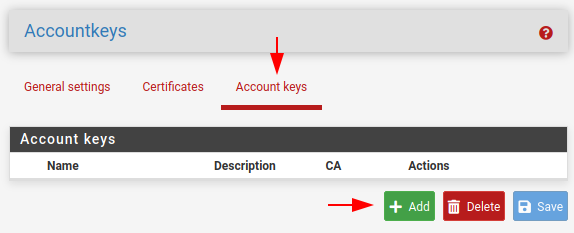
Populate the name and description fields and change the ACME server to Let’s Encrypt Production ACME v2, you can select the dryrun options if you do not want to actually request certificates.
Select the Create new account key and Register ACME account key, then save.
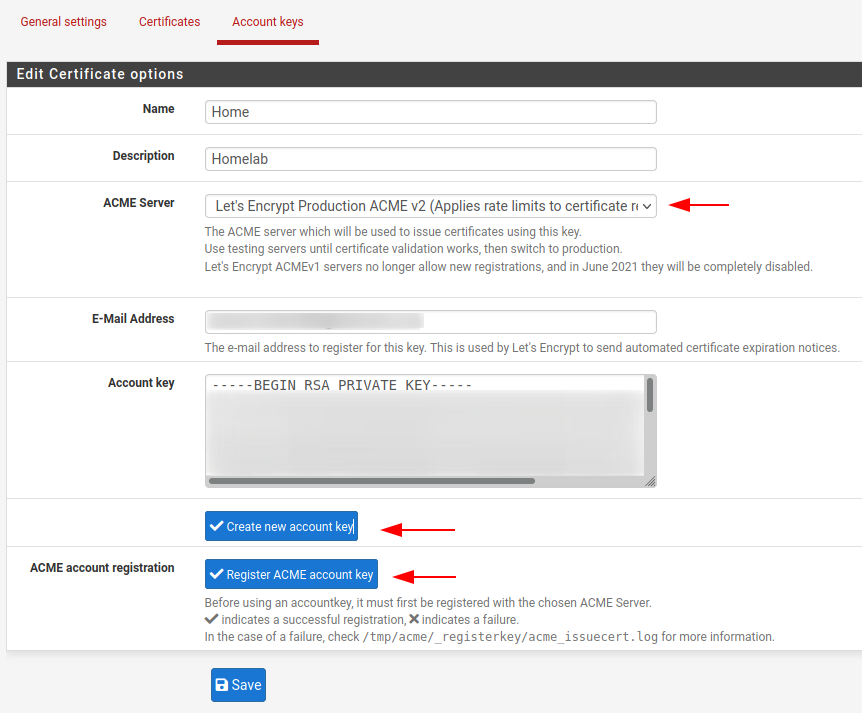
We should now have our account key registered and ready to create some certificate requests.
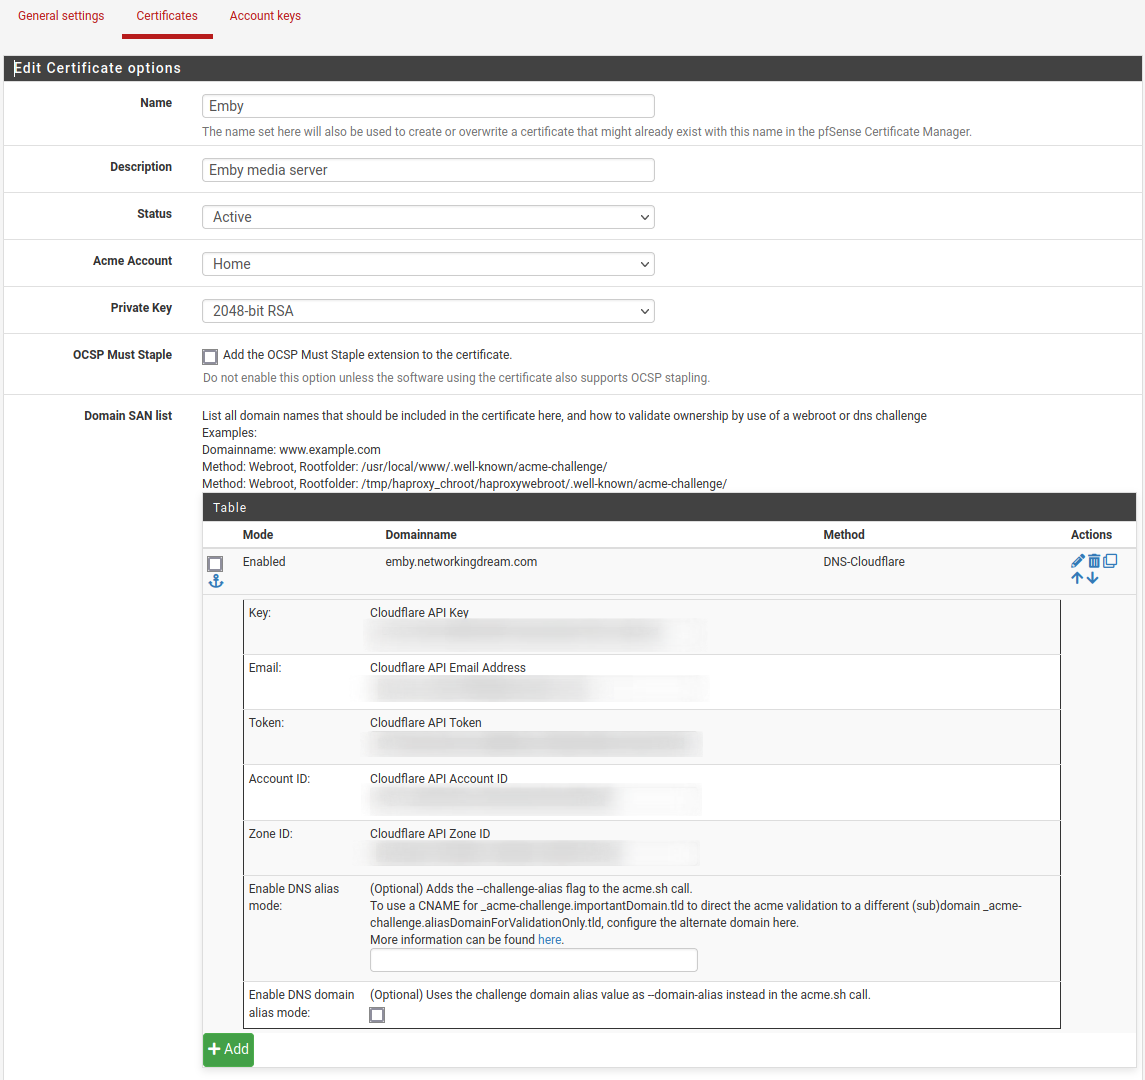
To create a certificate request go to the Certificate top pane navigation and select Add.
Populate the fields and ensure you have your ACME account selected. We will also need access to our Cloudflare API, Token and Account ID, which can all be found within our Cloudflare account.

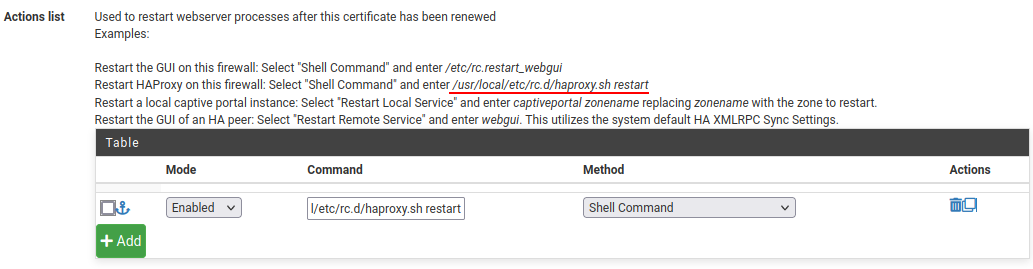
We can also create a restart action for the HAProxy service when the certificate is renewed, this is extremely important otherwise our service will not use the newly issued certificates and we’ll need to manually restart the service.
In the actions list, change the mode to Enabled and copy the Restart HAProxy command, this is /usr/local/etc/rc.d/haproxy.sh restart, paste it into the command and ensure the method is set to shell command and save.
To start the request process we need to click the Issue/Renew button
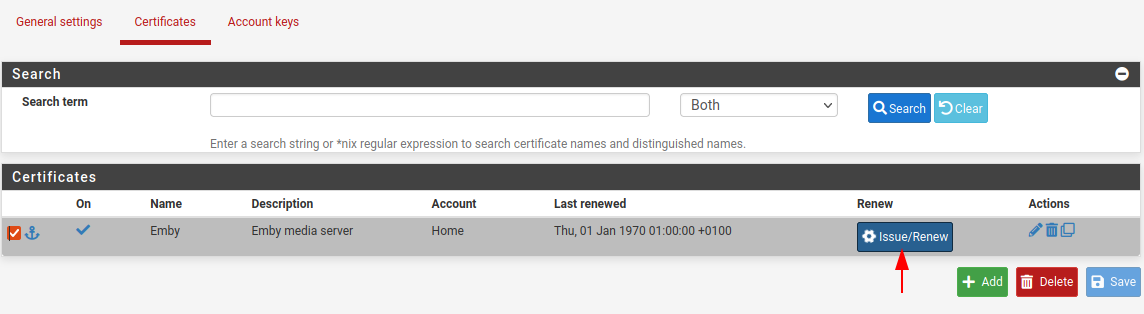
The request process will start and should return with a Success and Cert Success, if this does not succeed the log will provide enough detail on why it failed so you can troubleshoot.

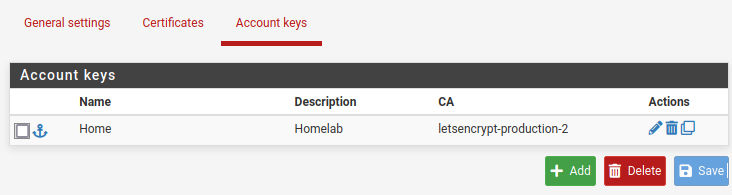
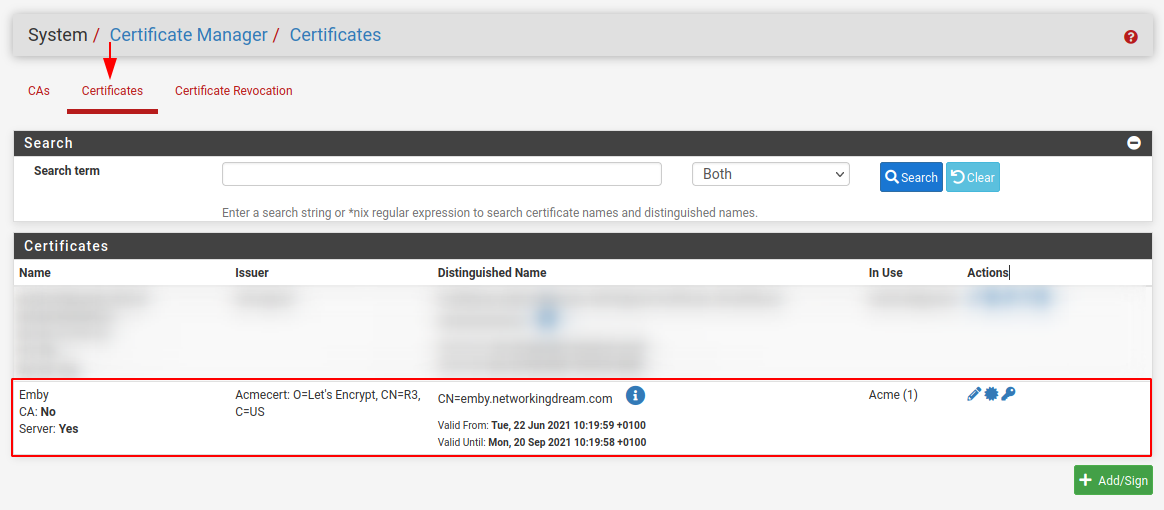
Once the request has successfully completed we can view our new certificate within the Certificates panel, as shown in the figure below.
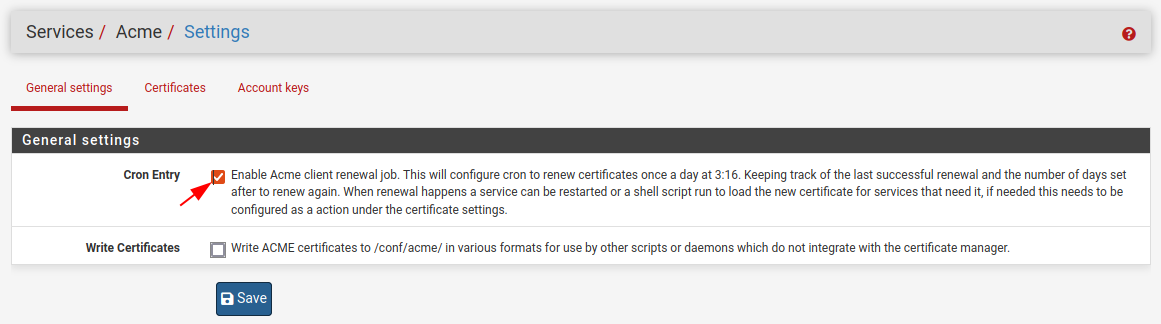
With our manual test completed we can go into the General settings tab and select the Cron Entry, this will create a cron job to renew our certificates.
With ACME configured and working we can now move onto configuring the HAProxy aspects, its important to complete this step first as the certificates are used within the HAProxy configurations and without them we’ll need to revisit.
HAProxy
Navigate to Services > HAProxy and Settings, check the Enable HAProxy and set the Maximum connections, this will depend on what services you are offering and the amount of expected connections, I am currently using 100 and have not reached my capacity just yet.
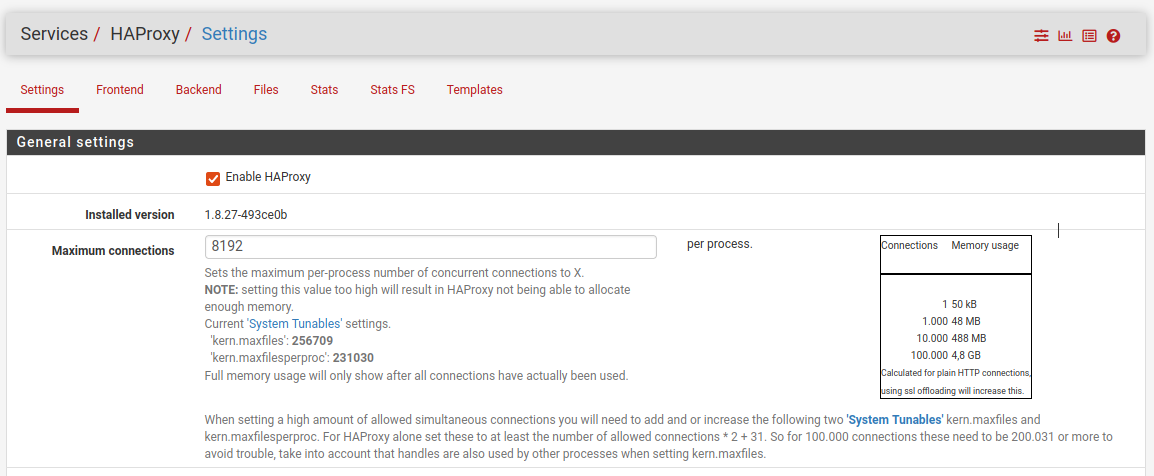
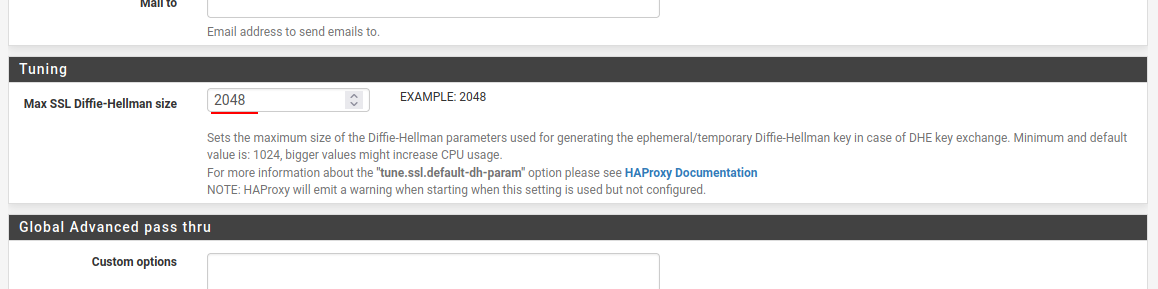
We also want to scroll down to the Tuning section and set a Max SSL Diffie-Hellman size of 1024 or 2048 if your hardware can support the extra load.
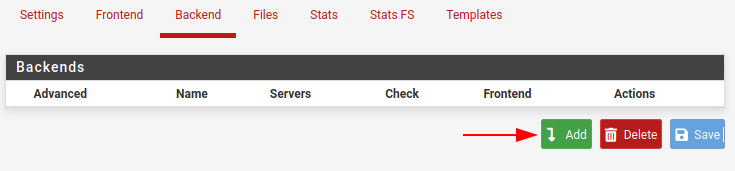
With HAProxy enabled we can start by creating our Backend services, these are the internal services.
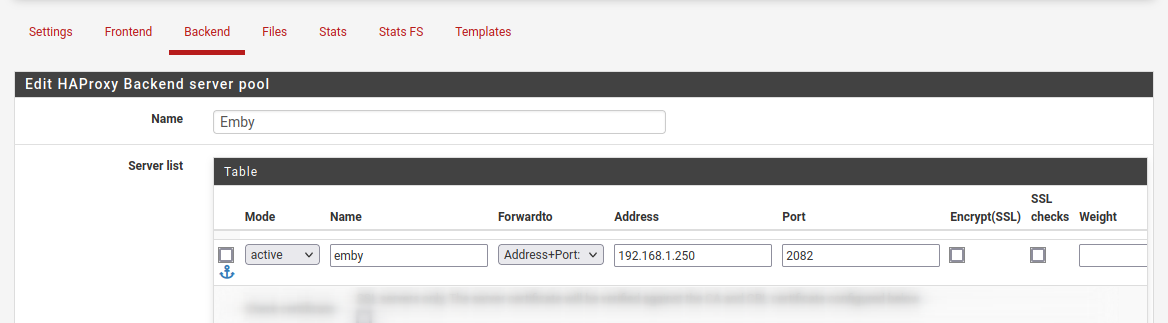
In the figure below I have an example of using an Emby server, we’ll be using the forwardto option of Address+Port with the internal address of 192.168.1.250 and a port of 2082, this connection is not encrypted therefore does not require a checked box for Encrypt (SSL) or SSL Checks.
If the service was using a self-signed certificate, we would need to check the Encrypt (SSL) but leave the SSL checks box unchecked as a self-signed certificate would cause a security warning.
In this section we can also configure load balancing and health checks for our services, although I am not covering this topic in this example.
Save the configuration and we should now see our Emby backend, it will remain greyed out as its not currently in use.

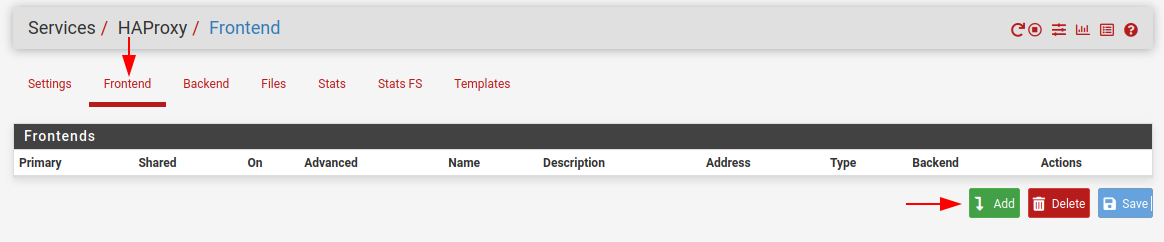
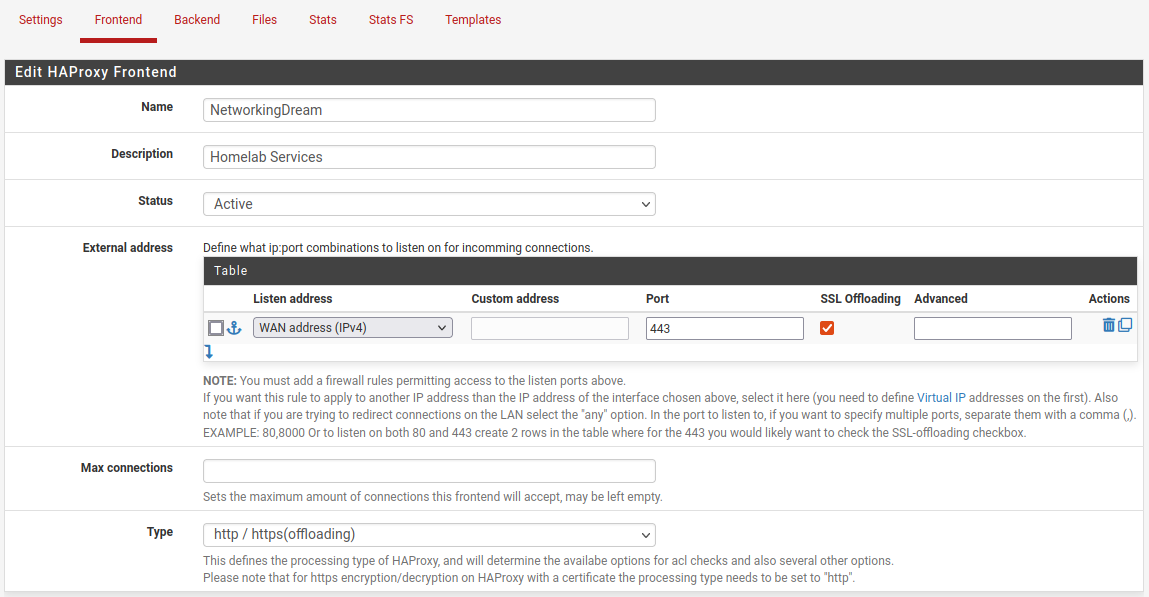
Now we will configure the Frontend, its important to have the Backend already configured as we will require it for the Frontend configuration.
Navigate to Frontend and select Add.
The Frontend is the service we are offering from the external network (Internet), we will be listening from our WAN IP address and only port 443 (HTTPS) with SSL offloading as I do not want any HTTP traffic.
We do not need to use port 443, we can direct any any port.
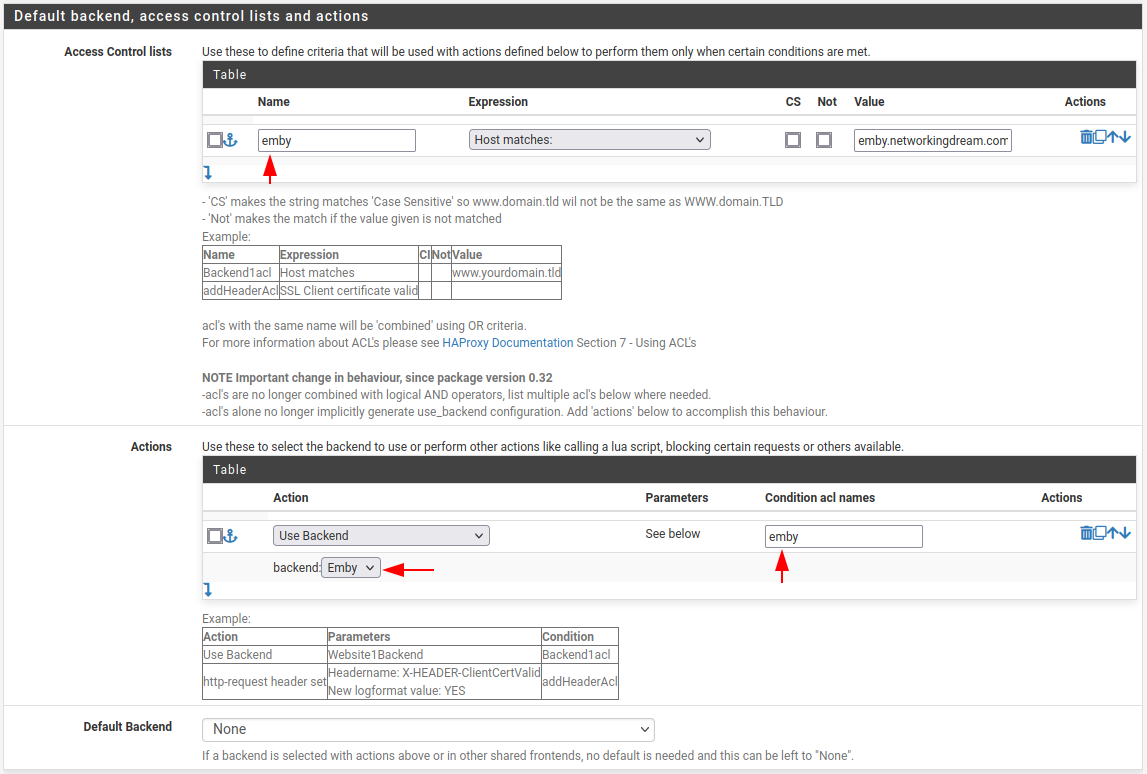
Scrolling down we can configure a basic Access Control List (ACL), I have configured in the figure below an example where the host address matches the url of “emby.networkingdream.com” with a name of emby, the name is important for the action.
In the action we will use the Backend we created called Emby, the condition ACL will be the name, emby. its important its exactly the same including case, best bet is to copy and paste the value.
This basic rule means that when we point our browser to https://emby.networkingdream.com it will be directed to our Emby backend of 192.168.1.250:2082.
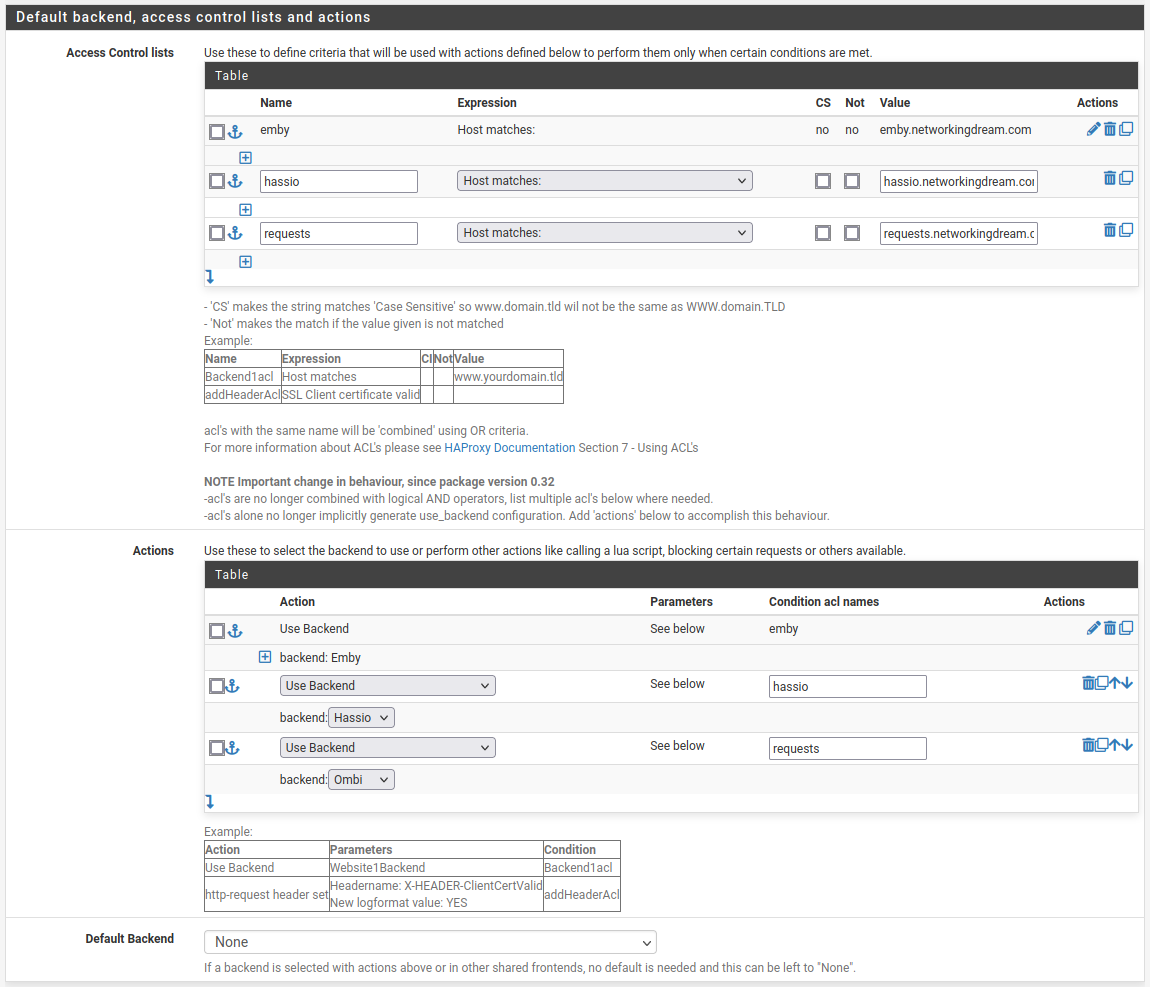
We can create more ACL and actions to utilise our WAN IP address and port 443 (HTTPS). The figure below shows some examples where we can redirect traffic to our internal services.
You’ll need to create the Backend services first.
Scrolling down we can see the SSL Offloading configuration section, here we will be select a default certificate and adding any additional certificates we might require. Make sure to check the Add ACL for certificate Subject Alternative Names.
This also requires we have successfully requests more certificates from Let’s Encrypt.

We are now finished and our internal services should be accessible from our domain names.
NAT Reflection
NAT Reflection is the ability to access external services from the internal network using the external (usually public) IP address, the same as if the client were on the Internet.
This means we can use the same domain names internally and externally.
We can enable NAT Reflection on our pfSense by navigating to System > Advanced > Firewall & NAT and scrolling down to the Network Address Translation section.
Set NAT Reflection mode for port forwards to Pure NAT.

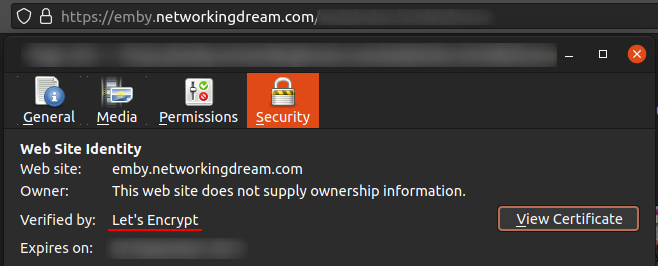
Now we can access our internal services using our external domain names. We can see that our certificates are also working.
Extras
A few extra settings we can include are:
- HAProxy > Frontend > Edit > Advanced settings, we can enable the use “forwardfor” option this will pass the client’s IP address through to our servers, this is helpful otherwise all connections will look to be coming from our WAN or LAN address.
Troubleshooting
Some services have policies for internal address and external addresses such as Emby can handle connections different depending if it thinks you are local or remote.
In our current solution all out connections appear as they are coming from our WAN IP, therefore classed as remote or externally connected.
We can add a workaround for this problem by telling our HAProxy to listen on our LAN address and configure DNS entries to point to our LAN address.
First go to your HAProxy Frontend and add your LAN address and an external address, as shown in the figure below.
EDIT: Due to required configuration differences between internal and external I have not added the LAN address to the WAN frontend, instead I cloned the WAN frontend and replace the WAN address with the LAN address. This gives me two frontend ends.

Now go to your DNS server and add host overrides for the Backend services pointing to your HAProxy LAN address with alias for each domain name.
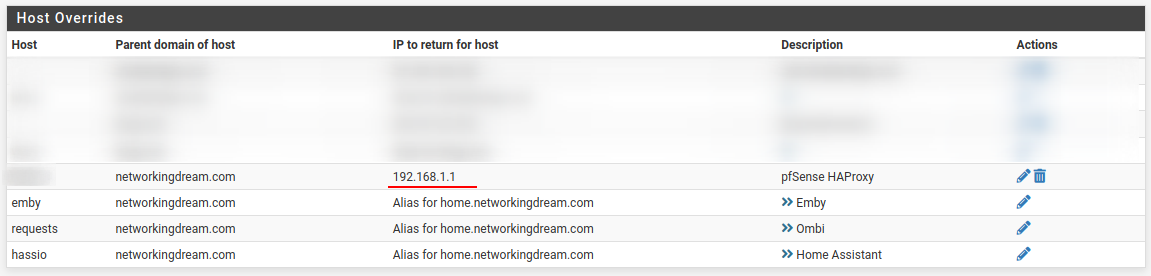
Now when we visit these domain names the request will be sent to our HAProxy service and forwarded appropriately while still maintaining our Let’s Encrypt certificates. Connections will appear as coming from 192.168.1.1 and therefore classified as an internal address.