OMV on RPI4 with 4Bay USB Storage
30 Oct 2021
In this article I will be exploring Open Media Vault (OMV) on a Raspberry Pi 4 (RPI4) with a USB 4 bay 3.5” IcyBox DAC. I will cover how to prepare the RPI4, Install OMV and basic configuration to enable a general purpose SMB share. I have discover OMV’s Docker integration and container management Yacht and some useful plugin additions such as LVM, KVM and OpenVPN.
Its worth noting that storage connected via USB is not eligible for raiding via OMV, but can still achieved using the built-in raid options and we can group disks together using LVM.
Prepare the MicroSD card
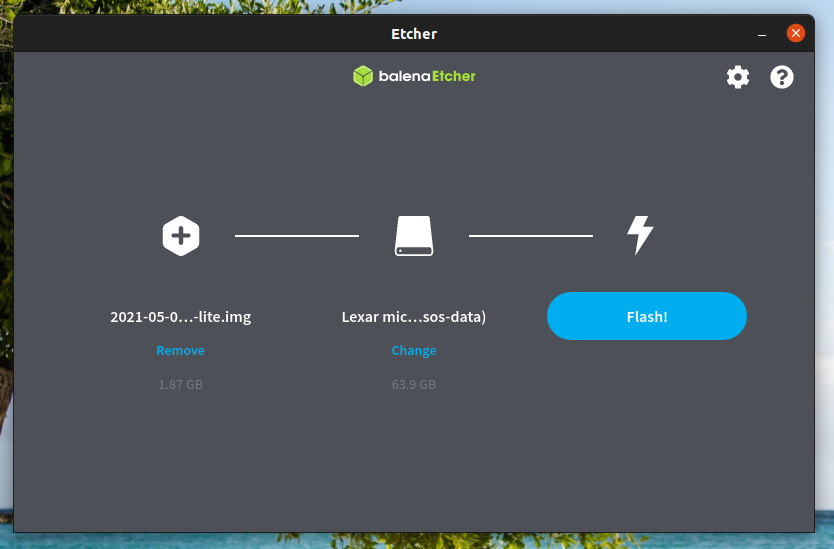
First download the latest version of Raspberry Pi OS Lite from the Raspberry Pi website. Now using Etcher flash RaspiOS on to your MicroSD card, I am using a 64GB SanDisk Extreme A2.
Create a SSH file on the MicroSD Boot partition, this will enable the SSH server from the initial boot.
touch /media/username/boot/ssh
Eject the SD and insert into your Rasppberry Pi 4
SSH & Config
SSH into the Raspberry Pi, using a username of “pi” and the password “raspberry”.
I know the IP address of my new RPI4 because I looked at my DHCP server address leases.
First thing you want to do with any RPI4 is to set a new password.
passwd
Now Update and Upgrade all the packages.
sudo apt update && sudo apt upgrade -y
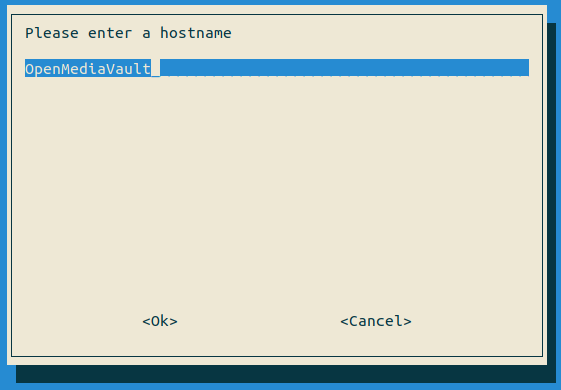
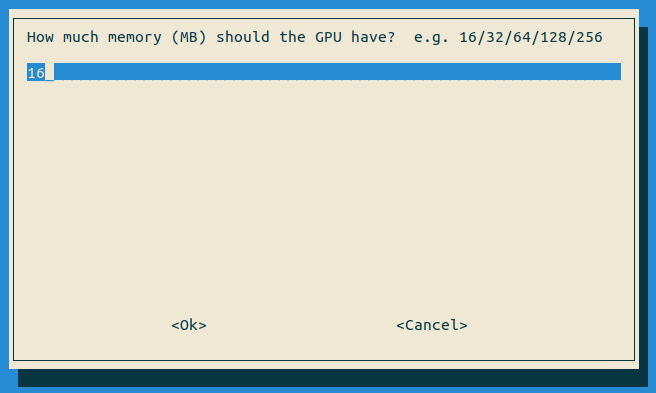
Using the raspi-config tool we will be setting an appropriate hostname and tweaking the GPU allocated memory.
sudo raspi-config
Navigate to System Options > Hostname and set a new name, I am using OpenMediaVault.
Now go to Performance Options > GPU Memory and set it to 16, this saves a little memory as we are not using any GUI.
Finish and Reboot the RPI4.
OMV Installation
We will be using the Install Script - GitHub Repo
The below command will download the script and pipe it to bash for execution. Piping to bash is dangerous and should only be used if you know what will be happening and trust the author.
wget -O - https://github.com/OpenMediaVault-Plugin-Developers/installScript/raw/master/install | sudo bash
In the last step of the installation the eth0 network interface is added to the OMV database, which may cause the IP address to change and we could lose our SSH connection, this happened to me.

You can reconnect using the new IP address or just continue to the webGUI.
Open Media Vault
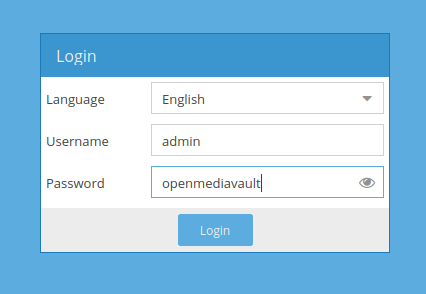
Visit the OMV webGUI
http://192.168.1.50/
The default username is admin with a password of openmediavault.
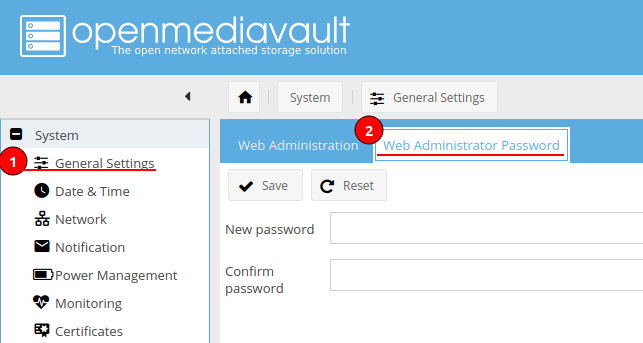
First thing is to change the default web admin password. Navigate to System > General Systems and the Web Administrator Password tab.
That completes the initial installations of Open Media Vault.
Storage
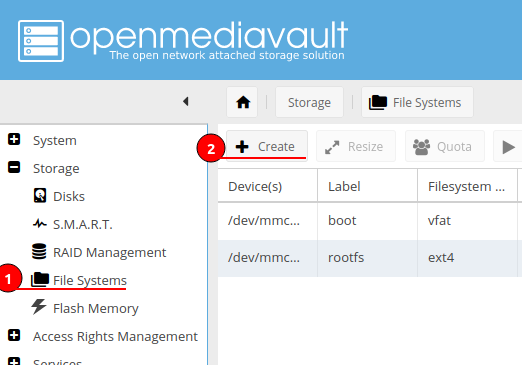
I have two 3TB disks within my IcyBox, to utilise them I need to create a File System. Navigate to Storage > File Systems and click the Create button.
Select a disk, provide a label and select your preferred file system, I have chosen the default EXT4.
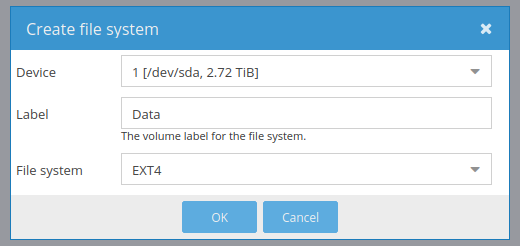
All data will be lost as the drive will be formatted. Initialisation of the disk can take some time depending on the capacity of the disk.
Once the disk has completed Initialisation you can then mount it.
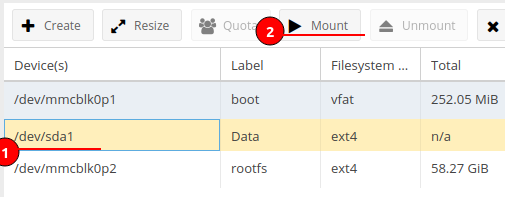
The File System is now ready to use.
Creating Users
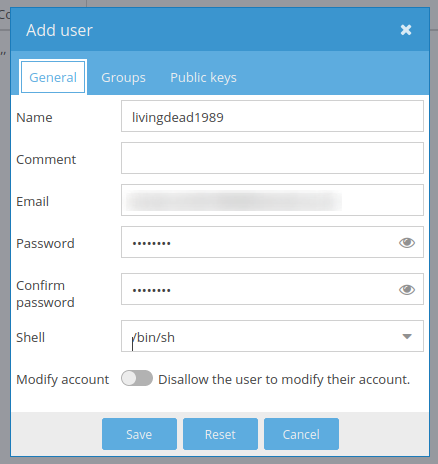
I will be creating a single user for demonstration purposes. Navigate to Access Rights Management > User and click the Add button.
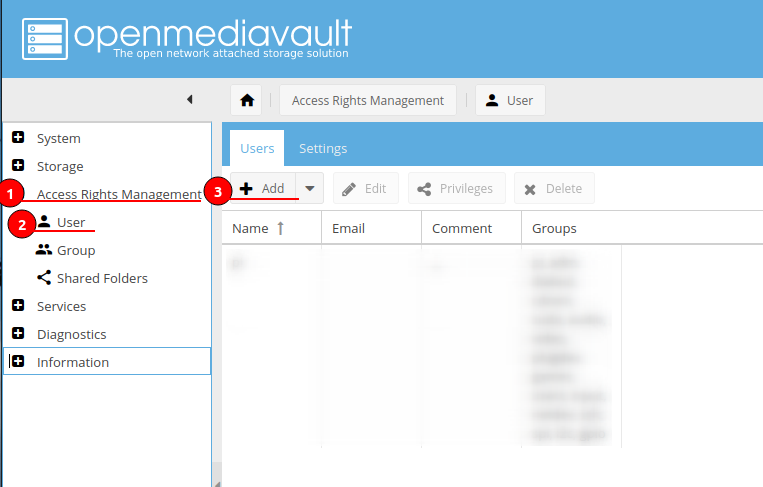
Provide a name and password then save.
Creating a Share (SMB/CIFS)
Now lets create a Shared Folder using the initialised and mounted disk. Navigate to Access Rights Management > Shared Folders and click the Add button.
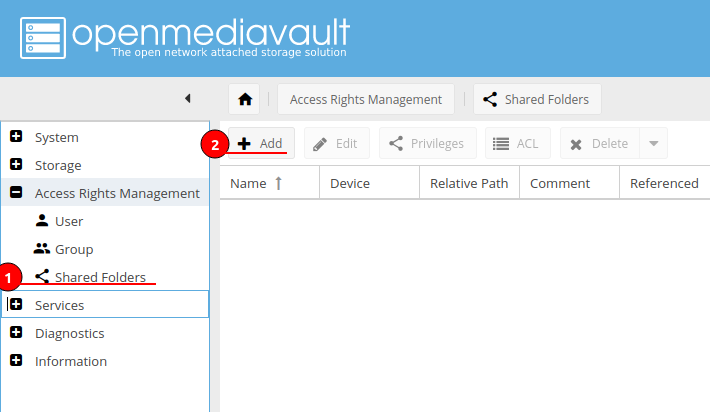
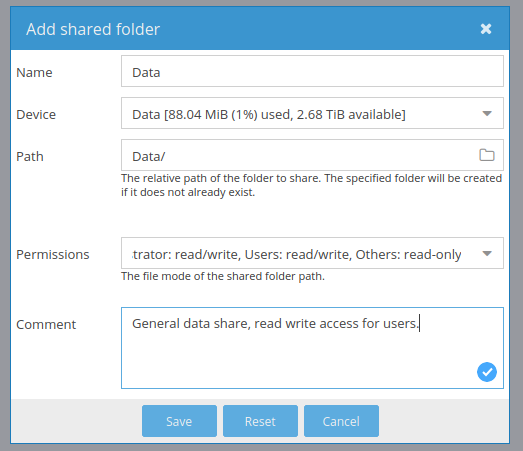
Provide a name for the shared folder and which device and path.
The permissions by default will grant all administrators and users read/write access, while others (anonymous) have read only access. Use the drop down menu to change this preset.
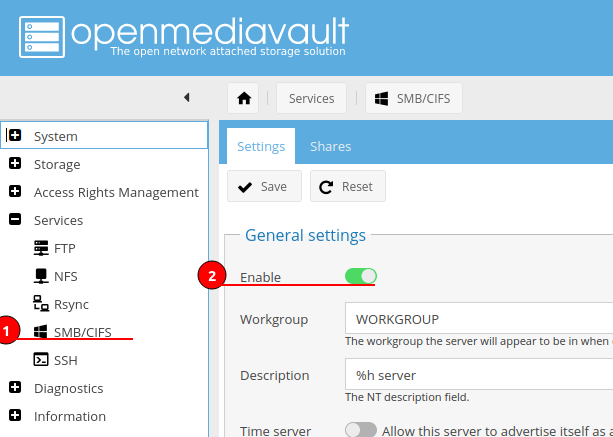
Now lets enable SMB/CIFS sharing. Navigate to Services > SMB/CIFS and enable the service.
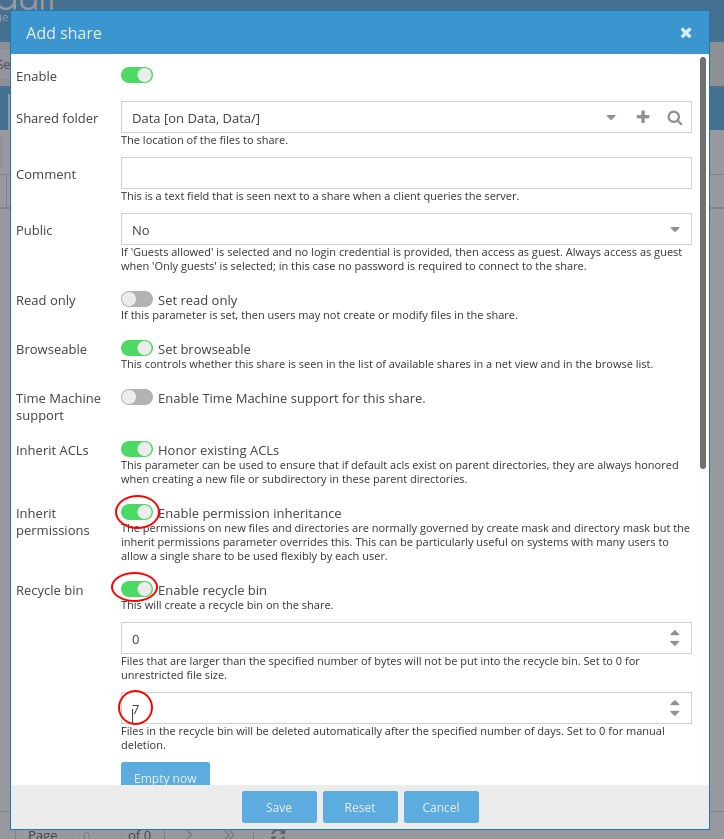
Now switch over the the Shares tab and Create a new share, selecting the Shared folder we just created.
I have also enabled:
- Inherit Permissions - This will help keep the permissions clean throughout the share.
- Recycle Bin - This will help prevent accidental deletion by creating a hidden folder called “.recycle” where deleted files are moved to, similar to Windows.
- Automatic Deletion after: 7 Days.
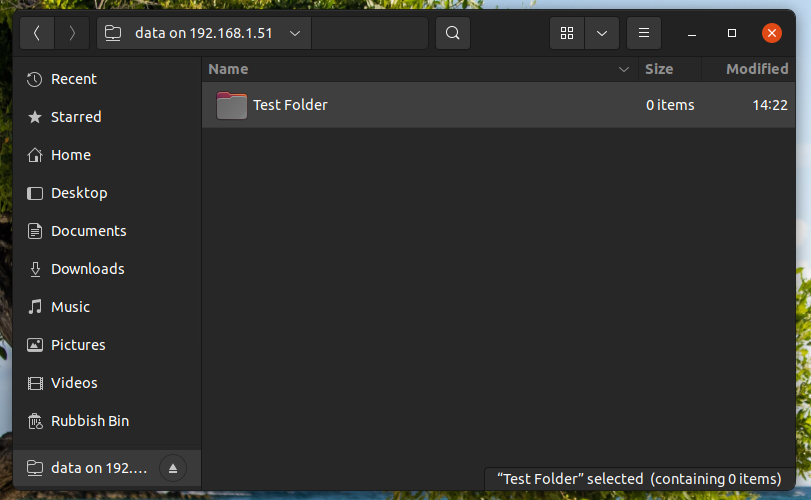
Testing the new share, I have created a folder to test everything is working. I even deleted some files and checked the “.recycle” folder.
Docker
Now lets take a look at the Docker integration with OMV. Navigate over to System > OMV-Extras and the Docker tab.
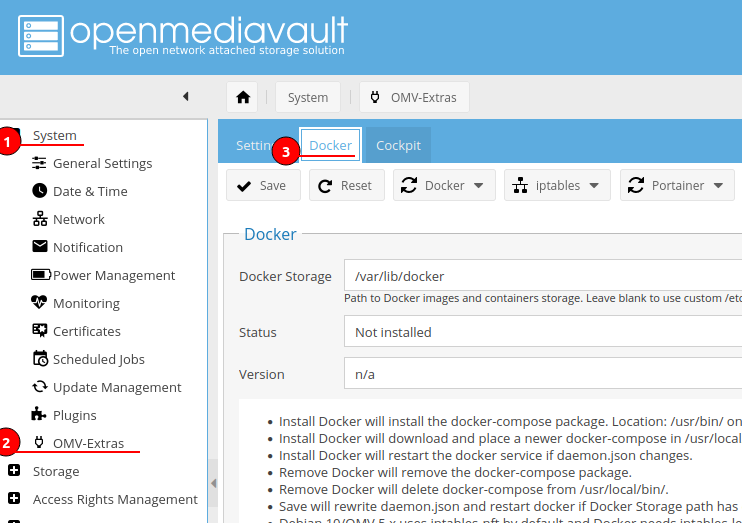
You can set your Docker Storage to use another path, such as an external disk.
You’ll also notice that Docker is not currently installed. Install and enable Docker using the Docker drop down tab and select Install.
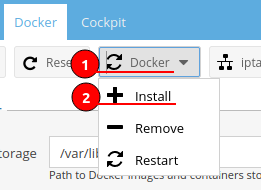
Once complete the Status will change to “Installed and running”. OMV comes with two options for container management the first is Portainer and the second is Yacht, I will be looking at Yacht.
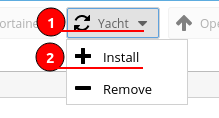
Yacht
I have covered Portainer in other projects, its a fantastic project which makes container and stack management a breeze, its worth checking out if you haven’t used it before.
Install Yacht using the drop down menu.
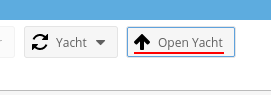
Once installed open the webGUI using the provided button. The default user is “[email protected]” with a password of “pass”.
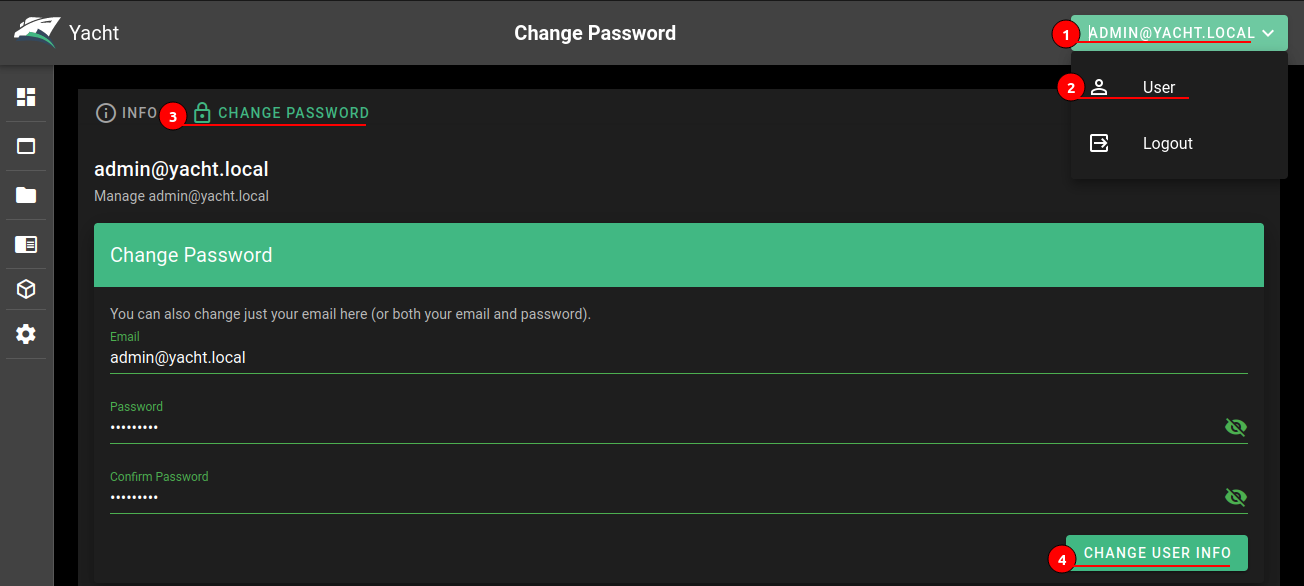
The first thing to do is change the default password.
Click the [email protected] in the top right and select User, then Change password.
Terminology
- Applications - Individual containers
- Templates - Container templates
- Projects - Docker-compose or as in Portainer, Stacks
I will not be covering how to deploy using Yacht as that is a little out of the scope of this article.
Conclusion
To conclude, the Open Media Vault (OMV) is a powerful project, which can be easily ran of a Raspberry Pi 4 (RPI4). Although I have only covered this project very lightly, it has the ability to offer numerous services such as:
-
S.M.A.R.T and Raid Management
-
Flash Memory support
-
File Sharing
-
Backup with Time Machine support
-
Access Control Lists (ACL) and User / Group permissions
-
Support for FTP, NFS, Rsync and SMB/CIFS
-
Docker support with container management webGUIs
-
Cockpit integration for host management
-
Range of additional plugins adding extra functionality including:
-
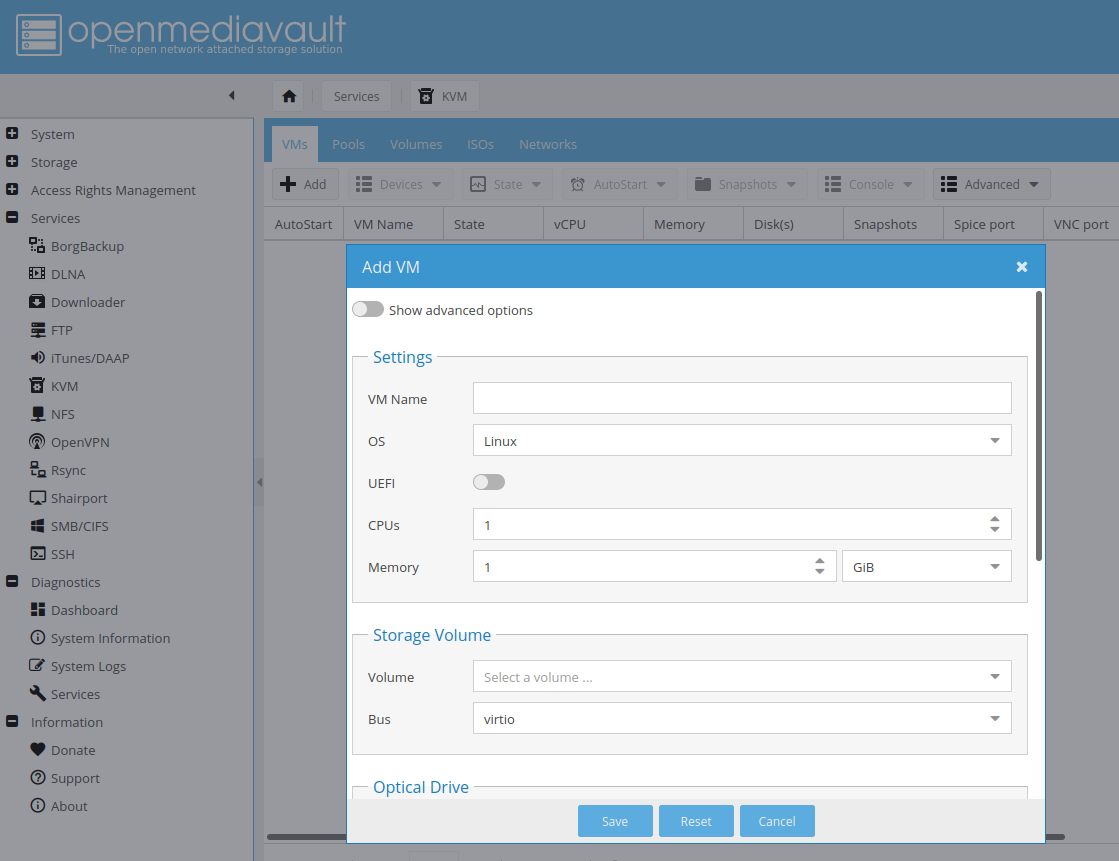
KVM - Ability to create and manage Kernel Virtual Machines (KVM).
-
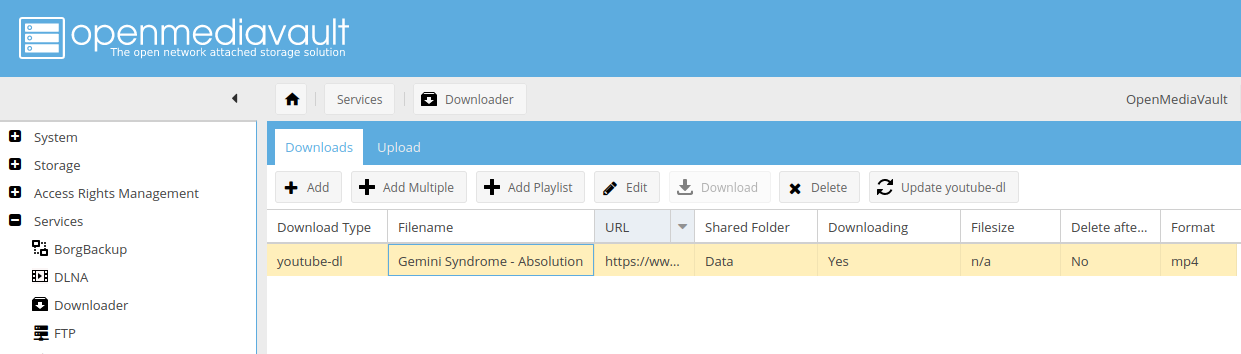
OMV Downloader - Downloader including youtube-dl through a webGUI, also the ability to upload.
-
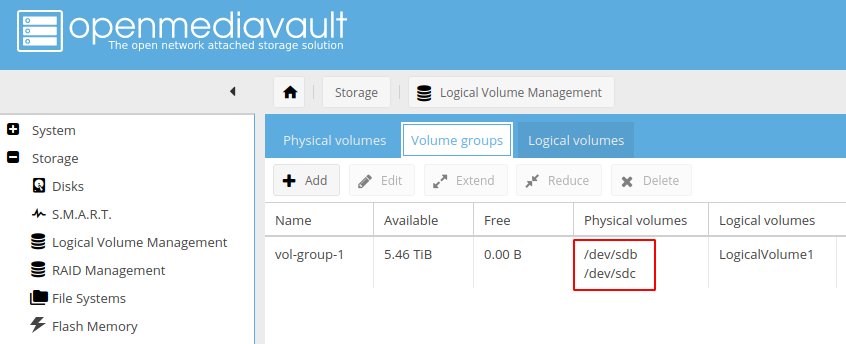
LVM2 - Ability to make volume groups across disks, including USB DAC.
-
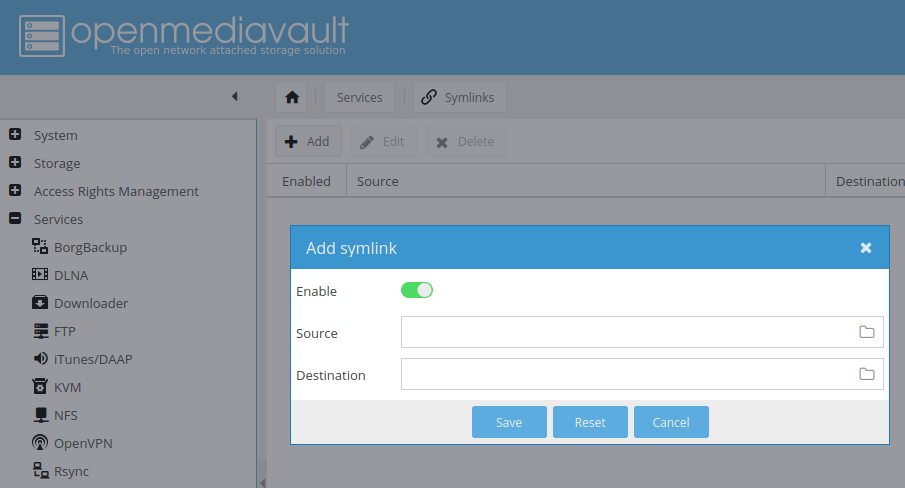
Symlinks - Symlink management direct in the webGUI
-
Diskstats - Additional performance statistics for Disks
-
OpenVPN - Access to OpenVPN direct in the webGUI
-
All behind a slick and intuitive web interface. The last note is that OMV is running on Raspberry Pi OS Lite, which is a Debian based distribution so the possibilities are limitless with what features and functions we can add.