Cloudflare and Home Assistant
23 Jan 2021
In this article I will be configuring a domain name with Cloudflare and Home Assistant, the purpose of this is to allow external access to my Home Assistant installation while being secure. I will be leveraging Cloudflare’s network, free certificates and firewall rules.
I personally use pfSense as my firewall and I will be configuring that as well.
We’ll need a domain, I’d recommend NameCheap, they are fast, cheap, offer a range of additional services, to date I have never had any issues with them.
Next you’ll need a Cloudflare account, for personal usage the free tier is perfect for this project, it will offer us access to the Cloudflare network, DDoS mitigation, DNS, TLS and Firewall settings, plus the benefit of viewing Analytic data.
We’ll need to add our NameCheap domain with our Cloudflare account by using the “+ Add Site” button and then after modify our Namecheap DNS server to those provided by Cloudflare, this can be found in the Cloudflare dashboard and DNS.
I will be using a sub-domain for my home assistant for example “homeassistant.domain.com” so I needed to create an A record within DNS that points to my Home Assistant inside global IP address, if you are unsure what your IP address is visit WhatIsMyIP.net
Securing our connection
Now we need to generate our certificate and enable strict SSL/TLS. In your Cloudflare dashboard navigate to SSL/TLS and Origin Server then Create Certificate
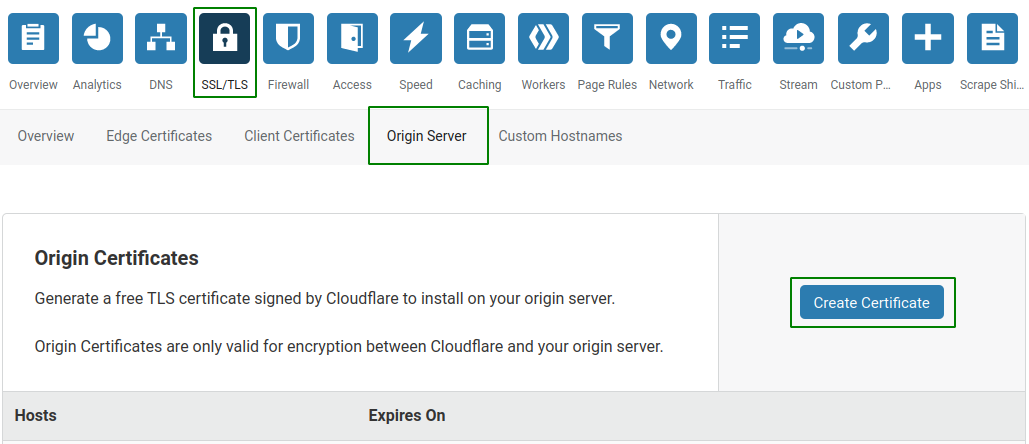
The default values will suffice
- RSA
- *.domain.com & domain.com
- 15 years

The next page will contain your Origin Certificate and Private Key, we’ll keep the key format as PEM (Default), and we will save these to files on our computer called.
- cloudflare-origin.pem
- cloudflare-private.key
Now we have our free certificate we can enable “Full (strict)” SSL/TLS encryption mode, this can be found in the SSL/TLS menu under Overview.
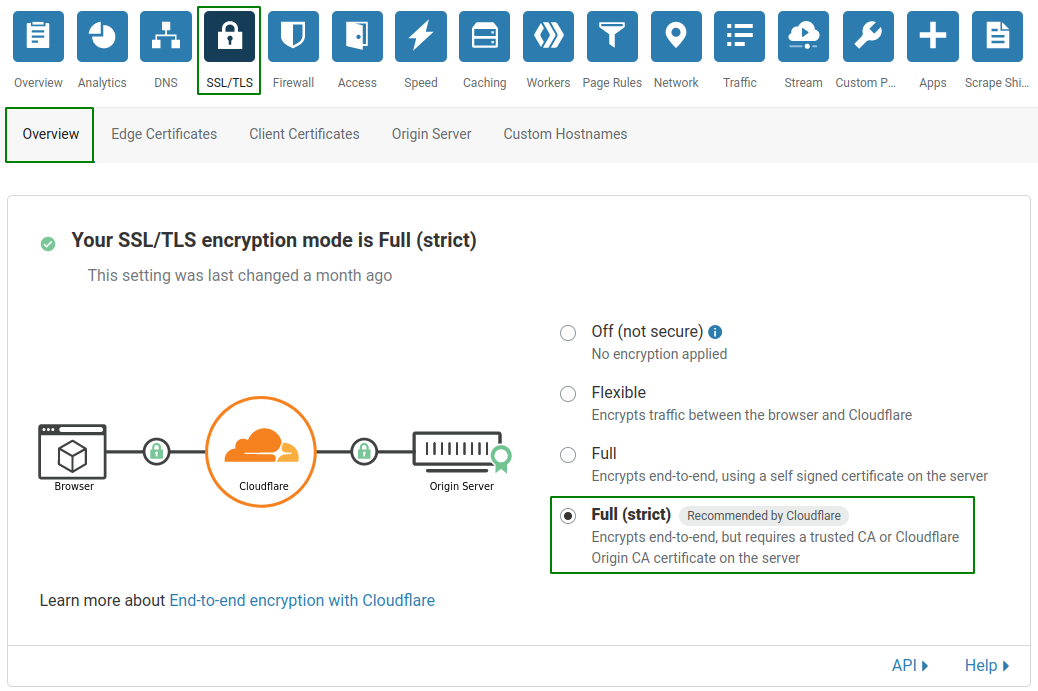
I have also enabled a few other settings within the “Edge Certificates” section, these are:
- Turned on Always use HTTPS
- Minimum TLS Version is set to TLS 1.2
- Turned on TLS 1.3
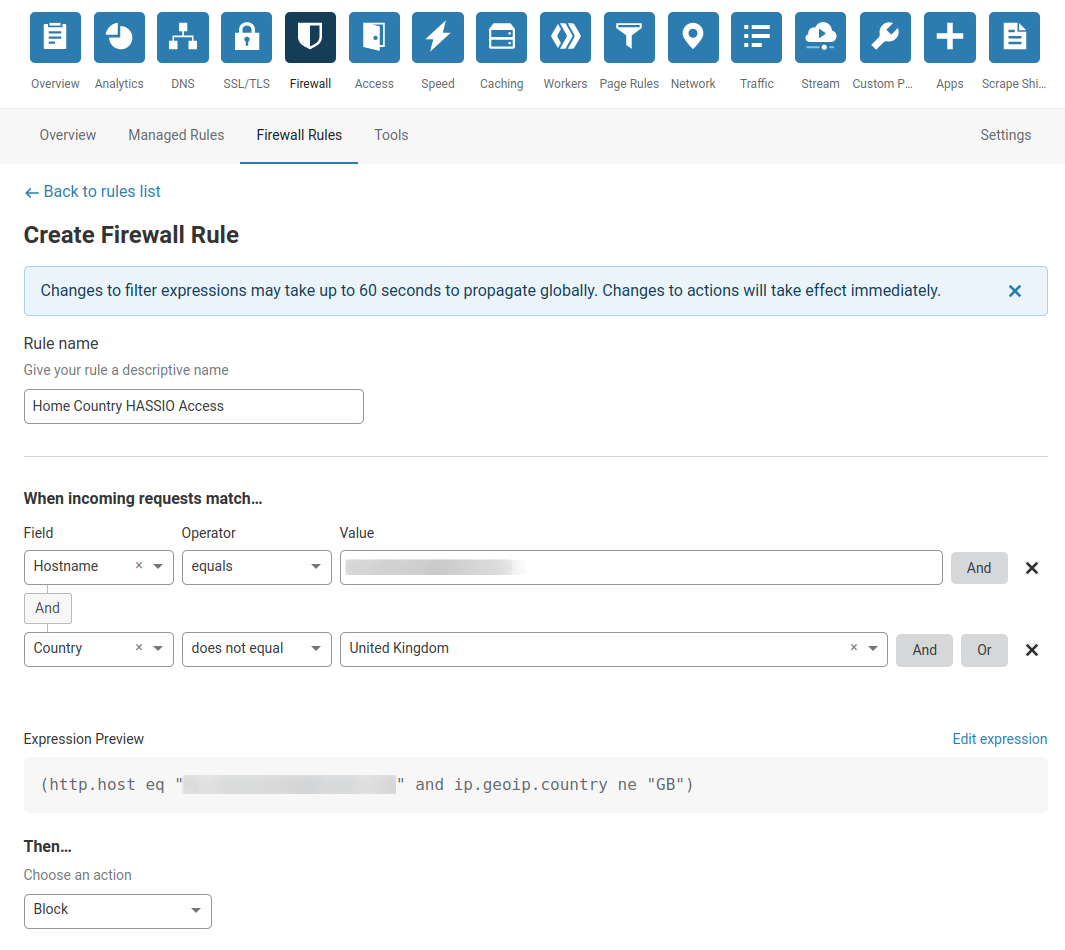
Firewall Rule
To add a little extra protection I will be creating a firewall rule within Cloudflare to drop all traffic to my Home Assistant unless it originates from my home country.
Navigate to Firewall and Firewall Rules then select Create a Firewall rule. We will be matching the host name that equals our Home Assistant URL for example “homeassistant.domain.com” and when the Country does not equal my home country of UK.
This means that when someone from outside the United Kingdom accesses “homeassistant.domain.com” we will then “Block” that connection.
Home Assistant Configuration
Now we are finished with Cloudflare configuration we can move onto setting up our Home Assistant instance.
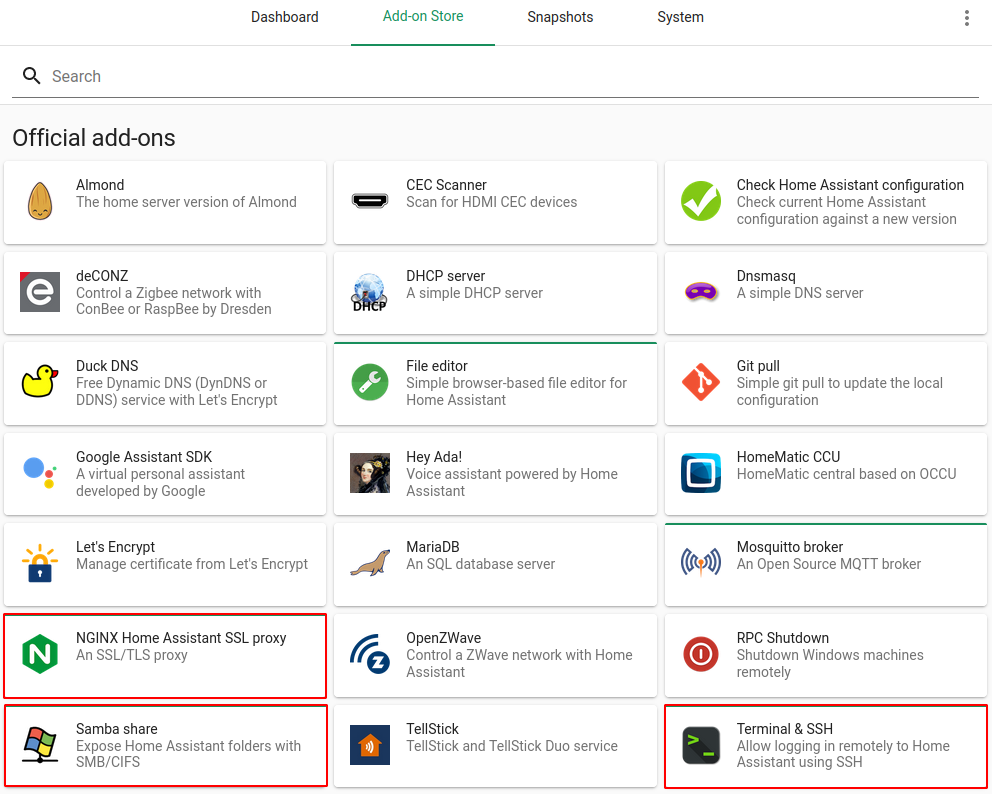
We will be installing the following add-ons from the Add-on Store.
- Terminal & SSH
- Configuration
- password: random_password
- Network
- Container 22/tcp = Host 22
- Configuration
- Samba share
- Configuration
- username: username
- password: username_password
- allow_hosts: 192.168.1.0/24 (what ever your network range is)
- Configuration
- NGINX Home Assistant SSL proxy
- Configuration
- domain: homeassistant.domain.com
- certfile: cloudflare-origin.pem
- keyfile: cloudflare-private.key
- cloudflare: true
- Network
- Container 443/tcp = Host 443
- Configuration
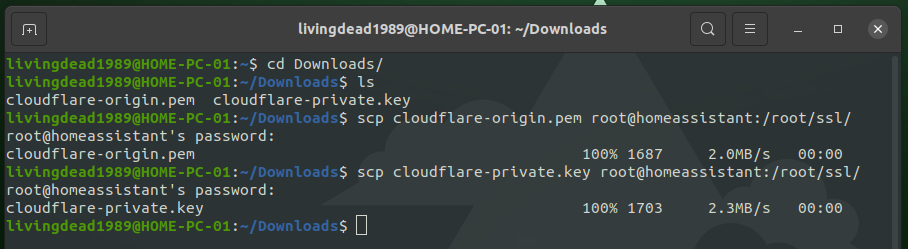
We’ll be uploading our Cloudflare PEM and KEY files, we can do this via SSH using SCP or using Samba (SMB), I’ll include a quick how to for both.
Upload the PEM and KEY into the /ssl folder on Home Assistant using SSH or SMB
Using SCP to transfer files using SSH
- Install the “Terminal & SSH” add-on and configure a password and expose a port number.
- Ensure you have SSH connectivity to your Home Assistant by connecting
ssh root@homeassistantthen exit - Copy the file using
scp filename.pem root@homeassistant:/root/ssl/
Using Samba Share to transfer files using SMB
- Install the “Samba share” add-on and configure
- connect using
smb://homeassistant/sslor for windows using\\homeassistant\ssl - copy and paste the files over.

Configuring NGINX
Install the “NGINX Home Assistant SSL proxy” add-on and edit the configuration NGINX with:
- domain: yourdomain.com
- certfile: cloudflare-origin.pem
- keyfile: cloudflare-private.key
- cloudflare: true (used for ip_ban_enabled feature)
Now we will modify the http element of the Home Assistant, I have the “File Editor” add-on installed, but you can also edit this using the Samba (SMB) shares we created previously. Configure HTTP within your configuration.yml
http:
  server_port: 2053
  ip_ban_enabled: true
  login_attempts_threshold: 5
  ssl_certificate: /ssl/cloudflare-origin.pem
  ssl_key: /ssl/cloudflare-private.key
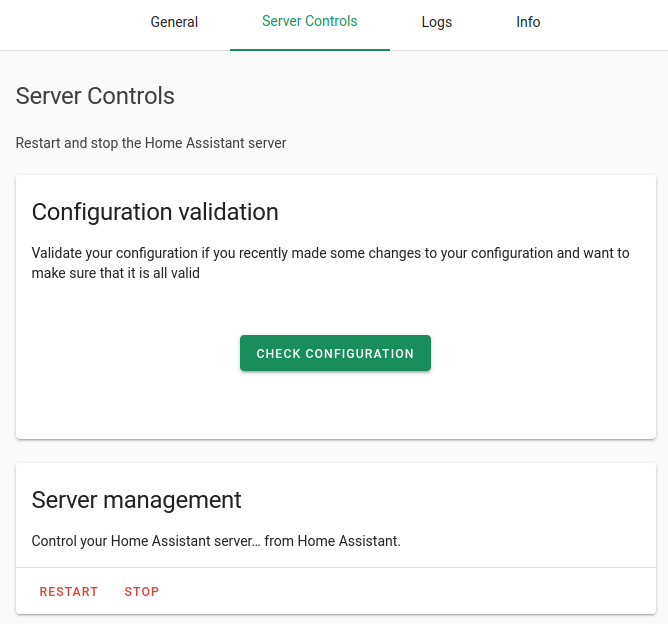
Save, check your configuration using the “Configuration Validation” tool within Configuration > Server Controls, then “Restart” the server management.
pfSense Firewall
The last step is to set up our firewall, I use pfSense so this may differ depending on what you are using.
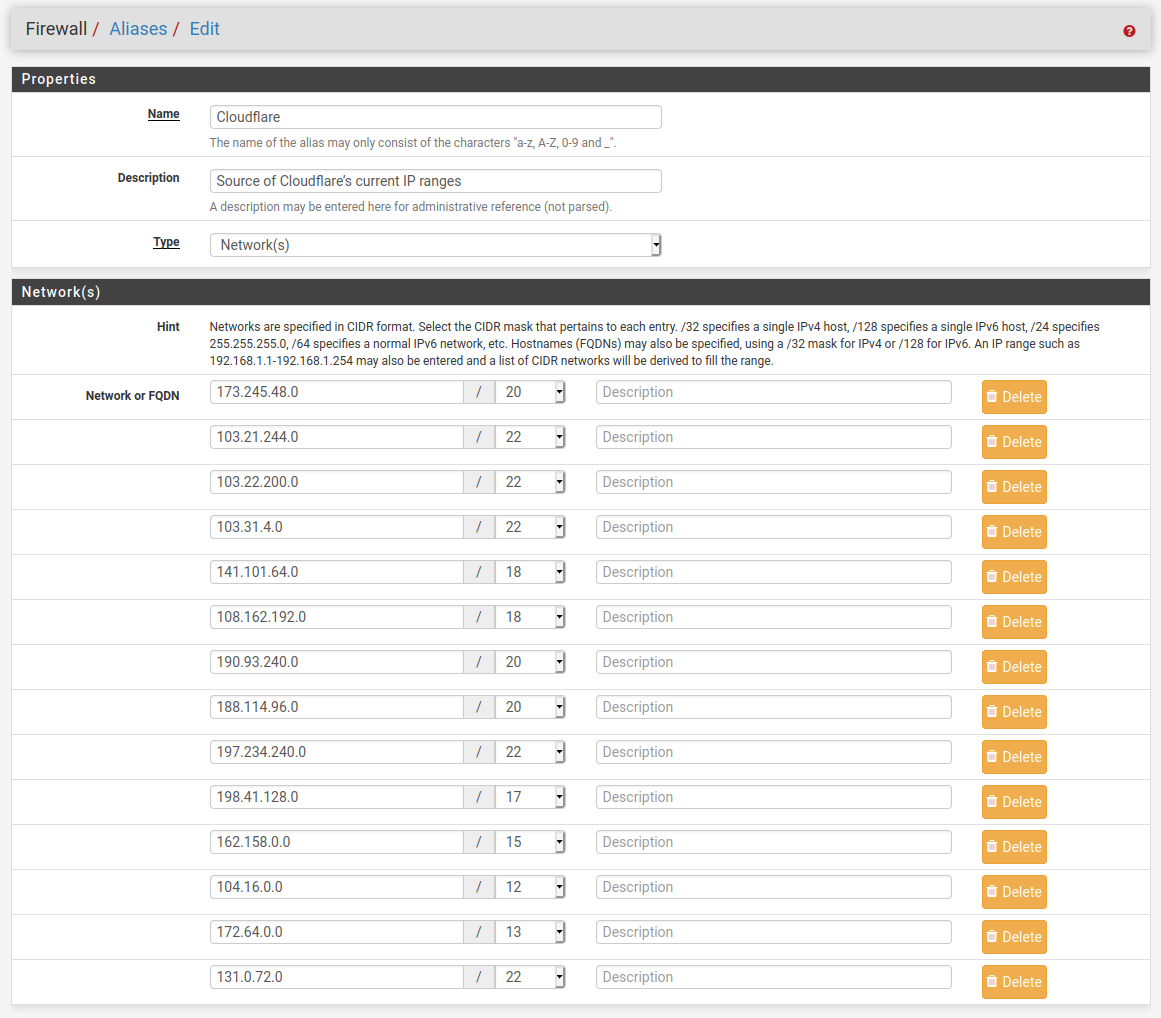
First I will create an alias group containing all of Cloudflare’s IP addresses, this is because all of our connections will be coming from Cloudflare, everything else will be dropped.
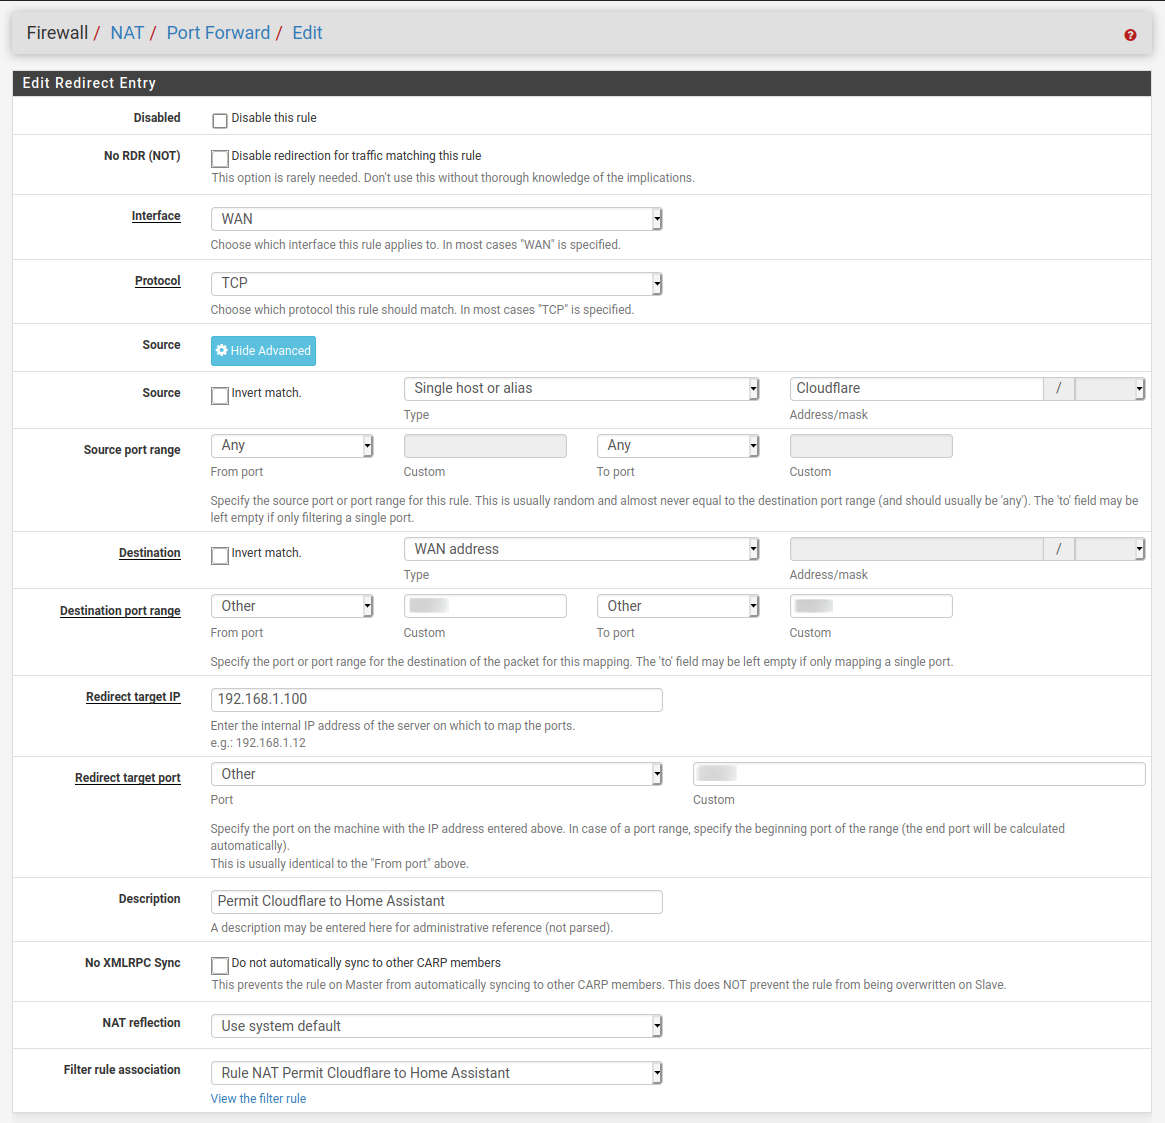
I then created a NAT Port Forward rule which will direct only source IP addresses matching Cloudflare’s listed IP addresses and my configured Home Assistant port.
- WAN interface
- TCP
- Source is from the Cloudflare Alias addresses with any port
- Destination WAN address on port 2053
- Redirect to Home Assistant internal IP address on port 2053
That is it, my implementation required waiting a while for everything to be straightened out, but then everything just started working.
I would also recommend using strong user passwords and MFA.