OpenWRT on RPI4
26 Sep 2021
Why use OpenWRT?
People install OpenWrt because they find it to be superior to the stock firmware of their router or embedded device.
OpenWrt is designed by network professionals and others who care about the performance of their network.
OpenWrt is stable and open source software.
OpenWrt provides more than 3000 packages ready to be installed.
Requirements
- Raspbery Pi 4 Model B
- Raspberry Pi 4 Case (passive or active cooled recommended)
- MicroSD card (Class 10, A2 recommended)
- Raspberry Pi 4 Power Cable (USB Type C 5.1V 3A)
- 2 Ethernet Cables (Cat 5e minimum)
- USB to Ethernet Adaptor
Guide
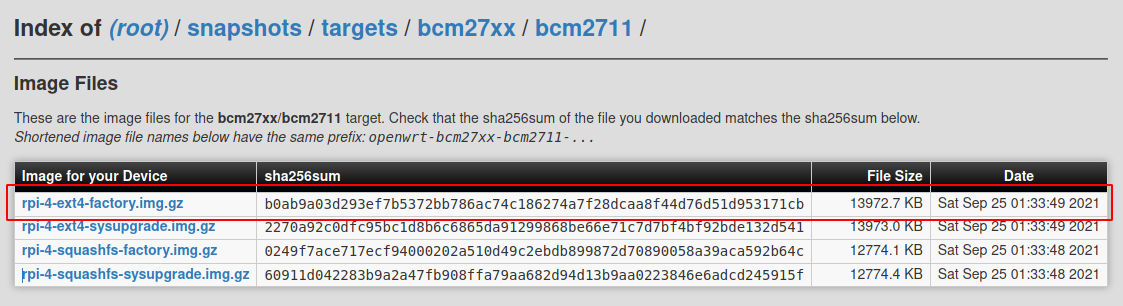
Download the appropriate image of OpenWRT 21.02.2 for the Raspberry Pi 4, it can be found using the following link:
https://downloads.openwrt.org/releases/21.02.2/targets/bcm27xx/bcm2711/
Download the rpi-4-ext4-factory.img.gz file
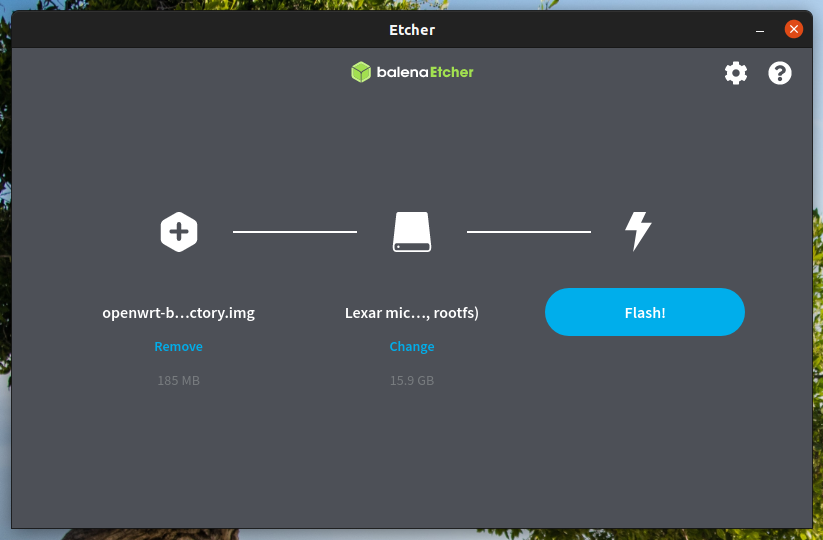
Using Etcher flash your MicroSD card with the downloaded image.
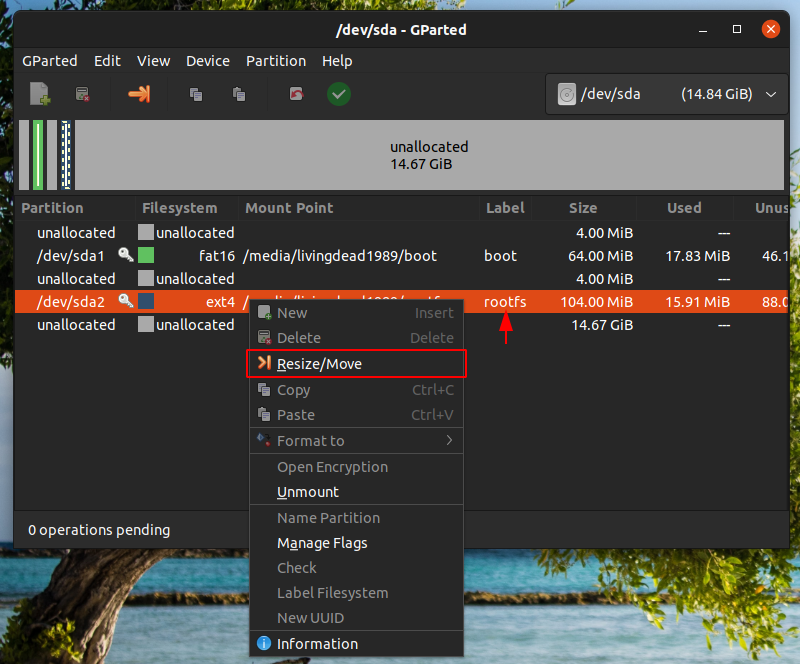
Expand the rootfs partition, I’m using GParted to perform this task.
Make sure to change the drive in the top right drop-down menu then right click the rootfs partition and select resize/move.
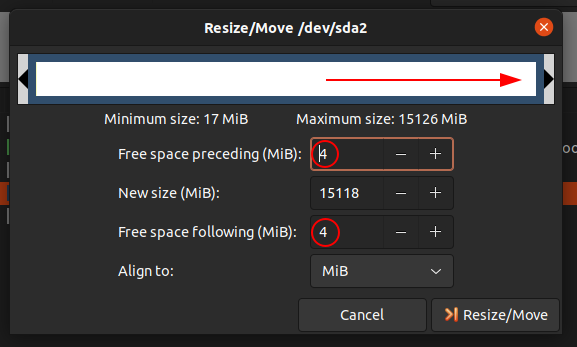
I expanded the rootfs partition to use all available space with 4MiB either side.
Once completed, eject the MicroSD card storage and insert it into your Raspberry Pi 4.
Conflicting IP addresses
OpenWRT will have the IP address of 192.168.1.1 /24 automatically configured, in my setup this will cause an issue so I needed to change this before I could continue.
The workaround was to power on the Raspberry Pi 4 while connected to a monitor and keyboard so I could change the address before connecting to the rest of the network.
You could also connect the Raspberry Pi 4 to a switch with a computer or laptop device in isolation from the rest of the network, then statically configure an IP address in the 192.168.1.0/24 range such as:
| IP address | 192.168.1.5 |
| Subnet Mask | 255.255.255.0 |
| Gateway | 192.168.1.1 |
Changing OpenWRT IP address
Edit the configuration file using vi.
vi /etc/config/network
I modified the configuration file to look like
### Example of my LAN interface section
config interface 'lan'
 option device 'br-lan'
 option proto 'static'
 option ipaddr '192.168.1.10'
 option netmask '255.255.255.0'
 option gateway '192.168.1.1' # Current router
 option dns '192.168.1.1'
 option ip6assign '60'
Then reboot the Raspberry Pi, when its back online SSH into the Raspberry Pi 4

The first thing we want to do is configure a password as there is no password for root access. We can set a password using the passwd command.
passwd
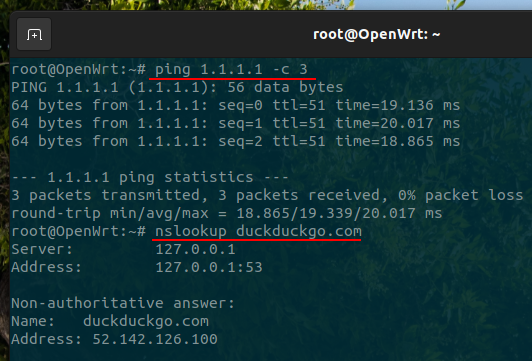
Once you have secured the device we need to test we have correct internet access ready for the next steps.
We can use ping to test we can access the internet and use nslookup to ensure we have domain name lookup services available.
ping 1.1.1.1 -c 3
nslookup duckduckgo.com
All good from the figure below.
Update and WebGUI Installation
This step is only required if using the SNAPSHOT, the stable release contains LuCI WebUI by default.
Update the system
opkg update
Install the LuCI WebUI
opkg install luci-ssl-nginx
Enable and start Nginx
service nginx enable
service nginx start
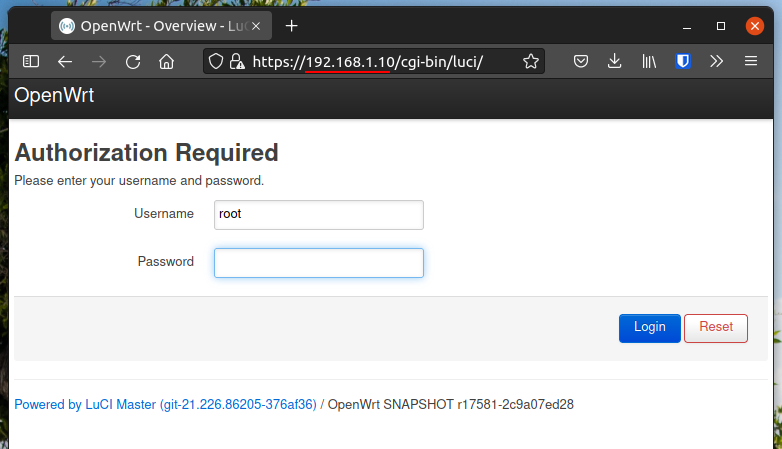
Once completed we can now navigate to https://192.168.1.10/ and login to the WebGUI
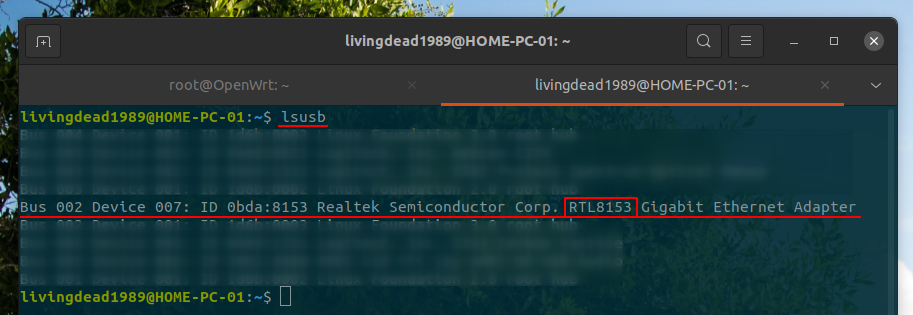
USB Ethernet Adaptor
To find out what chipset was used in my USB to Ethernet adaptor I plugged it into my computer and issued the command
lsusb
From the figure below we can see it uses RTL8153
Using this information we can go back to our Raspberry Pi 4 and list available drivers.
opkg update
opkg list kmod-usb-net-rtl*
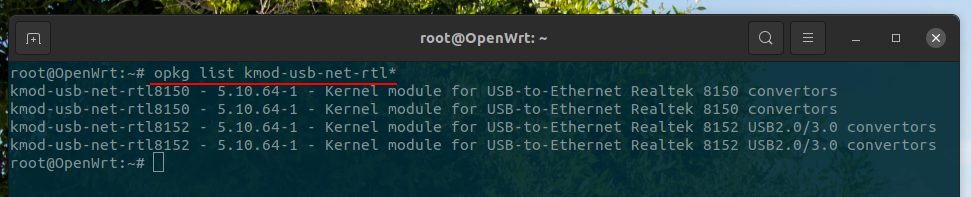
We will be okay to use the 8152 driver, we can install it by using the command
opkg install kmod-usb-net-rtl8152
Now plug the USB Ethernet adaptor into the Raspberry Pi 4 and check for the interface.
ip address
From the figure below we can see that the USB Ethernet adaptor has been detected as eth1
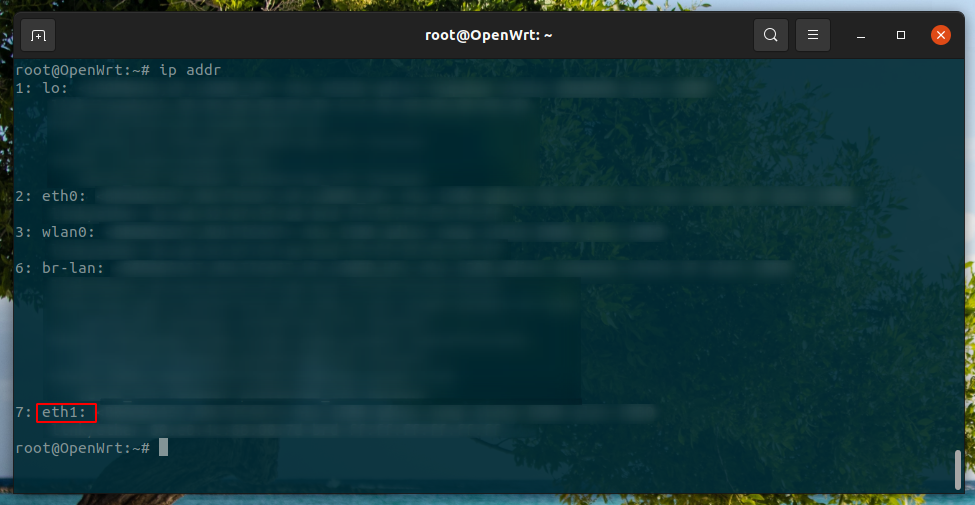
We now have OpenWRT installed on a Raspberry Pi 4 with two Ethernet interfaces one for WAN and one for LAN.
Configuring the Interfaces
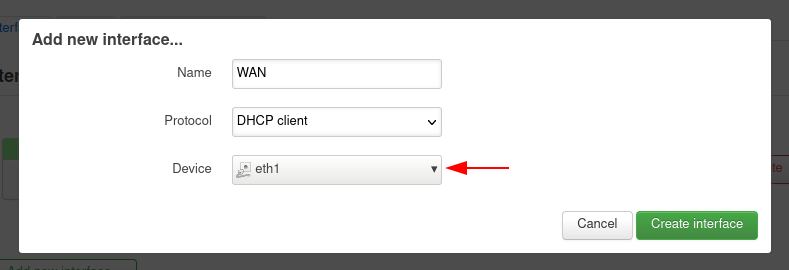
We will need to configure our interfaces, currently we have a LAN interface configured on the integrated NIC (Network Interface Card), but we need to add our WAN connection.
Navigate to Network > Interfaces and click Add new interface.
I’m calling this interface WAN and because of how my ISP provides my internet connection I am assigned a DHCP address, therefore I need to use the protocol of DHCP client and provide the interface of the USB Ethernet adaptor.
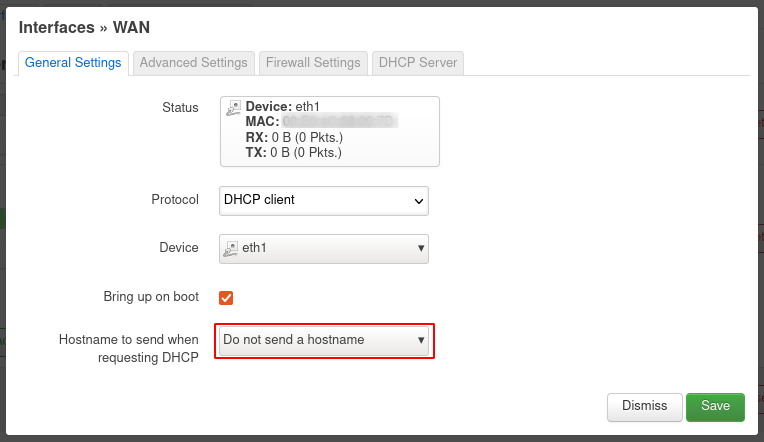
Now we can configure some additional settings such as not sending the host name to the ISP DHCP server.
and providing a Firewall zone.
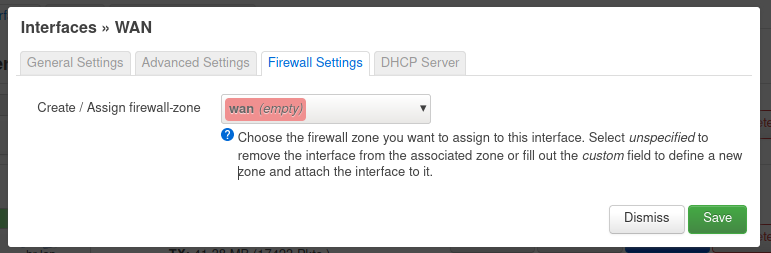
Once done, apply settings. You may also need to restart your modem, ensuring to wait a good 30 seconds before powering it back on to allow for the DHCP server to issue an issue correctly.
Also don’t forget to remove our other router on our LAN interface once you make the switch over.
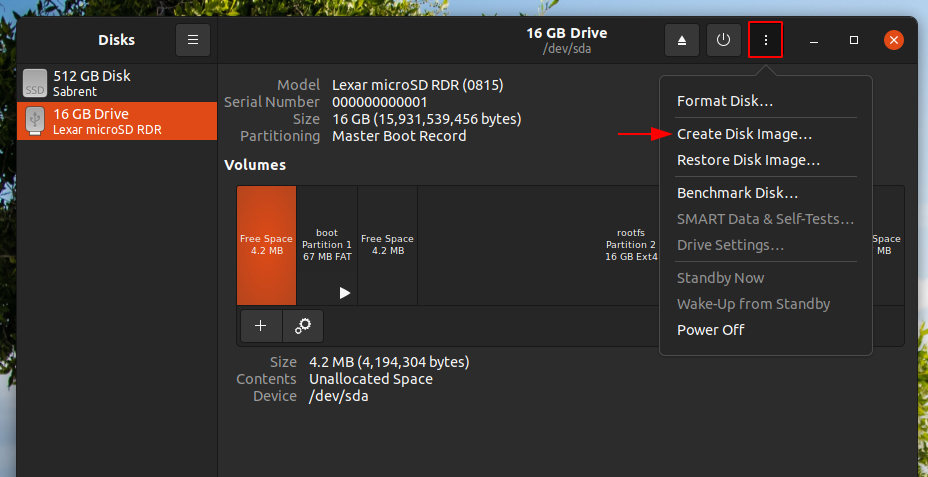
Backup the MicroSD card
This could be a good time to shutdown the Raspberry Pi 4 and make a backup of the MicroSD card.
Shutdown OpenWRT using the command
halt now
Eject the MicroSD flash card and using your preferred software create a disk image. In the figure below I am using Disks on Ubuntu.
This just means we can create a new MicroSD card in case of something breaking or we can rollback if we break something while experimenting with OpenWRT.
Extra Software
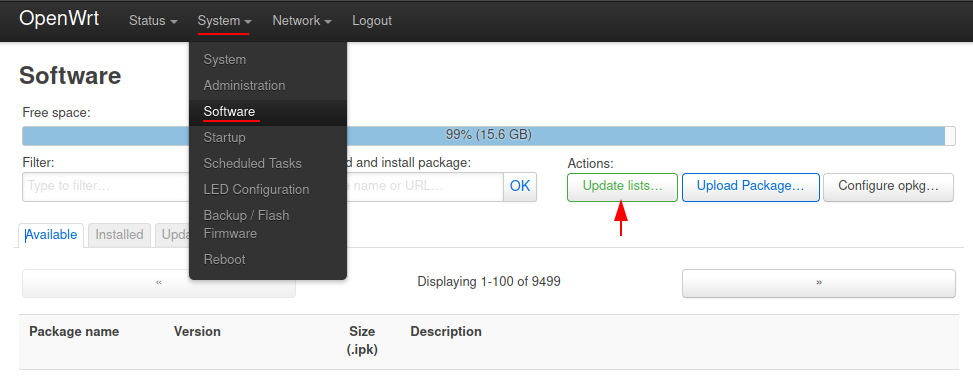
OpenWRT has a large software repository with extra features and functionality available to add with a click, you can find it by navigating to System > Software, make sure you Update your lists.
You can also add and install additional packages such as Argon theme, so we are not limited to the available repository software, but be careful with what you add.
I’ll be looking at the following packages as my current pfSense firewall is providing these services:
Snort
snort3 is available as a package in Software but there isn’t a webGUI available for monitoring or management so configuration will be through the command line interface.
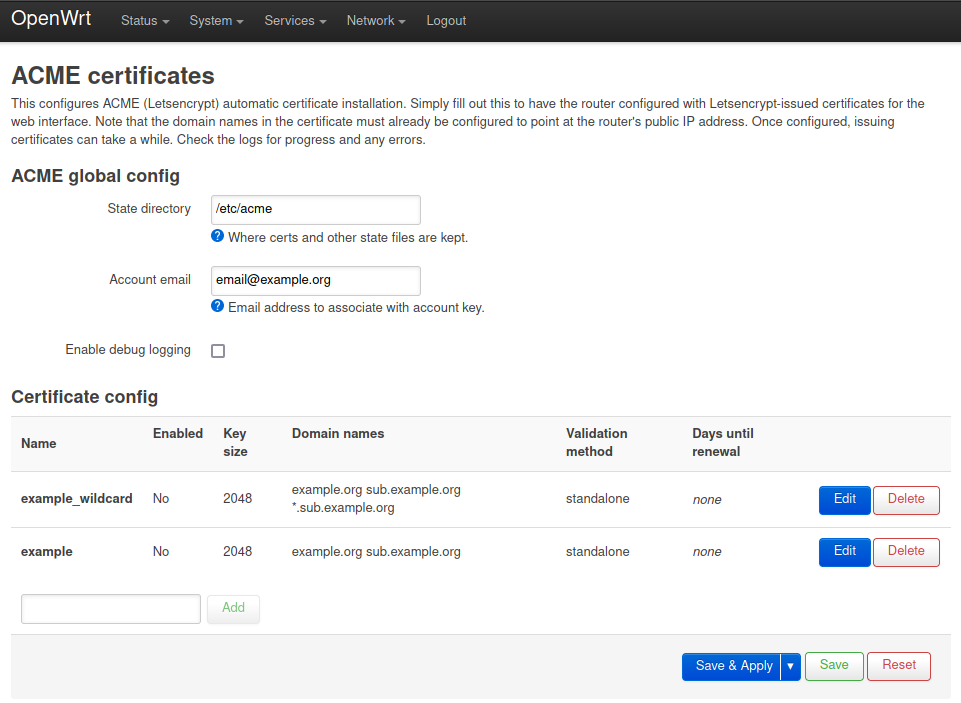
ACME (Let’s Encrypt)
I will be installing luci-app-acme and acme-dnsapi packages from the software list, this includes all dependencies. The figure below shows the ACME webGUI after installation, its also available from the Services top navigation tab.
ACME-DNSapi provides DNS challenge integration, which is useful for services such as Cloudflare.
HAProxy
haproxy is available as a package in Software but there isn’t a webGUI available for monitoring or management so configuration will be through the command line interface.
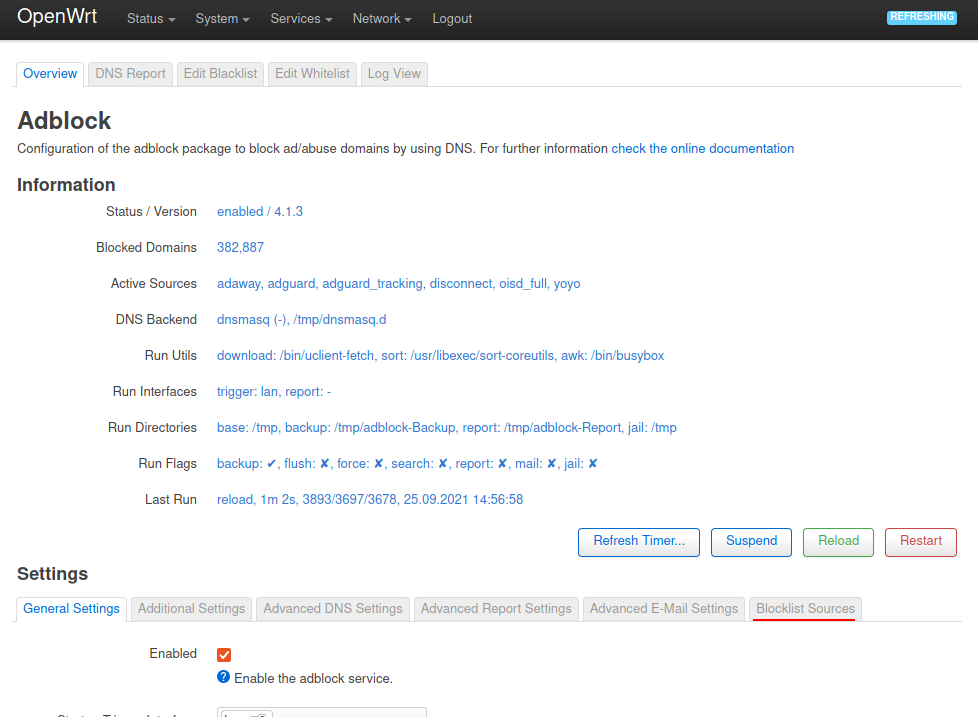
AdBlock
To enable ad blocking I have installed the package luci-app-adblock and enabled multiple Blocklist sources, we can also ensure SafeSearch for Google, Bing, DuckDuckGo, Yandex, Youtube (strict or moderate) and Pixabay, which are selective options.
We can force local DNS for specific zones and ports, which prevents users from using external DNS servers.
We can enable DNS reporting and Email notifications if we wish too, these will require the following to be installed; tcpdump-mini and msmtp.
Summary
OpenWRT is extremely good at replacing consumer routers, while being available on many platforms the Raspberry Pi option is excellent.
Installation was smooth and the user interface is intuitive for a tech savvy person. The large amount of additional software packages means we can add extra functionality although not everything is configurable through the webGUI.
I’ve enjoyed exploring openWRT on a Raspberry Pi 4 and I’ll be keeping this as a backup or portable solution for the future.