Motioneye and Home Assistant
06 Dec 2020
Motioneye Camera with Home Assistant Integration
Our aim here is to deploy the Motioneye OS to a Raspberry Pi Zero and add the stream into our Home Assistant dashboard.
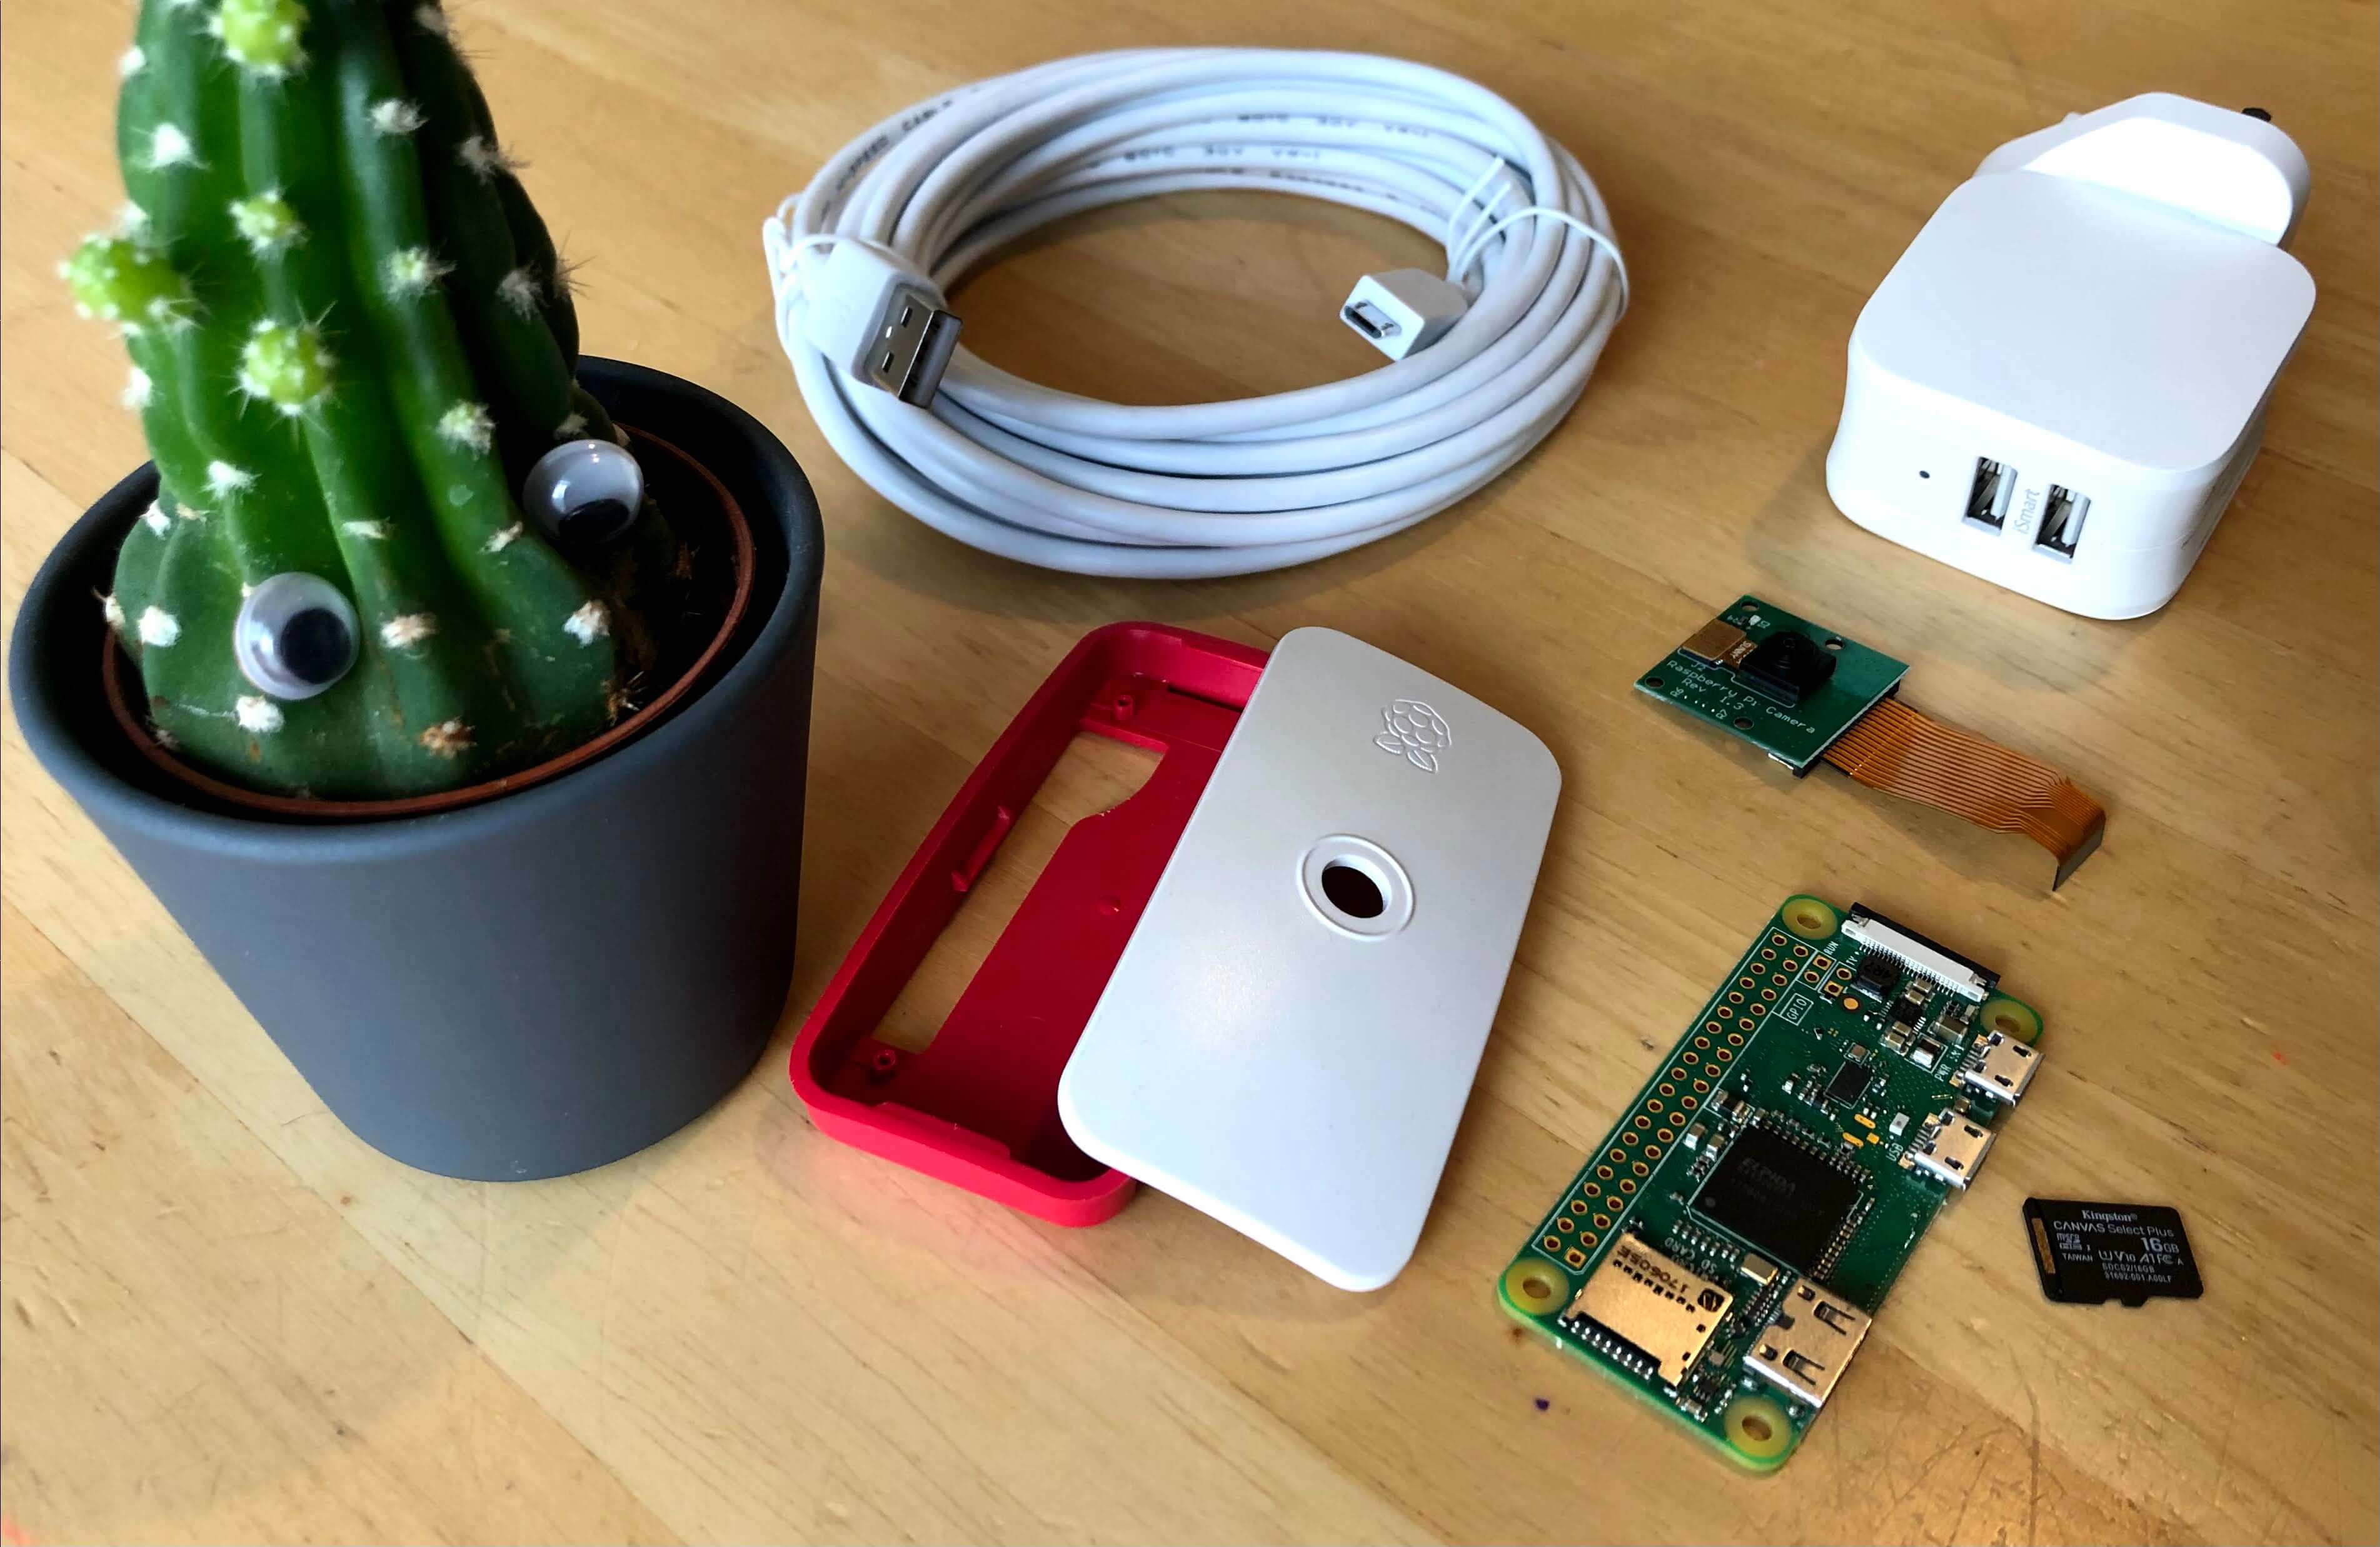
Hardware used
- Raspberry Pi Zero W v1.1
- Offical RPI Zero Case with Camera top (moved to 3d printed case)
- Raspberry Pi Camera Rev 1.3
- Kingston 16GB MicroSD Class10 A1
- Micro USB cable
- USB Plug 1.2A Recommended (documentation)
- Pigeon 3D Printed Case
Software used
Steps taken
-
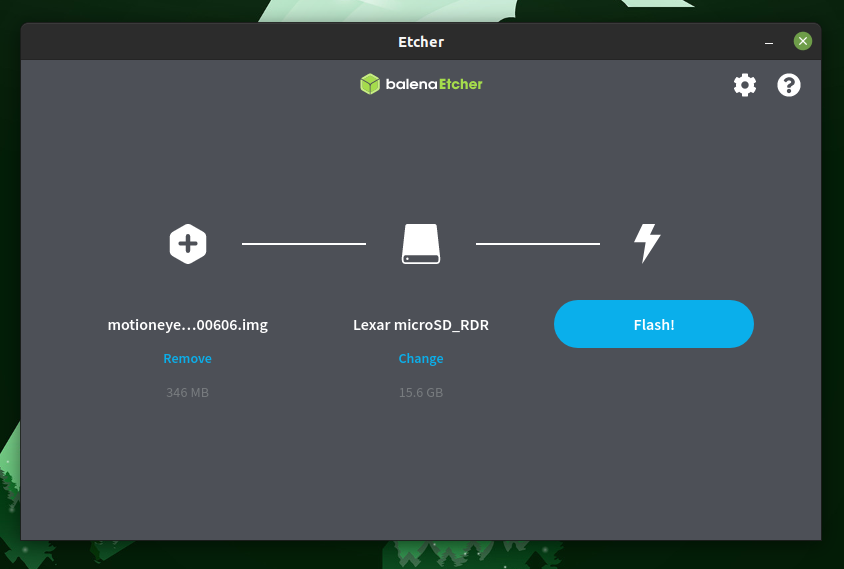
Download the MotionEye OS image
-
Burn the image file onto your microSD
-
Add Wi-Fi configuration
-
Create a file called
wpa_supplicant.confin the root folder on the microSD -
Add the following configuration
 ctrl_interface=/var/run/wpa_supplicant
 update_config=1
 country=GB

 network={
     scan_ssid=1
     ssid="MyNetwork"
     psk="Mypassword"
 }
-
-
Enable SSH
- Create another file called
sshin the root folder on the microSD - This file does not require any contents.
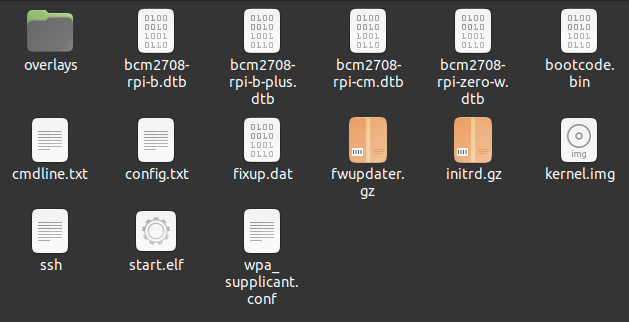
- Create another file called
-
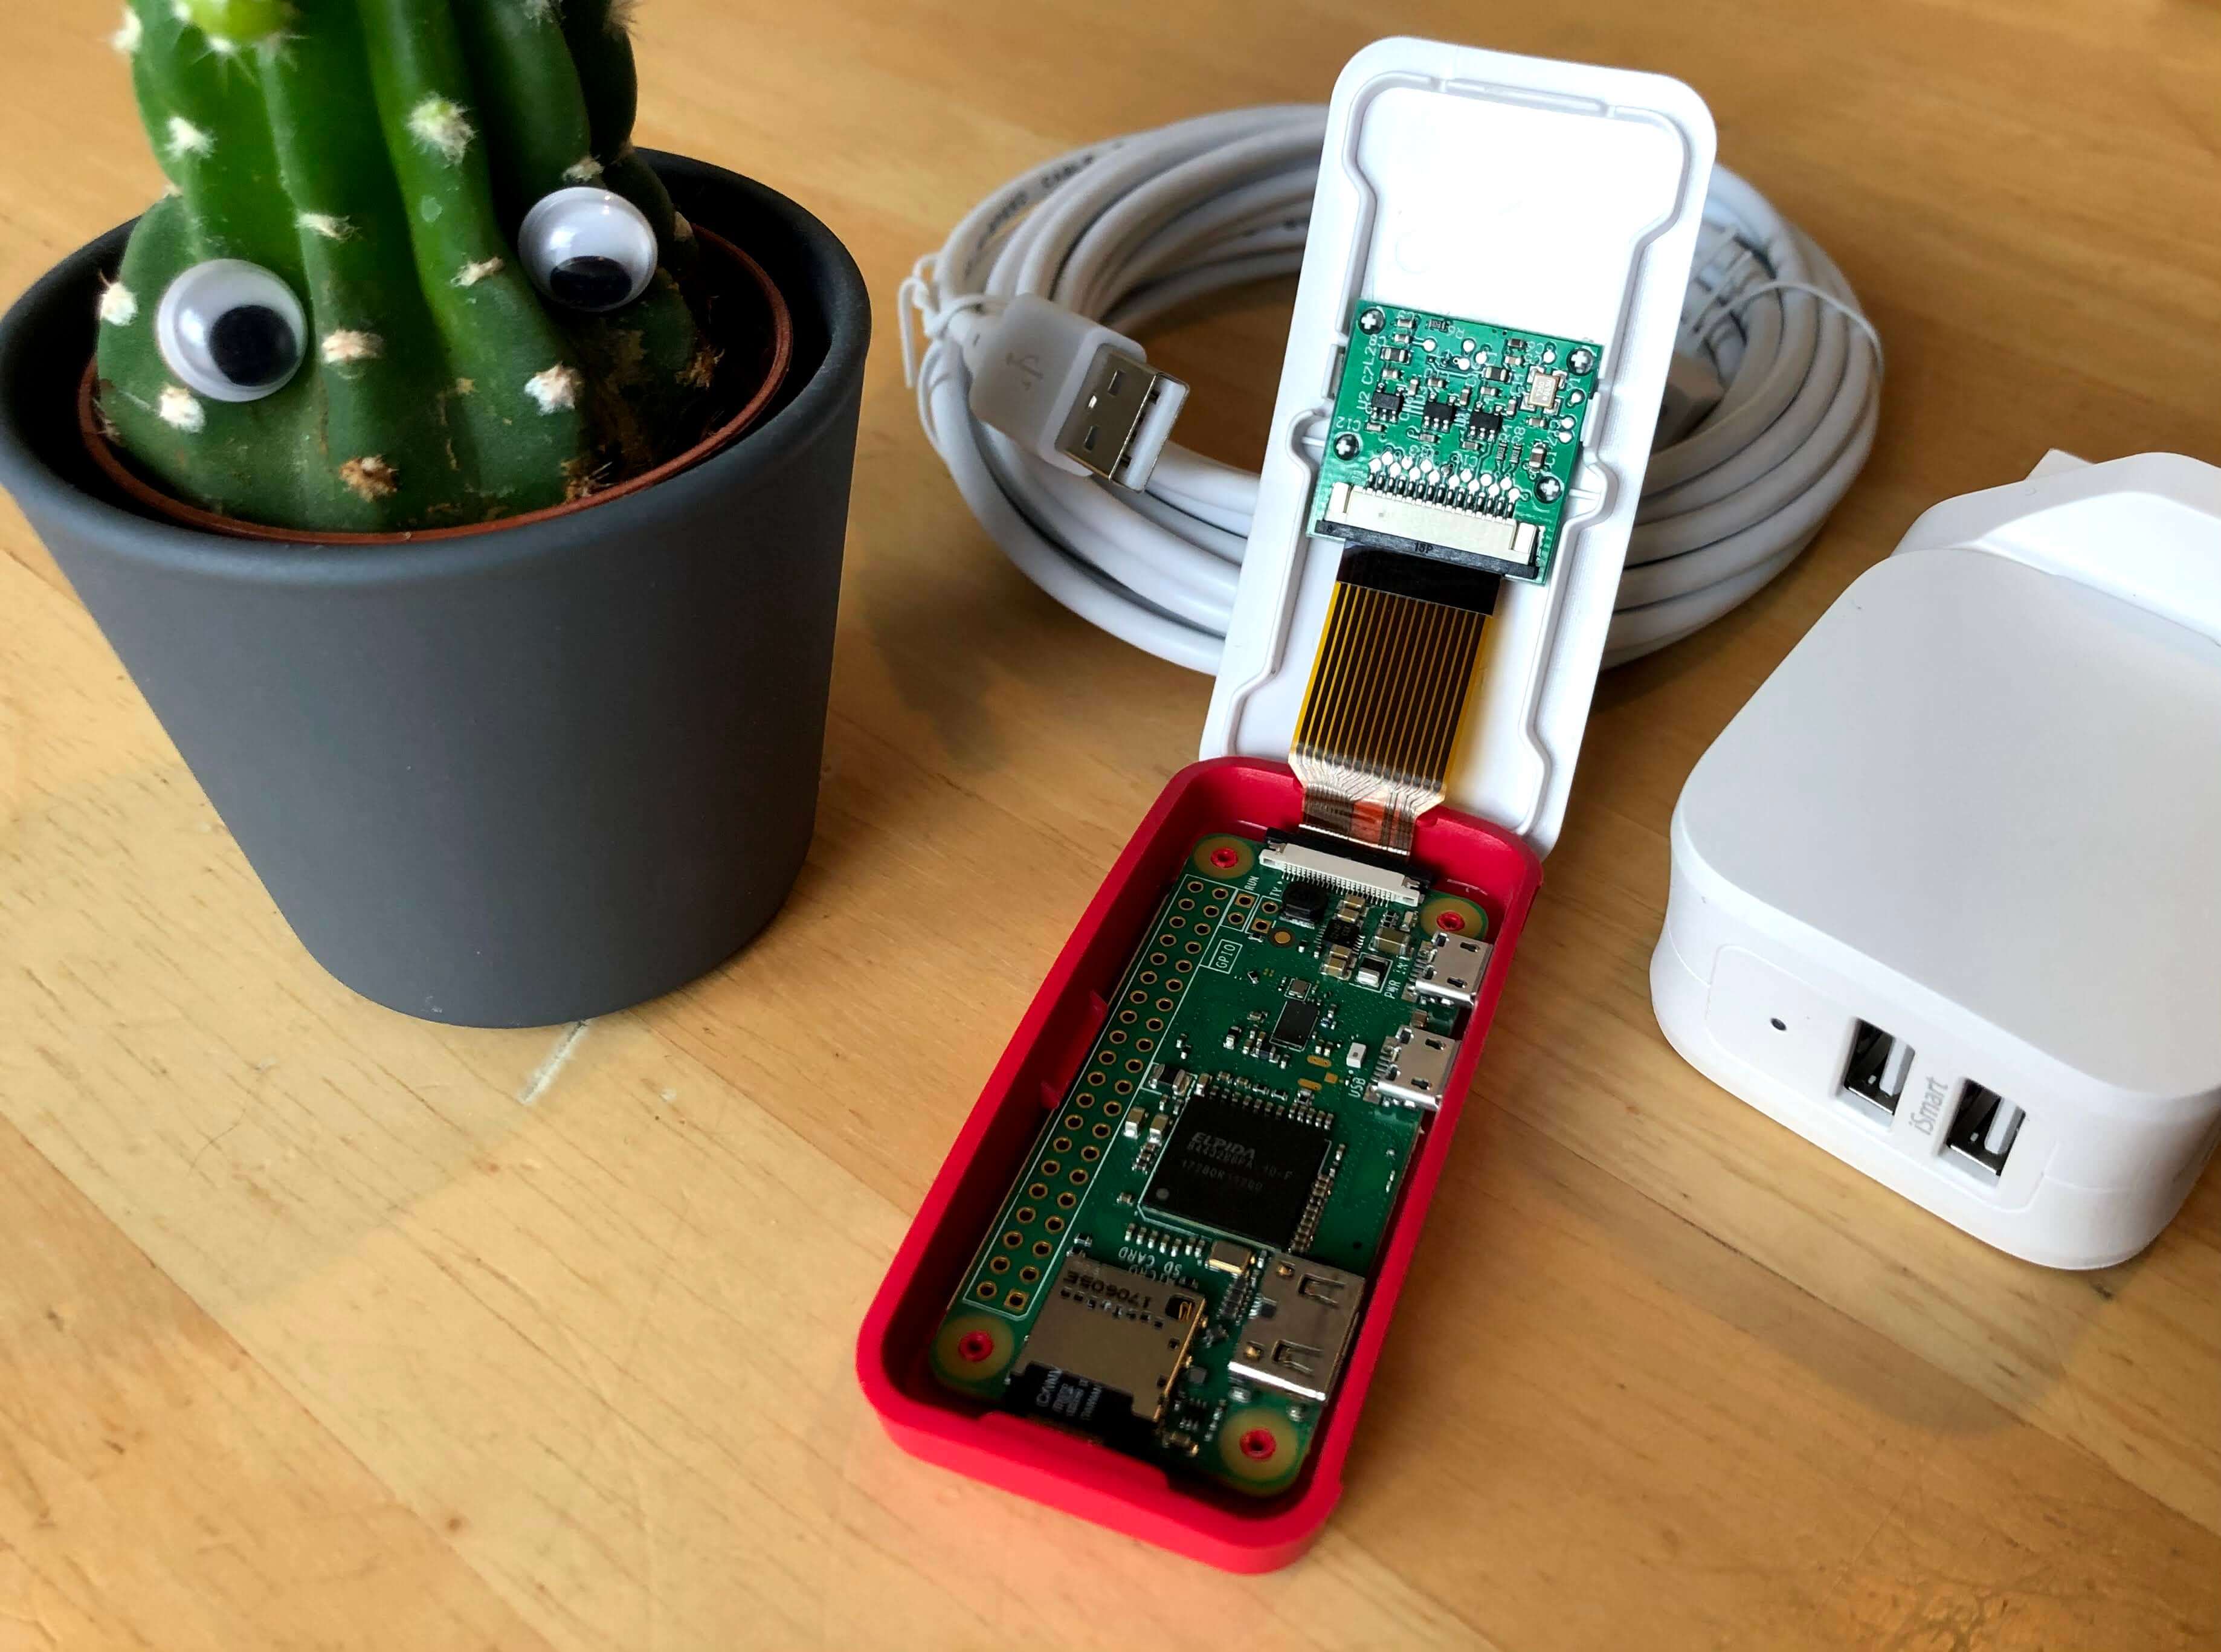
Assemble the Raspberry Pi Zero
-
First Boot - Be patient, first boot can take a few minutes
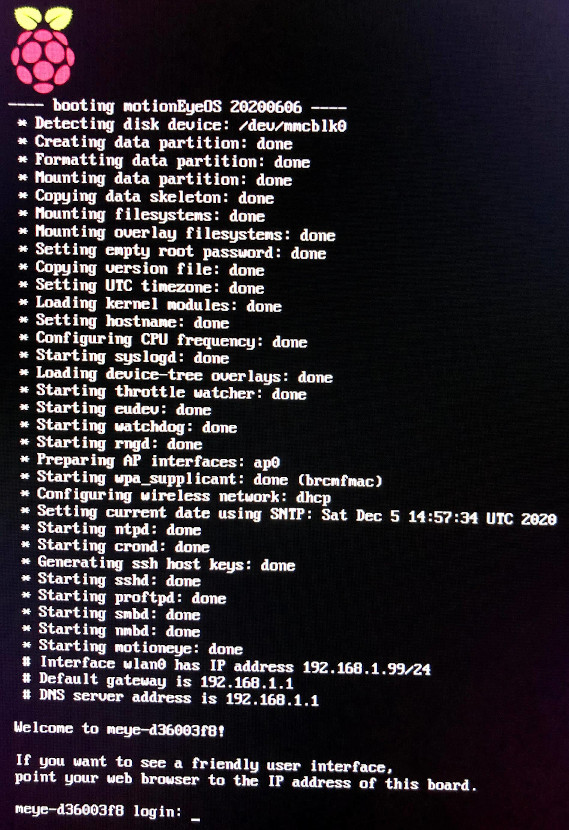
-
Find the device’s IP address
- Look at your DHCP server
- Use an app such as Hurricane Electric Network Tools
- Scan you local network using tools such as Zenmap
-
Using your preferred browser navigate to the IP address
- example: http://192.168.1.99/
- default username: admin
- default password: blank
That is it, next we can change the default configuration to fit our requirements and add the stream into our Home Assistant.
Basic Configuration
Once logged in make sure you secure the device using a good admin password from the General Settings tab.
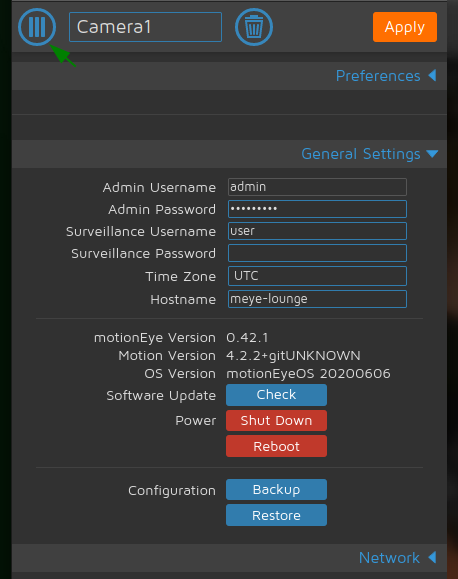
Also make sure you give the camera a static IP address or reserve the address on your DHCP server.
I also configured the time zone and set a hostname to match my other cameras
Motioneye Tweaks & Changes
Other settings I changed include:
-
Expert Settings
-
GPU Memory: 304
-
I looked at the used and available RAM on my RPI Zero using SSH and top and tweaked the values.

-
-
Video Device
- Video Resolution: 640x480
- Frame Rate: 20
-
Text Overlay
- Left Text: Disabled
- Text Scale: 2
-
Video Streaming
- Streaming Frame Rate: 20
- Streaming Quality: 50%
-
Still Images: Off
-
Movies: Off
-
Motion Detection
- Auto Threshold Tuning: On
- Auto Noise Detection: On
-
Working Schedule
- Configured to my working days and times
Extend into Home Assistant
Editing your configuration.yml file you can add the stream service and a camera entity
stream:
camera:
  - platform: mjpeg
    name: Motioneye
    still_image_url: "http://192.168.1.99/picture/1/current/"
    mjpeg_url: "http://192.168.1.99:8081"
Save, check configuration and restart your Home Assistant
- Configuration > Server Controls > Check Configuration
- Configuration > Server Controls > Restart
By default you’ll have a new entity in your ‘Overview’ dashboard because it is automatically controlled but you can add the camera into your own dashboards by using either the picture-entity, picture-glance or picture-elements cards
Later Alterations
I decided to turn on the Fast Network Camera option, this uses a different backend which offers better performance but removes features such as motion detection, but in case this was fine as I can make my home assistant instance perform the motion detection.
You can find the Fast Network Camera option within Expert Settings.
I also changed to the Pigeon: An Open source Raspberry PI Zero W Cloud Camera by Geraldoramos which was a dream to print and mount compared to retrofitting the Offical RPI Zero Case, I added my own 3D printed supports as my Raspberry Pi Zero moved a little left and right when connecting power.
The Pigeon case
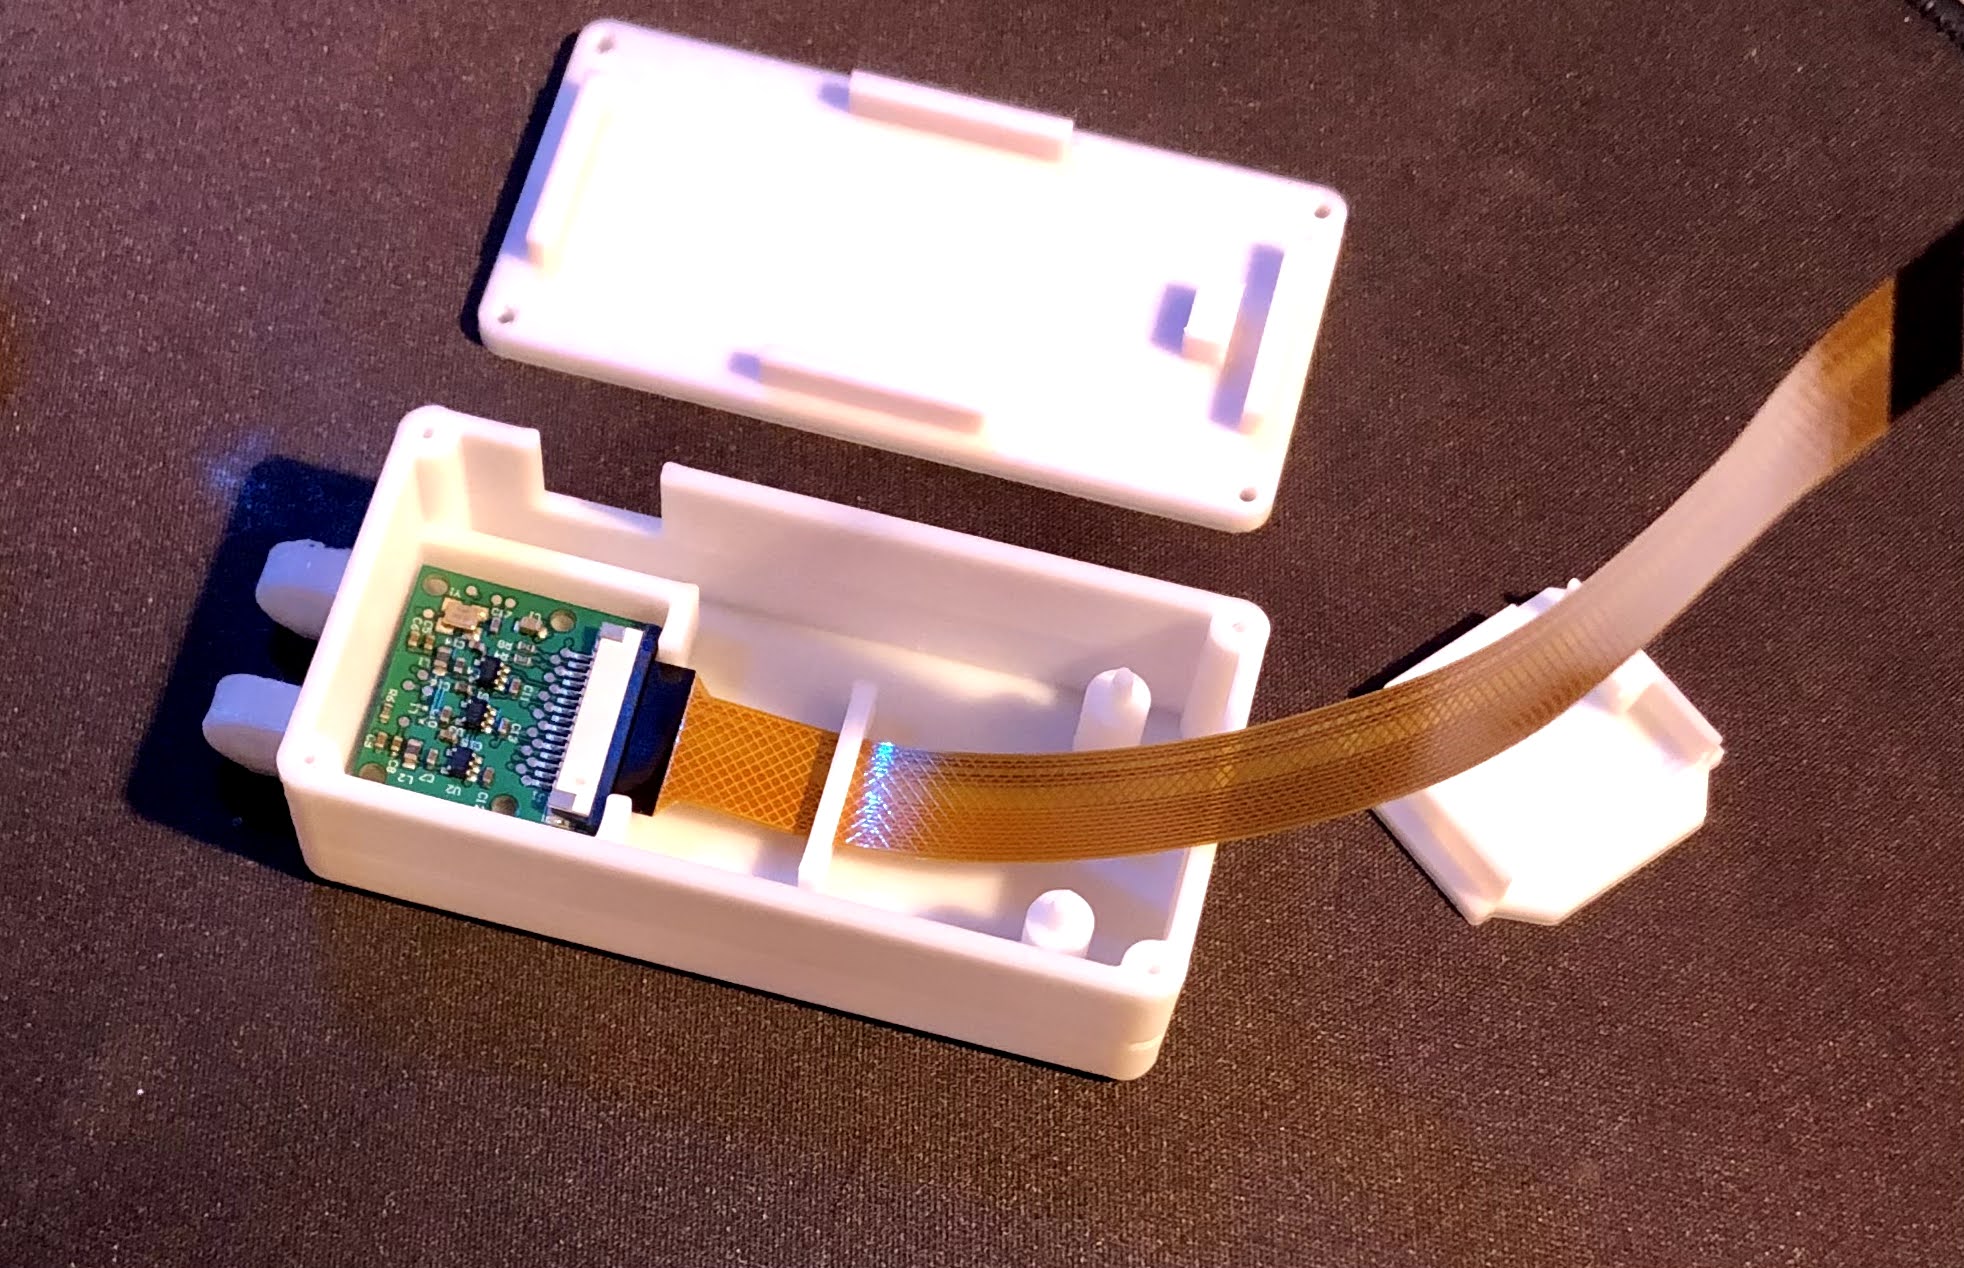
The added supports

Mounting
