Proxmox OpnSense VM Router
24 May 2021
Building upon my previous article HA Proxmox Cluster with Shared Storage.
The aim of this guide is to deploy a Virtual Machine running OpnSense in Proxmox offering firewall and router capabilities. I will be covering how to create a Virtual Machine for a router appliance, how to install OpnSense and some recommended Virtual OPNsense settings.
What is OPNsense?
OPNsense is a open-source firewall and routing software based on HardenedBSD. OPNsense is a fork of pfSense, which is a fork of m0n0wall. Some top features of OPNsense include:
- Virtual Private Networking (VPN) - OpenVPN, Tinc, WireGuard
- SD-WAN - ZeroTier
- Intrusion Detection & Prevention (IDS, IPS) - Suricata, Proofpoint ET.
- Routing Protocols - Pluggable support for OSPF and BGP
- Web Filtering - Web Proxy
- Web Application Filtering - Sensei
- Much more including - Captive Portal, NetFlow Monitoring and REST API
Now we know a little about what OPNsense is, lets crack on with getting this setup within our HA Proxmox cluster.
Create Virtual Machine
Make sure to download the latest copy of OpnSense, in this guide I am using 21.1 dvd amd64.
System Requirements - Virtual Recommended
| Type | Description |
|---|---|
| Processor | 1.5 GHz multi core cpu |
| RAM | 4 GB |
| Install method | Serial console or video (vga) |
| Install target | 120 GB SSD |
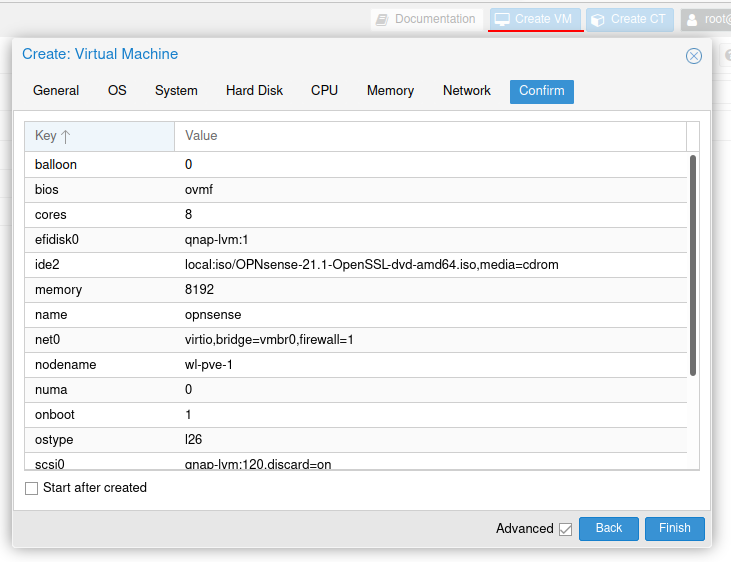
We’ll be creating a new VM for our OpnSense instance. Use the “Create VM” button within Proxmox and follow the wizard through to completion.
Notes:
- as per OPNsense documentation, Q35 chipset will not work this is why we are using i440fx.
- Multiqueue it is recommended to set it to a value equal to the number of Total Cores of your guest. Multiqueue parameter to a value greater than one will increase the CPU load on the host and guest systems as the traffic increases. Recommended for VM Router, Proxy or busy HTTP servers.
| Property | Value |
|---|---|
| General | |
| Name | opnsense |
| Start at boot | checked |
| Start/Shutdown order | 1 |
| OS | |
| ISO | OPNsense-21.1-OpenSSL-dvd-amd64.iso |
| System | |
| BIOS | OVMF (UEFI) |
| Add EFI Disk | checked |
| Storage | qnap-lvm |
| Machine | i440fx |
| Hard Disk | |
| Discard | checked |
| Storage | qnap-lvm |
| Disk size (GB) | 120 |
| CPU | |
| Cores | 8 |
| Memory | |
| Memory (MiB) | 8192 |
| Network | |
| Bridge | vmbr0 |
| Multiqueue | 8 |
Install OpnSense
Official Documentation for OpnSense
Start the Virtual Machine and wait, it will boot into Live mode with the following message:
“Welcome! OPNsense is running in live mode from install media. Please login as ‘root’ to continue in live mode, or as ‘installer’ to start the installation.”
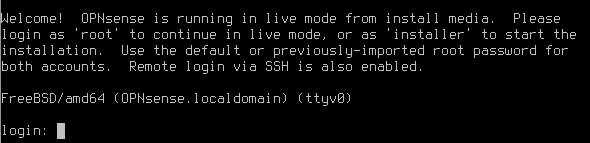
In the login prompt enter installer and for the password opnsense. By entering installer as the username this tells OPNsense to start the installation process.
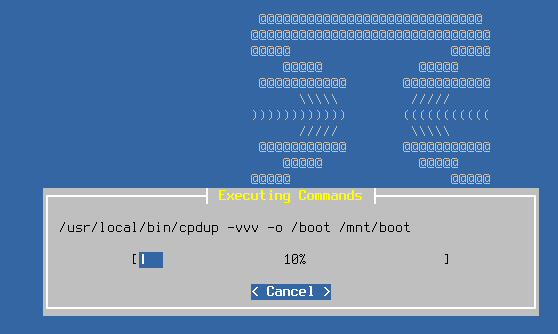
Follow the wizard through step-by-step, I will be using the “Guided installation” method in “GPT/UEFI mode” as it is the recommended option, and we have configured the VM to use UEFI. I continued with the recommended SWAP size.
Once the installation completes you’ll be prompt for a root password and then asked to reboot the machine, at this point we will remove the installation media ISO file from the Virtual Machine.
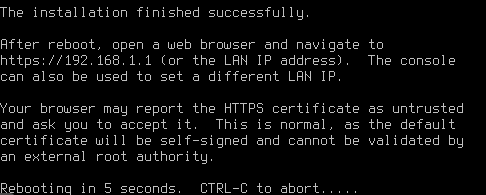
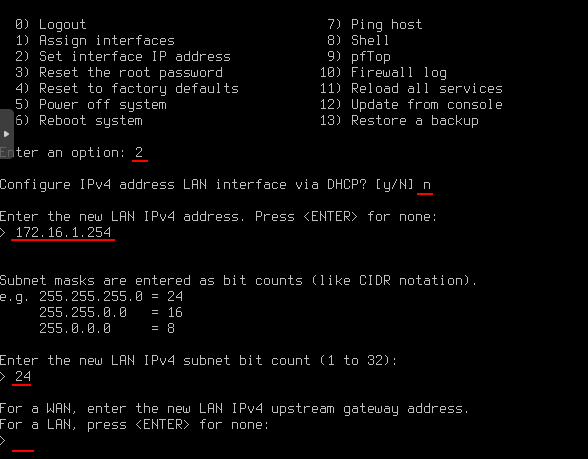
The installation finished successfully. After the reboot we can navigate to https://192.168.1.1 but this is not our address space and we wont be able to reach it, instead we need to change the addressing information for the interface.
From the console we will re-configure the LAN interface. Enter 2 to Set interface IP address and step through the wizard. I will configure a static address so there is no requirement for DHCP. I want my LAN address to be 172.16.1.254/24 and make sure to enter blank to set this to a LAN interface.
After the IPv4 questions, OPNsense will ask the same questions for IPv6, in my case I do not require IPv6 therefore did not configure it.
Finally it will ask if you want to start a DHCP server for this LAN, I choose not to start this service. I also reverted to HTTP and restored web GUI access.
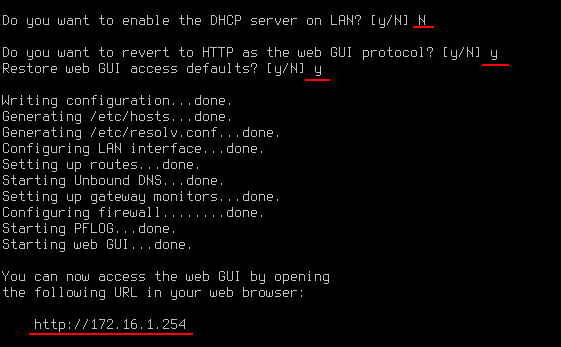
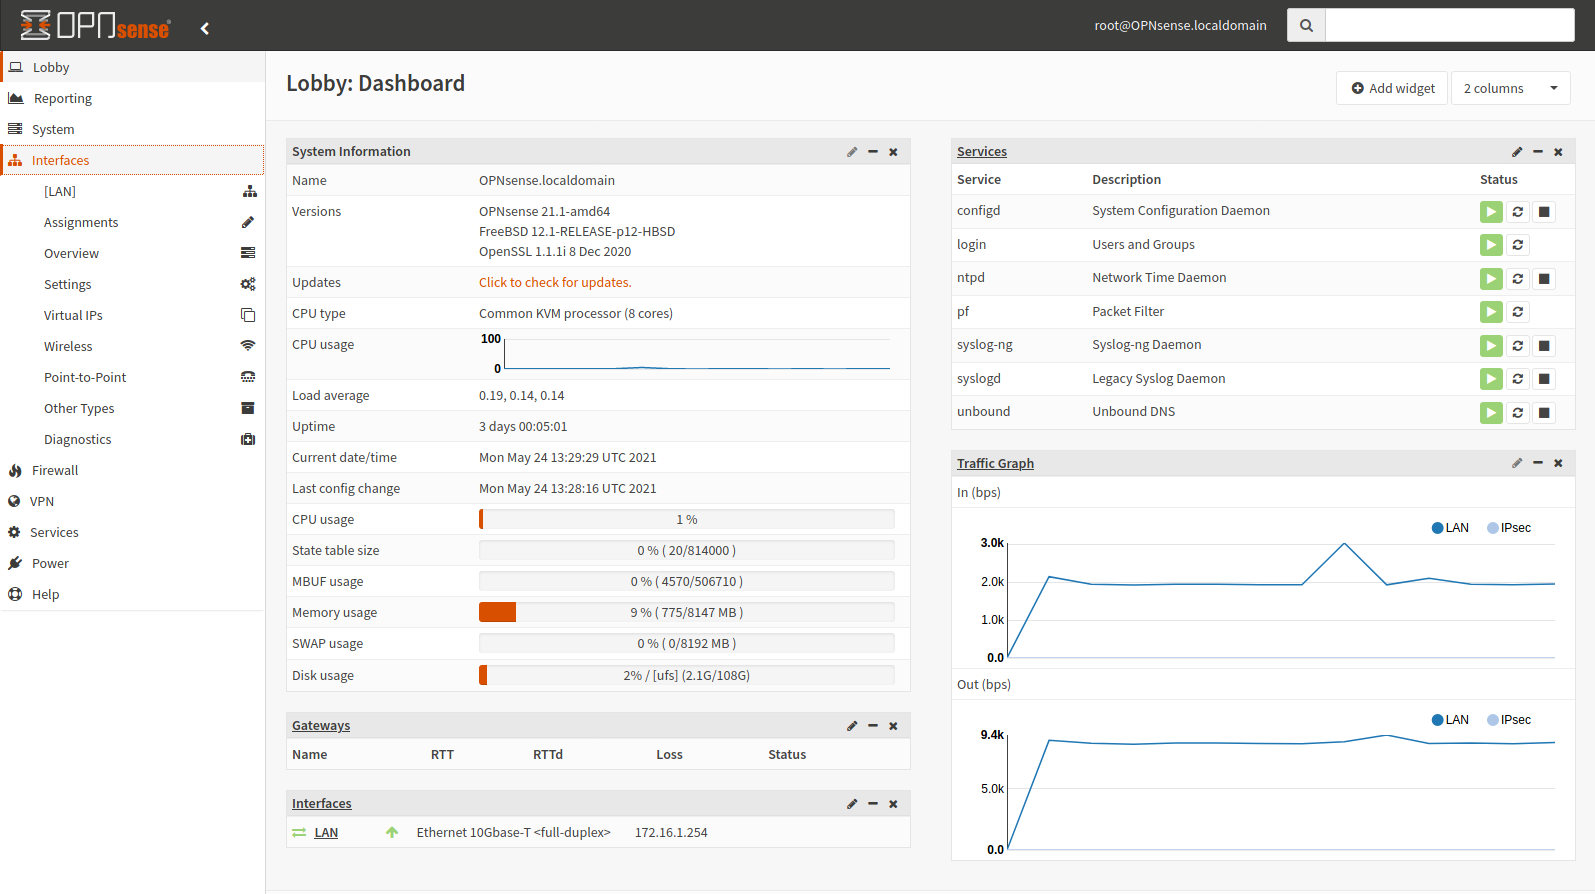
Using a browser we can navigate to our OPNsense address and should be greeted with a login box, we can login using root as the username and the password we set when installing.
VM Configurations
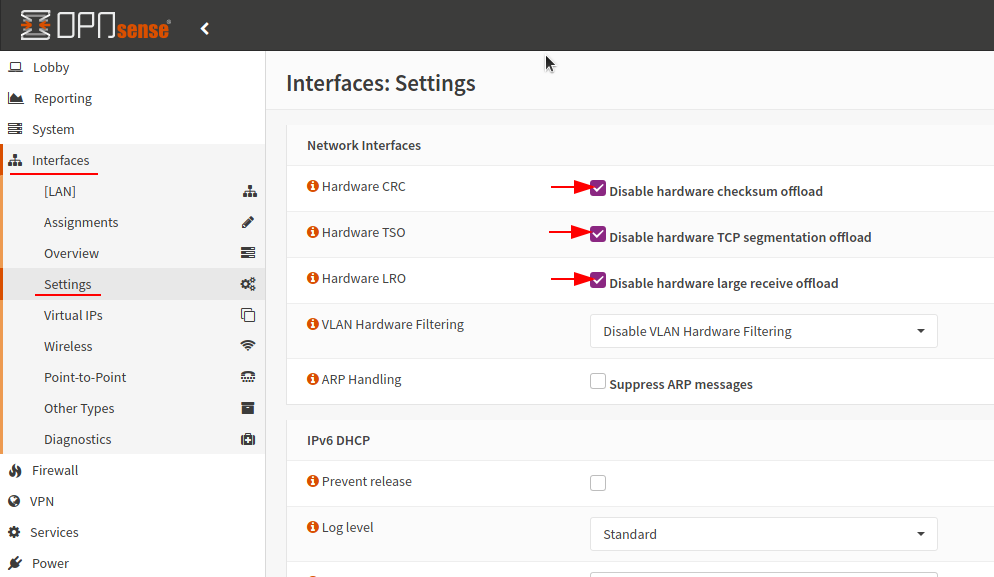
OPNsense provide some general tips for optimum performance and compatibility, these can be found on their documentation site.
We will ensure the following are disabled:
- Hardware CRC
- Hardware TSO
- Hardware LRO
Navigate to Interfaces > Settings and check that these features have check boxes to disable the feature.
While exploring OPNsense I recommend turning on the “Full Help” option, its located in the top right of each panel. This provides explanation for all the options available.
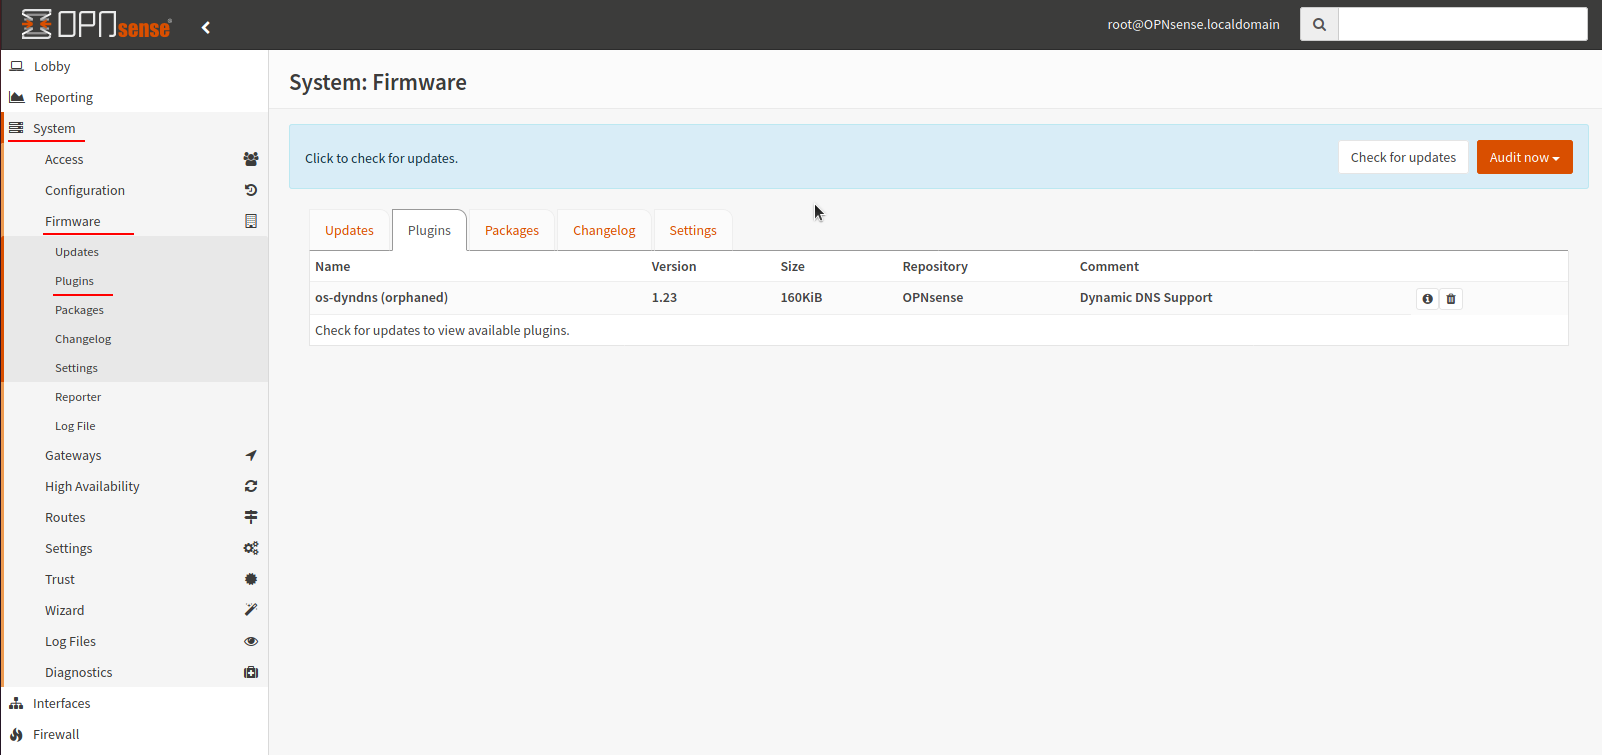
Overall OPNsense has a clean UI, although some menus are less intuitive than expected, such as the plugins can be found under System > Firmware > Plugins, this could just be me but I had to look this up in their documentation.
Many features are built-in with more than 70 plugins available to expand functionality and is well documented. Its a beautiful system and OPNsense should be proud of their product. I look forward to expanding my OPNsense instance with additional services such as DHCP server, Dnsmasq DNS, Suricata and Sensei.