OPNsense HAProxy ACME
05 Jul 2021
Why and Goals
The aim of this guide is to deploy HAProxy and Let’s Encrypt ACME onto our OPNsense instance, this will enable us to simplify our exposed ports and provide internal services with free SSL certificates. This article is similar to how I used HAProxy with ACME on our pfSense instance, you can find that article here.
Installation of Packages
You can install the required package by navigating to System > Firmware > Plugins and installing:
- os-acme-client
- Let’s Encrypt client
- os-haproxy
- Reliable, high performance TCP/HTTP load balancer

Cloudflare and DNS entries
We have Cloudflare for our domain services, these include Firewall, Caching and DNS. I already have my DNS A records which resolve to my external IP address.
I have also configured an API token for ACME as this will need write permission to your DNS records.
Configuration of Packages
ACME
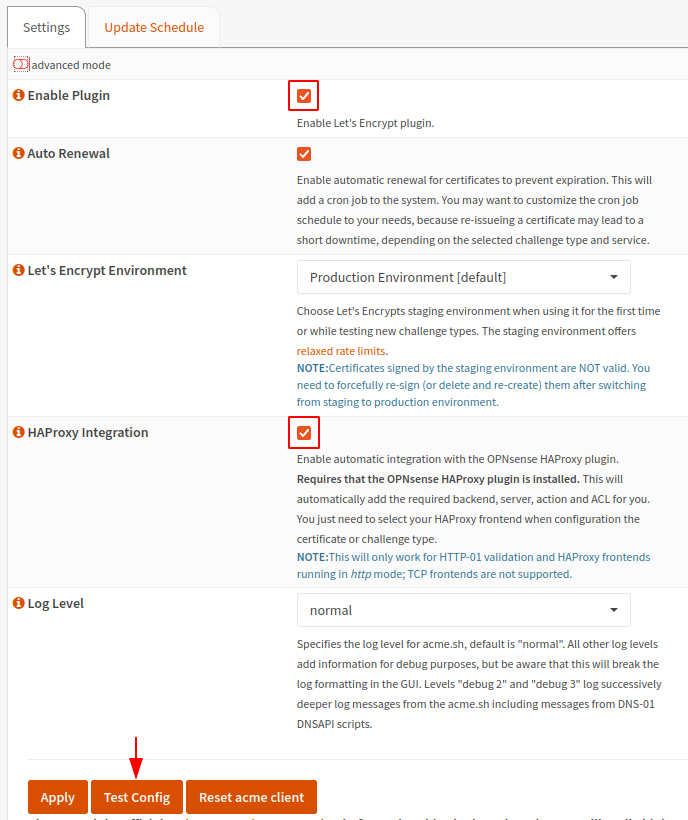
Navigate to Services > Let’s Encrypt > Settings and enable the plugin and HAProxy integration.
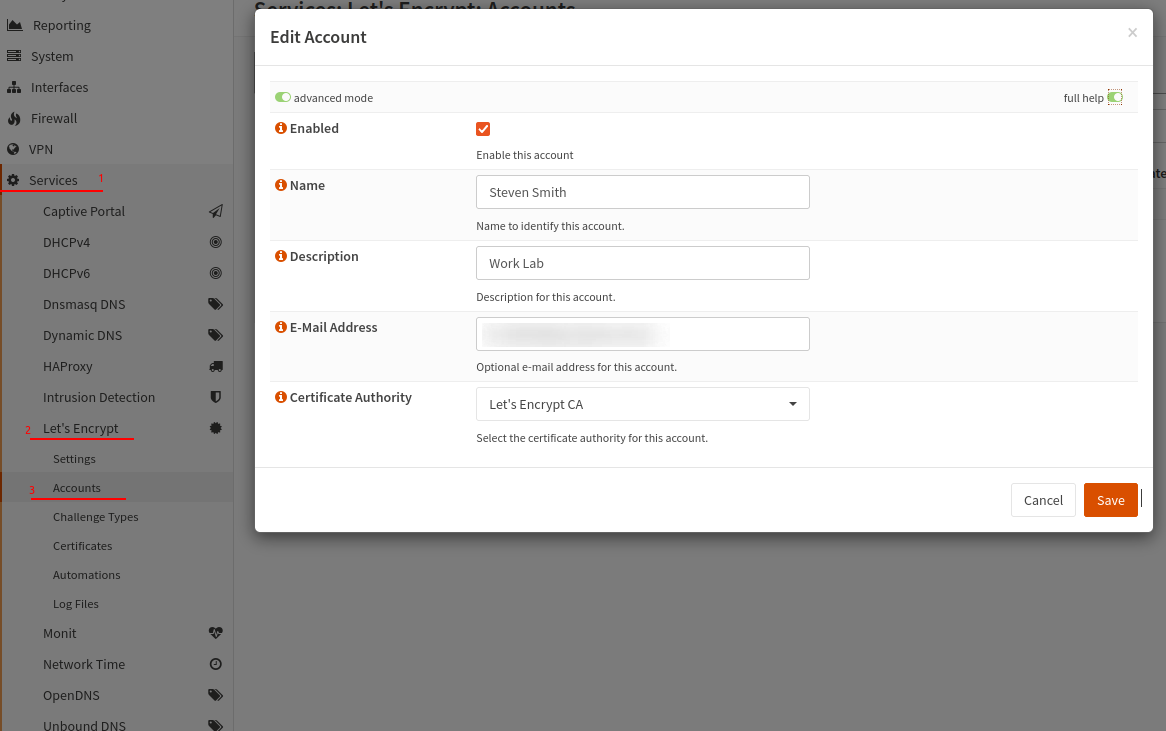
Then move to the Accounts menu and use the small plus symbol (+) to add a new account. Complete the required fields to create an account with Let’s Encrypt, then save.
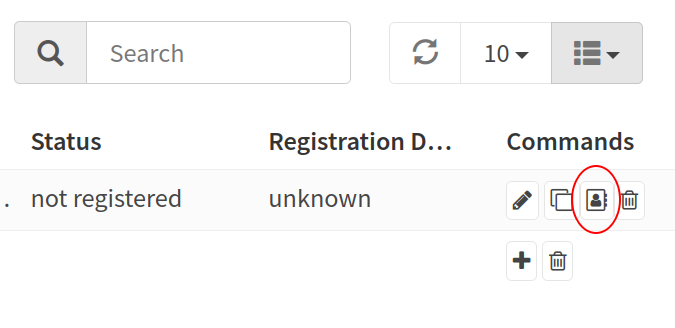
Use the register button to complete your registration. Time can take a minute or two to complete registration, but once complete your status will change to “OK (registered)” and we are ready for the next step.
Now we will create a Challenge Type, this is where we configure Let’s Encrypt to use DNS to challenge and configure our Cloudflare account.
Navigate to the Challenge Types menu and use the small plus symbol (+) to create a new challenge. Change the Challenge Type to DNS-01 and select your DNS service provider, in our case this is Cloudflare.
The next section you’ll need to provide your service provider account details to allow Let’s Encrypt to interface and authenticate the requests, we’ll only be using the Restricted API Token for increased account security.

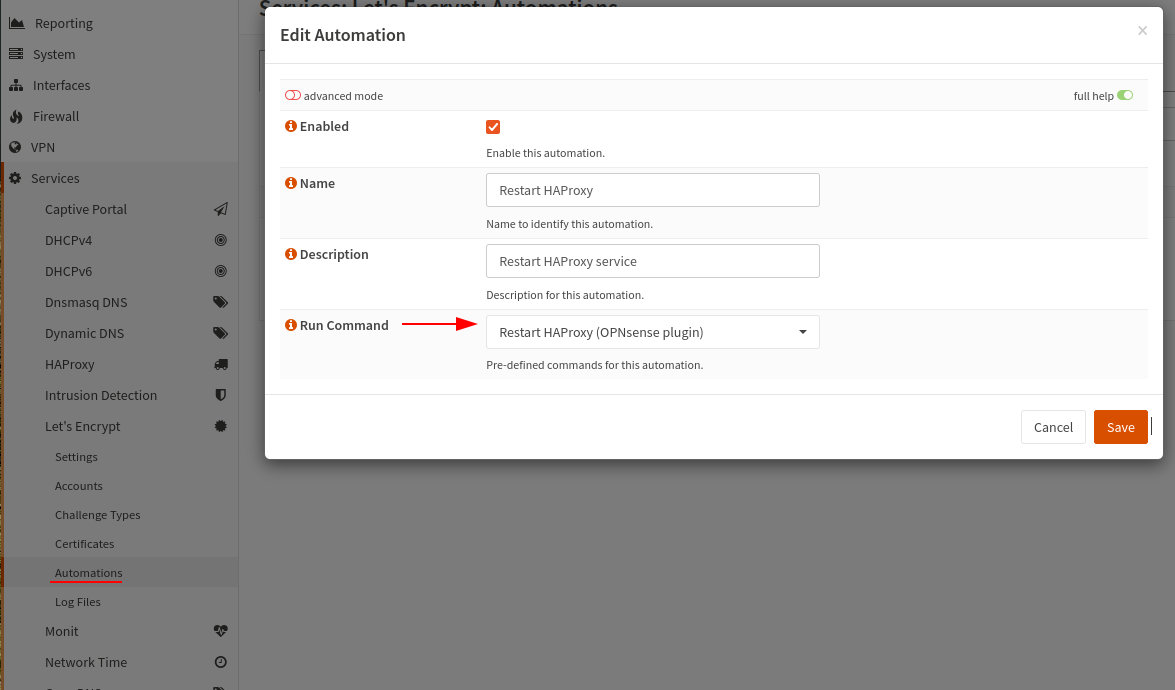
Now we want to create an automation that restarts the HAProxy after the certificate is renewed, this means that our newest certificate will always be used and we wont need to manually restart or run into problems later.
Go to the Automatons menu and create a new. Provide a name and from the Run Command drop down menu select Restart HAProxy (OPNsense plugin) and save.
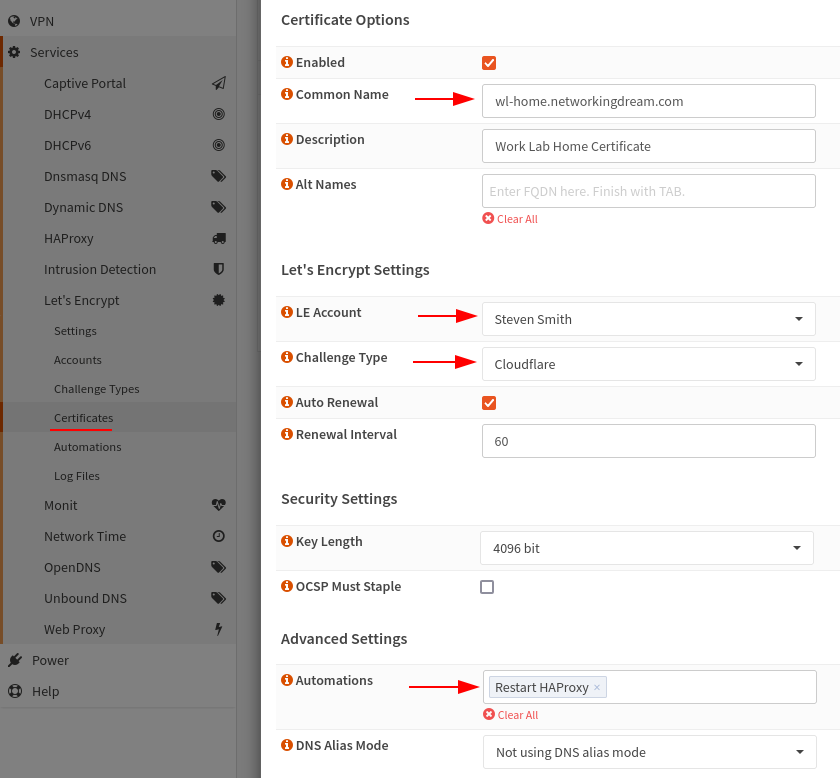
Now we are ready to create our certificate request. Navigate to the Certificates menu and create a new using the small plus symbol (+).
We’ll be providing a Common Name (FQDN) and selecting from the drop down menus our Let’s Encrypt account and Challenge Type, then finally adding our Restart HAProxy automation.
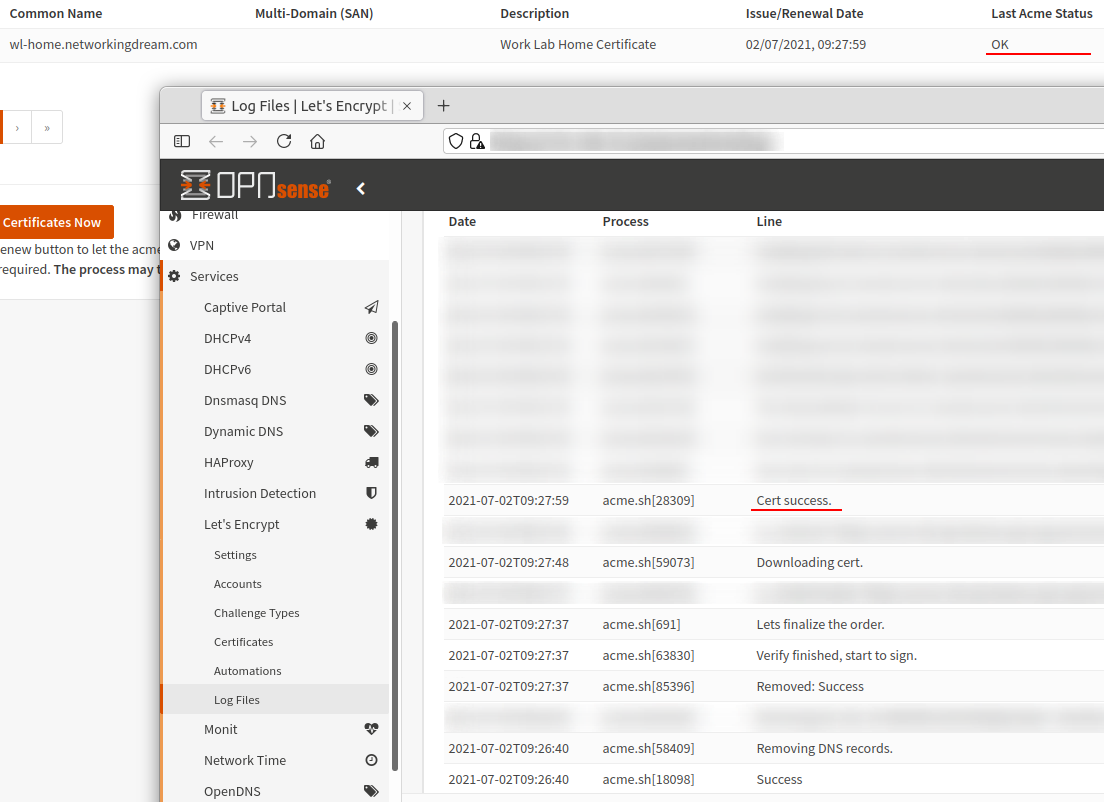
We can issue our certificate by using the individual “issue or renew certificate” button. This process with take a moment and if successful our Last Acme Status will change from “unknown” to “OK”.
If something else happens you can use the Log Files menu item to review the error logs.
Now that we have our certificates we can move onto configuring HAProxy.
HAProxy
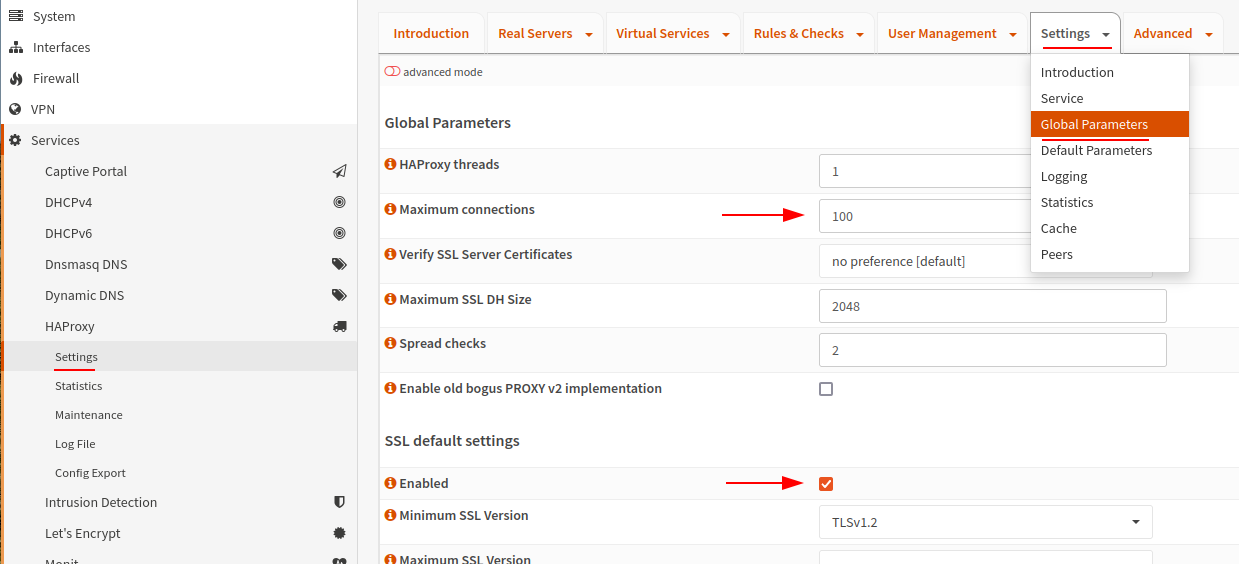
We will start by configuring some global settings, these can be found by navigating to Services > HAProxy > Settings and from the top navigation using the drop down menu and selecting Global Parameters.
Here we will configure the maximum connections which I have set to 100 and enable SSL.
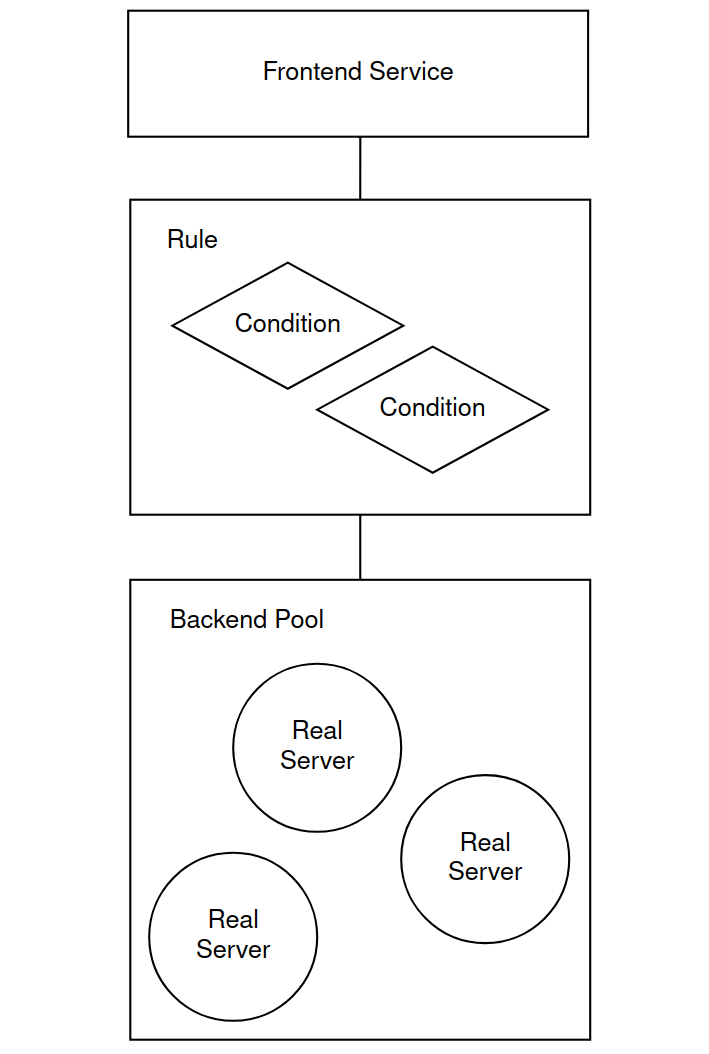
You should configure HAProxy in the following order:
- Add Real Servers
- Add Backend Pools
- Create Conditions and Rules
- Add Public Services
- Lastly, enable HAProxy using the Service settings page.
I have created a diagram to help break down how the next set of elements will work together. The diagram also helps to understand why we create each element in sequence.
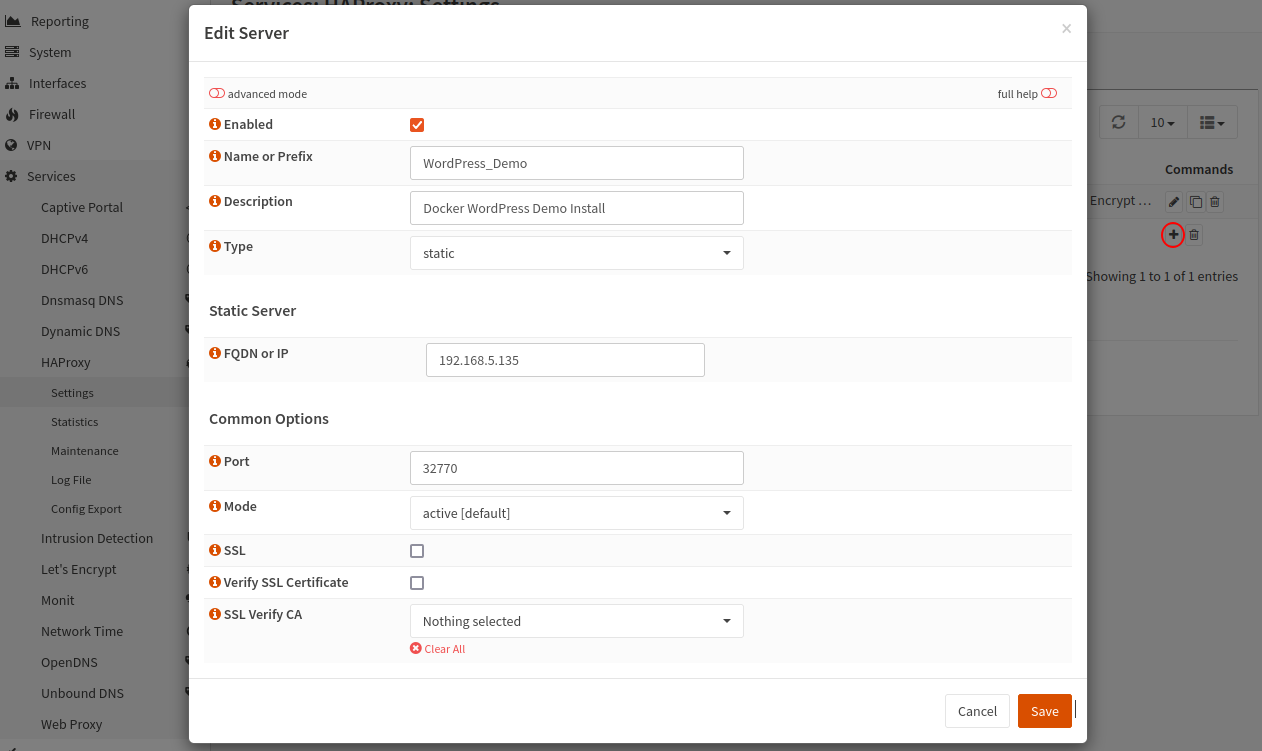
Go to HAProxy > Real Servers > Real Servers and use the small plus symbol (+) to create a new server. I have a demonstration Docker WordPress server, which I will use in this example.
I have populated a name, IP address and port number which can be used to reach the WordPress installation and unchecked the SSL and Verify as the WordPress installation uses HTTP not HTTPS.
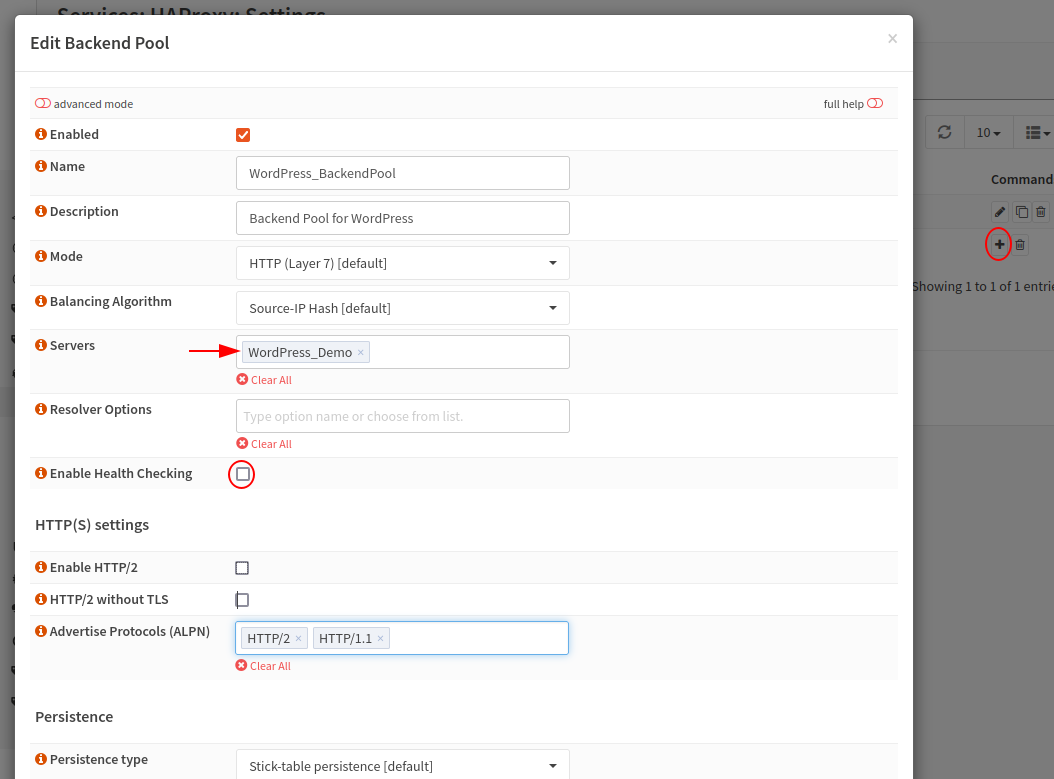
I then created a basic Backend Pool for our demonstration. I have kept the default values and added our server “WordPress_Demo”.
Next I have created a Condition, this simply states if the host matches “wl-home.networkingdream.com”.
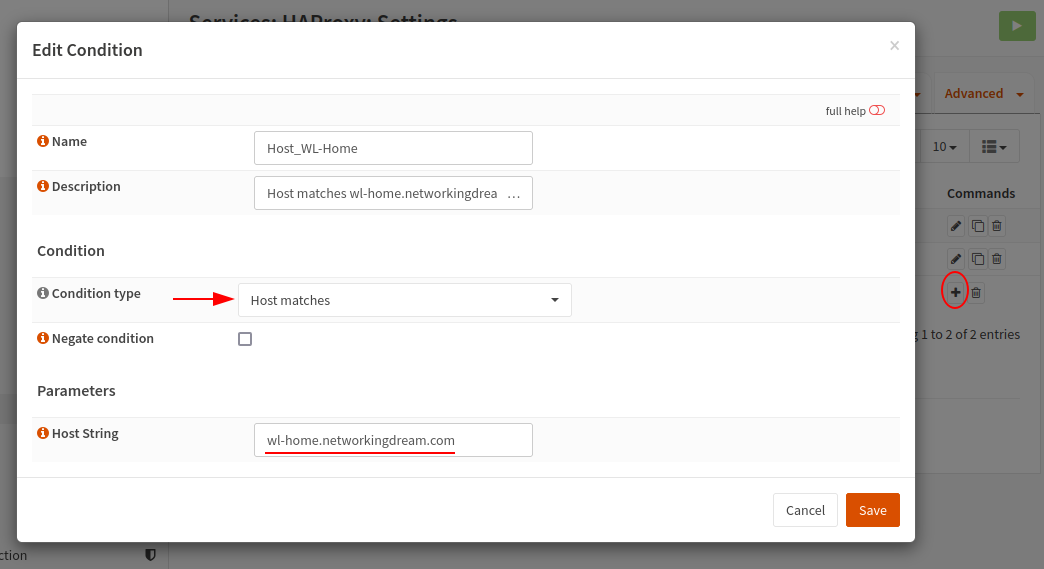
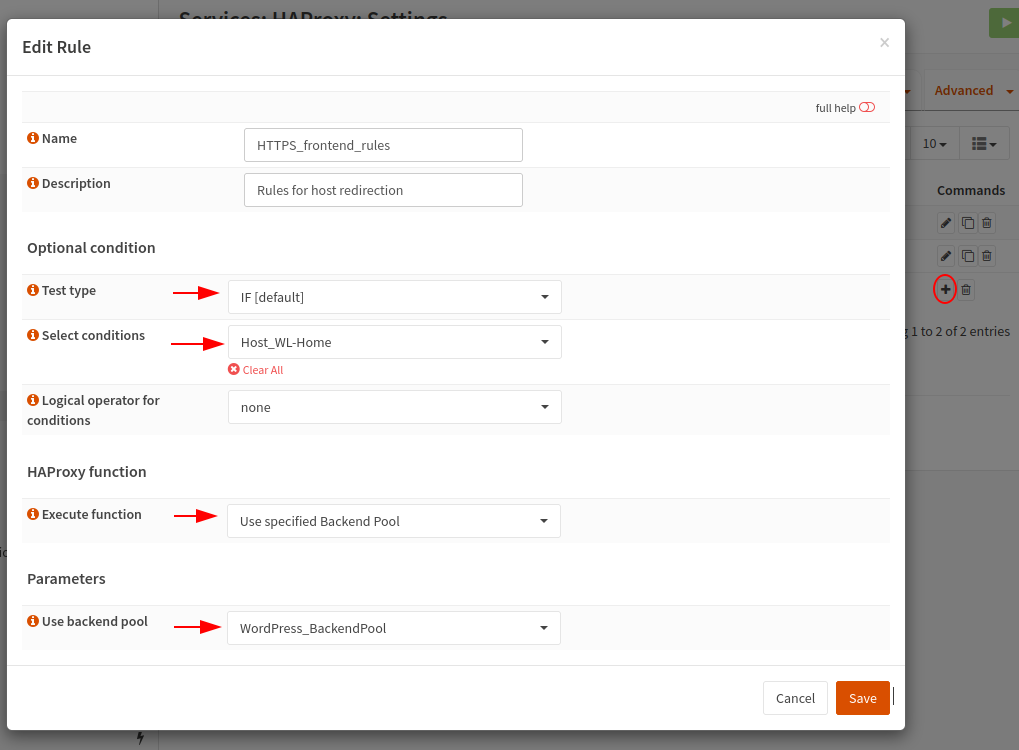
Next we create a Rule, this is where we use the condition to perform something. In this example IF the condition then use a Backend Pool which is our “WordPress_BackendPool”. The logical looks like this if you write it out:
If Host Matches "wl-home.networkingdream.com" Use Backend Pool "WordPress_BackendPool"
The Public Service is the frontend, this is where we configure our listen addresses, I have used 0.0.0.0:443 which will listen on all IPv4 addresses on port 443 (HTTPS).
I have also changed the type to HTTP/HTTPS SSL offloading and enabled SSL offloading. This adds additional options where we can set our certificates, I only have 1 but we can add more. I have also enabled HTTP/2 which is the newer revision from HTTP/1.1.
I have also enabled X-Forwarded-For header this forwards the clients IP address to our server which can be helpful, otherwise we will have all our incoming addresses listed as our WAN or LAN IP address.

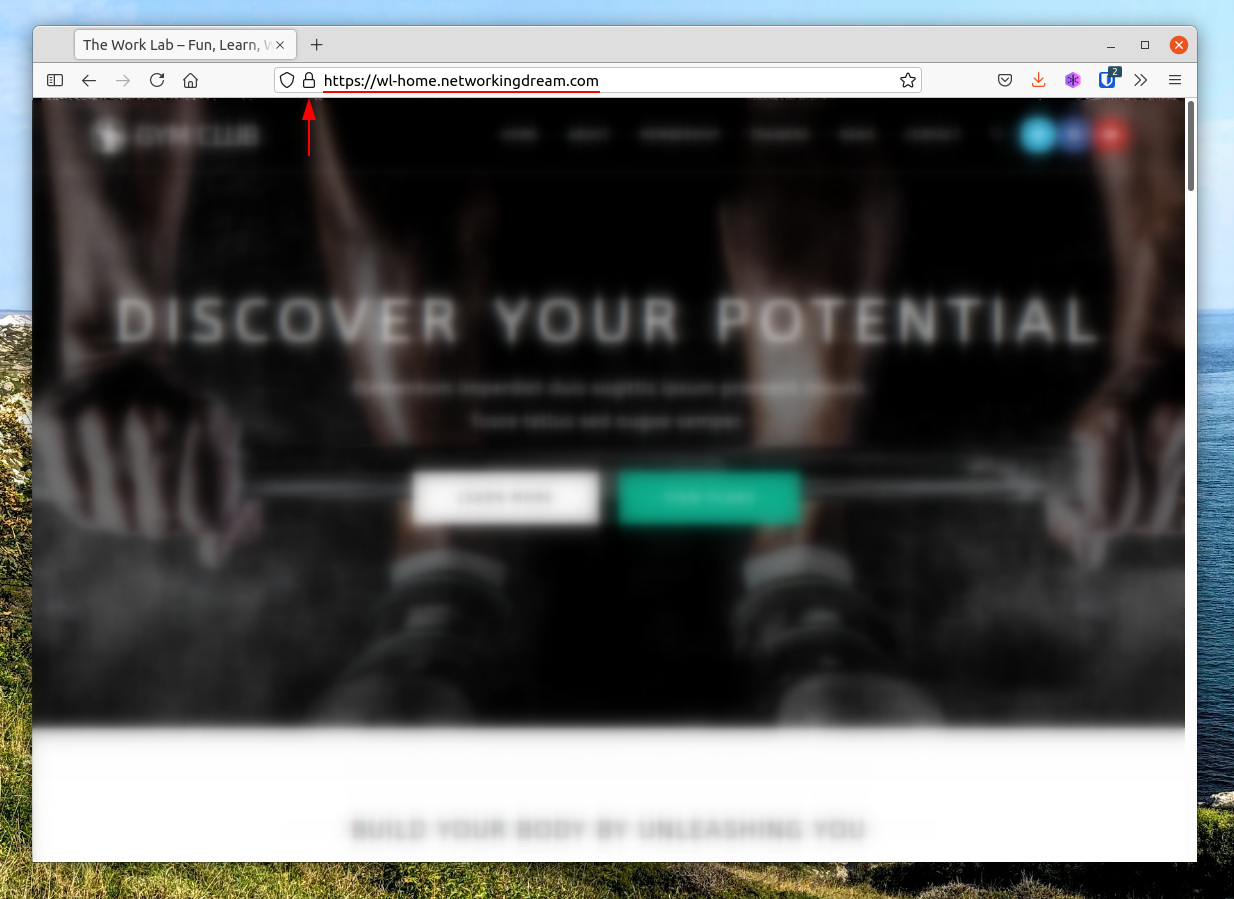
The figure below shows my demo WordPress site working with my domain name and secured with our certificate.
Thanks to OceanWP for the free theme and demo data
DNS Host Override
The figure below shows a host override using OPNsense DNSMasq DNS and OPNsense Unbound DNS. (I have shown both for demo purposes, of course we do not need two DNS servers)
This will direct our internal hosts to our LAN address instead of querying, going out and back in on our WAN address. This also maintains our domain names and certificates, if we were to use our internal server address we would need to use HTTP and port numbers.


Troubleshooting
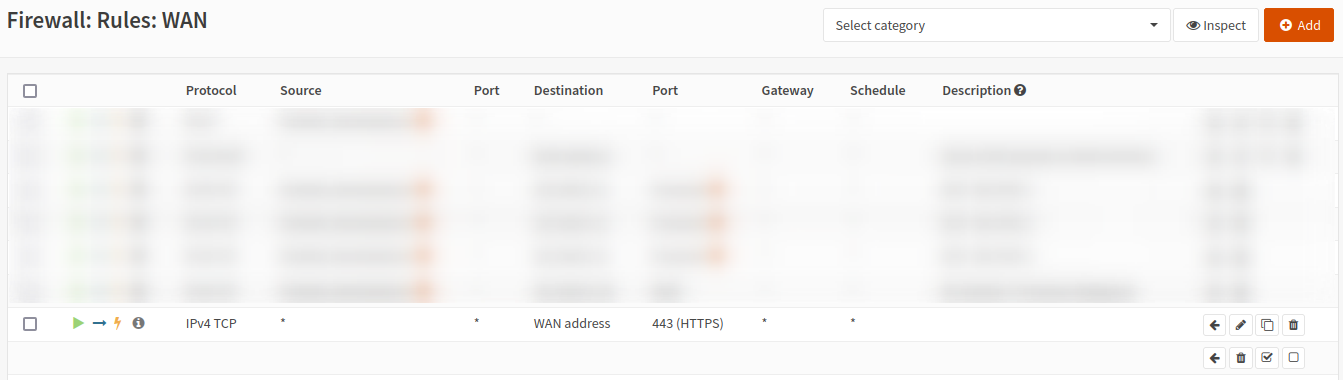
Firewall rules
Because we are allowing HTTPS traffic through, we need to ensure that our firewall is allowing TCP/443 through our WAN interface.
We can create a simple rule to permit traffic.
| Property | Value |
|---|---|
| Action | Pass |
| Interface | WAN |
| Direction | In |
| TCP/IP Version | IPv4 |
| Protocol | TCP |
| Destination | WAN address |
| Destination port range | HTTPS - HTTPS |